When Sam is using huge point sizes for making signs, or even large headings, he wonders how he can reduce leading to where the lines can be squeezed very tight, with almost no vertical space between them.
In typesetting, "leading" is the term used to reference the distance from the baseline of one line of text to the next. (It harkens back to the days when typesetters had to actually insert real lead between lines to control the vertical spacing.) The baseline is the imaginary line on which the main body of the letters sit. For instance, in the following figure the baselines are shown in red, and leading is the distance from one baseline to the next. (See Figure 1.)
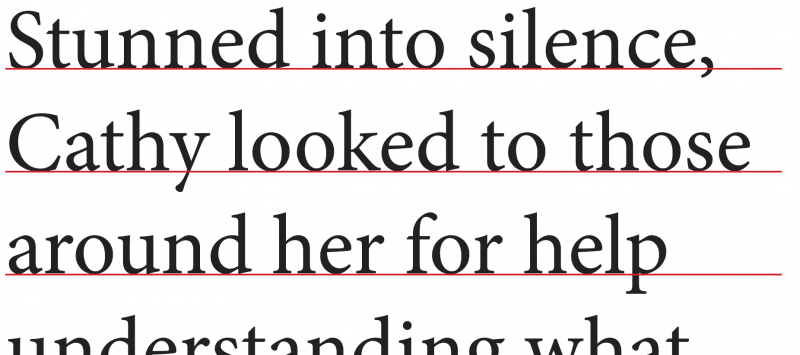
Figure 1. Baselines are the imaginary lines on which letters sit.
Word isn't a typesetting program, so it doesn't use the word "leading." Instead, it references "line spacing." After you select the text whose line spacing you want to adjust, display the Home tab of the ribbon and click the small icon at the bottom-right corner of the Paragraph group. This displays the Paragraph dialog box, and you should make sure that the Indents and Spacing tab is displayed. (See Figure 2.)
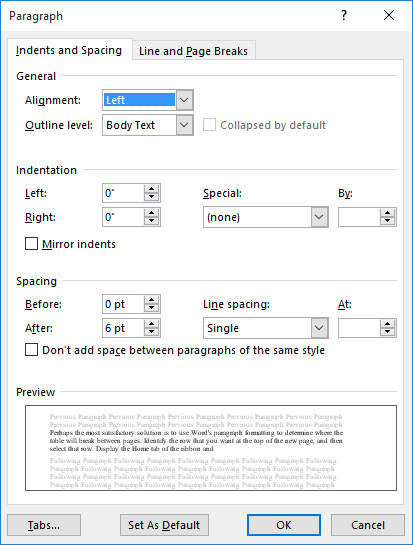
Figure 2. The Indents and Spacing tab of the Paragraph dialog box.
Note the Line Spacing drop-down list. There are a couple of different choices you can make with this drop-down list. Many people will select Multiple, and then use the At box to specify a multiplier for the line spacing. If you select 1, then Word uses normal, single-line spacing. (Normally this means 120% of the font size but can vary from font to font.) You can also put in a value of less than 1, such as .8 or .6 to close up your line spacing.
Personally, I prefer to change the Line Spacing drop-down list to Exactly, and then specify in the At box how many points I want between the base lines. You'll want to play with different values to see how they affect what you see displayed on the screen.
There is a big caveat here: I've been assuming so far that your multi-line text on the sign is all in a single paragraph. In other words, the only place that you actually press Enter is at the end of the paragraph, not at the end of each line. If you, however, press Enter at the end of each line, you'll also want to make sure the Before and After settings on the Paragraph dialog box are set to 0.
You should also be aware that with some fonts, if you decrease the leading too much, you may end up cutting off the tops or bottoms of letters as Word tries to move the lines over or under each other. Again, you'll want to experiment with the settings available to you.
Some people even go the extra mile, though. What they do is to insert each line of their text into text boxes. Thus, if you have 3 lines of text on the sign, you would have 3 text boxes—one for each line. Format the text boxes so they are transparent, have no fill color, and don't have a border. You can then move these text boxes as close to each other as you want, even overlapping them, as necessary.
Finally, if you want to use some really funky text in your signs, you might consider using WordArt to create the text. How you use this feature of Word has been covered in other WordTips. (Effectively, you end up creating text that is treated by Word as if it is a graphic. This allows you to get your lines of text quite close to one another.)
WordTips is your source for cost-effective Microsoft Word training. (Microsoft Word is the most popular word processing software in the world.) This tip (13613) applies to Microsoft Word 2007, 2010, 2013, 2016, 2019, and 2021.

Create Custom Apps with VBA! Discover how to extend the capabilities of Office 365 applications with VBA programming. Written in clear terms and understandable language, the book includes systematic tutorials and contains both intermediate and advanced content for experienced VB developers. Designed to be comprehensive, the book addresses not just one Office application, but the entire Office suite. Check out Mastering VBA for Microsoft Office 365 today!
When adjusting the position of things on the Ruler (like tab stops), you can use the Alt key to get very precise in your ...
Discover MoreA common task is to add page numbers to document headers and footers. If you want those page numbers to include more than ...
Discover MoreA common editorial need is to change the capitalization used on different words in a selection of text. Word provides a ...
Discover MoreFREE SERVICE: Get tips like this every week in WordTips, a free productivity newsletter. Enter your address and click "Subscribe."
2024-03-19 17:05:35
Ian
Under parragraph, my drop down, had zeros in every box. Your information advised me I could use a 0.5 etc. I actually used 0.8, and acheived the result I needed. Thank you.
2019-01-30 05:50:55
Stig Wedel
There is one more way to force small line spacings between lines of large fonts. Insert a table with one column (provided the lines should fill the page horizontally), format rows alternately with large and (very) small font sizes, and remove all border from the table . The table will keep all neatly ordered, and it is automatically avoided that upper or lower parts of characters become cut off by Word moving lines up or down. It is also very easy to adjust the individual small line spacings independently to optimize over-all layout.
Sincerely yours
Stig Wedel
Got a version of Word that uses the ribbon interface (Word 2007 or later)? This site is for you! If you use an earlier version of Word, visit our WordTips site focusing on the menu interface.
Visit the WordTips channel on YouTube

FREE SERVICE: Get tips like this every week in WordTips, a free productivity newsletter. Enter your address and click "Subscribe."
Copyright © 2026 Sharon Parq Associates, Inc.
Comments