Changing One of Three Fonts

Written by Allen Wyatt (last updated June 23, 2023)
This tip applies to Word 2007, 2010, 2013, 2016, 2019, and Word in Microsoft 365


Jon has a document that uses three different fonts in various places and for various purposes. He needs to change one of these fonts to a different one, without affecting any of the text formatted with the other two fonts. He wonders if there is a way to do this.

The easiest way to make this change would be to use styles. For instance, if you had created three styles, one for each of the fonts you use "for various purposes" in your document, then you could easily modify one of the styles to use the new font. This would, in turn, affect all of the text in the document that uses that style, without affecting any of the text that uses the other styles.

If your document doesn't use styles, then making the change gets a bit trickier, but it can be done without too much trouble. The standard way of doing this is to simply use Find and Replace, as illustrated in these steps:

  1. Press Ctrl+H. Word displays the Replace tab of the Find and Replace dialog box.
  2. Click the More button, if it is available. The dialog box expands.
  3. Make sure the Find box is empty and the insertion point is in that box.
  4. Click the Format button and then click Font. Word displays the Find Font dialog box. (See Figure 1.)
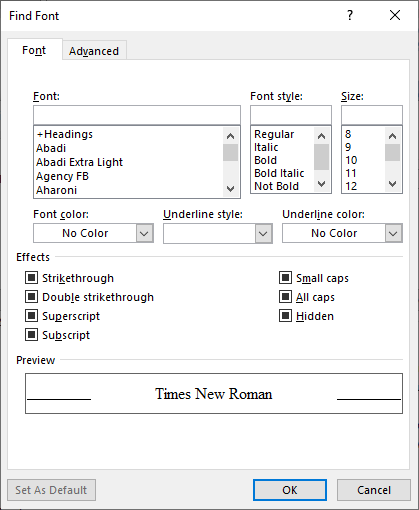
  5. Figure 1. The Find Font dialog box.

  6. Using the controls in the dialog box, indicate what font you want to change. (If you want to only change a particular typeface, regardless of the style and size, just choose it in using the Font list.)
  7. Click OK to dismiss the Find Font dialog box. The Find and Replace dialog box should still be visible, with the font information you specified showing under the Find box.
  8. Make sure the Replace With box is empty and the insertion point is in that box.
  9. Click the Format button and then click Font. Word displays the Replace Font dialog box. (This looks almost exactly like the Find Font dialog box.)
  10. Using the controls in the dialog box, indicate the font to which you want to change.
  11. Click OK to dismiss the Replace Font dialog box. The Find and Replace dialog box should still be visible, with the font information showing under the Replace box.
  12. Click Replace All. Word displays a dialog box informing you how many replacements it made.
  13. Click OK to dismiss the information dialog box.
  14. Click Close to dismiss the Find and Replace dialog box.

The changes in your document should not affect anything (like the other two fonts) that do not match the specifications you use in step 5.

WordTips is your source for cost-effective Microsoft Word training. (Microsoft Word is the most popular word processing software in the world.) This tip (13634) applies to Microsoft Word 2007, 2010, 2013, 2016, 2019, and Word in Microsoft 365.

Author Bio

Allen Wyatt

With more than 50 non-fiction books and numerous magazine articles to his credit, Allen Wyatt is an internationally recognized author. He is president of Sharon Parq Associates, a computer and publishing services company. ...

MORE FROM ALLEN

Breaking Links in Lots of Documents

Breaking document links can be a tedious chore, especially if there are lots of links and lots of documents. This tip ...

Discover More

Changing Column Width

Do you use columns in your document layout? You may want to modify the widths of various columns, and Word makes the ...

Discover More

Adding Last-Row Data to a Page Footer

If you want to modify information that appears in the footer of a worksheet printout, on a page-by-page basis, you can ...

Discover More

Comprehensive VBA Guide Visual Basic for Applications (VBA) is the language used for writing macros in all Office programs. This complete guide shows both professionals and novices how to master VBA in order to customize the entire Office suite for their needs. Check out Mastering VBA for Office 2010 today!

More WordTips (ribbon)

Copying Formats

Want to copy a format from one place to another without taking your hands off the keyboard? It's easy to do if you apply ...

Discover More

Precise Ruler Adjustments

When adjusting the position of things on the Ruler (like tab stops), you can use the Alt key to get very precise in your ...

Discover More

Double-Spacing Your Document

Need to produce a quick double-spaced printout of your document? You can do it by using the simple steps in this tip.

Discover More
Subscribe

FREE SERVICE: Get tips like this every week in WordTips, a free productivity newsletter. Enter your address and click "Subscribe."

View most recent newsletter.

Comments

If you would like to add an image to your comment (not an avatar, but an image to help in making the point of your comment), include the characters [{fig}] (all 7 characters, in the sequence shown) in your comment text. You’ll be prompted to upload your image when you submit the comment. Maximum image size is 6Mpixels. Images larger than 600px wide or 1000px tall will be reduced. Up to three images may be included in a comment. All images are subject to review. Commenting privileges may be curtailed if inappropriate images are posted.

What is 6 - 0?

There are currently no comments for this tip. (Be the first to leave your comment—just use the simple form above!)


This Site

Got a version of Word that uses the ribbon interface (Word 2007 or later)? This site is for you! If you use an earlier version of Word, visit our WordTips site focusing on the menu interface.

Videos
Subscribe

FREE SERVICE: Get tips like this every week in WordTips, a free productivity newsletter. Enter your address and click "Subscribe."

(Your e-mail address is not shared with anyone, ever.)

View the most recent newsletter.