Please Note: This article is written for users of the following Microsoft Word versions: 2007, 2010, 2013, 2016, 2019, 2021, and Word in Microsoft 365. If you are using an earlier version (Word 2003 or earlier), this tip may not work for you. For a version of this tip written specifically for earlier versions of Word, click here: Managing Corporate Templates.
In a corporate environment that uses Word, it is not uncommon that the company has developed a standard set of templates that define the "look" wanted for corporate communications. Unfortunately, if users make changes to the styles within the templates (there are many ways to do this without even purposefully trying) then the original templates can easily become corrupted.
For instance, let's say that Mary uses the corporate template to create a letter, and then saves the letter to disk. Later, Bill creates a letter using the same template, but makes a couple of changes to the styles in the course of creating and saving his document. The next time Mary opens her letter, the style changes made by Bill will affect the look of her letter.
Getting around this problem involves a three-pronged approach. First, you need to save your corporate templates in a protected manner; second, you need to set up Word to access them properly; and third, you need to do some user education.
First, make sure your templates are stored on the company's network server in a special folder you created just for the purpose of storing the templates. Make sure that everyone has access to the folder, but it should be read-only access. In addition, it doesn't hurt to make sure that the templates are saved as read-only. If you have any problems with setting up and storing the templates in this manner, your network administrator should be able to do it quite quickly.
Second, follow these steps within Word:
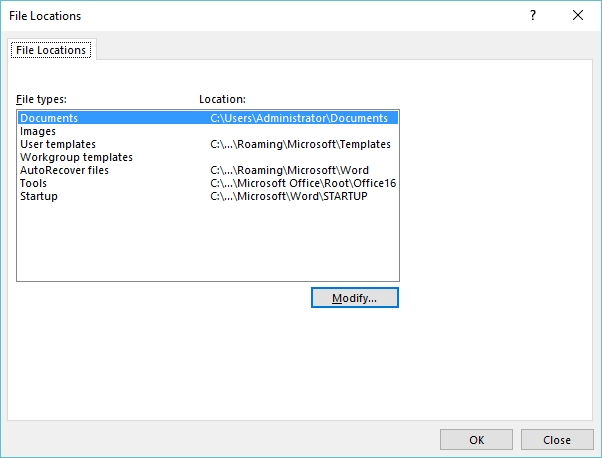
Figure 1. The File Locations dialog box.
Third, instruct users that if they want to make changes to a template (so they can use those changes over and over again) they should copy the template from the protected area on the network server to their user template area and give the template a new name. (This copying should take place outside of Word, using the capabilities of Windows itself.) Changes can now be made to the template without affecting anyone else.
There's an interesting tangent to setting up a Workgroup Templates location if you are using Word 2013 or a later version—it can affect what you see when you choose, in Word, to create a new document. The article at this terribly long URL goes into exquisite detail on this tangent:
https://answers.microsoft.com/en-us/msoffice/forum/msoffice_word-msoffice_custom-mso_2016/word-2016-templates-featured-vs-shared-vs-custom/d23e9c8f-5420-4bcd-84fd-e502e21ab0a5
WordTips is your source for cost-effective Microsoft Word training. (Microsoft Word is the most popular word processing software in the world.) This tip (9444) applies to Microsoft Word 2007, 2010, 2013, 2016, 2019, 2021, and Word in Microsoft 365. You can find a version of this tip for the older menu interface of Word here: Managing Corporate Templates.

Discover the Power of Microsoft Office This beginner-friendly guide reveals the expert tips and strategies you need to skyrocket your productivity and use Office 365 like a pro. Mastering software like Word, Excel, and PowerPoint is essential to be more efficient and advance your career. Simple lessons guide you through every step, providing the knowledge you need to get started. Check out Microsoft Office 365 For Beginners today!
Templates are very powerful with the ability to contain both styles and macros. If you want to see what styles and macros ...
Discover MoreWouldn't it be great to be able to track what changes are made to a template, over time? Unfortunately, Word doesn't ...
Discover MoreTemplates, when attached to a document, can greatly affect how that document looks. You can change from one template to ...
Discover MoreFREE SERVICE: Get tips like this every week in WordTips, a free productivity newsletter. Enter your address and click "Subscribe."
There are currently no comments for this tip. (Be the first to leave your comment—just use the simple form above!)
Got a version of Word that uses the ribbon interface (Word 2007 or later)? This site is for you! If you use an earlier version of Word, visit our WordTips site focusing on the menu interface.
Visit the WordTips channel on YouTube

FREE SERVICE: Get tips like this every week in WordTips, a free productivity newsletter. Enter your address and click "Subscribe."
Copyright © 2026 Sharon Parq Associates, Inc.
 Please Note:
This article is written for users of the following Microsoft Word versions: 2007, 2010, 2013, 2016, 2019, 2021, and Word in Microsoft 365. If you are using an earlier version (Word 2003 or earlier), this tip may not work for you. For a version of this tip written specifically for earlier versions of Word, click here:
Please Note:
This article is written for users of the following Microsoft Word versions: 2007, 2010, 2013, 2016, 2019, 2021, and Word in Microsoft 365. If you are using an earlier version (Word 2003 or earlier), this tip may not work for you. For a version of this tip written specifically for earlier versions of Word, click here:
Comments