Please Note: This article is written for users of the following Microsoft Word versions: 2007, 2010, 2013, 2016, 2019, and 2021. If you are using an earlier version (Word 2003 or earlier), this tip may not work for you. For a version of this tip written specifically for earlier versions of Word, click here: Removing Return Addresses.
In other issues of WordTips you learned how to insert a graphic in a return address for creating envelopes or for creating labels. It seems that learning how to remove those special return addresses has resulted in the subject for another tip—this tip.
How you go about removing a return address that contains a graphic depends exactly on how it was created in the first place. There are a couple of things to try, each of which may result in the offending graphic being removed. The first method is to simply try to delete the return address. You do this by following these steps:
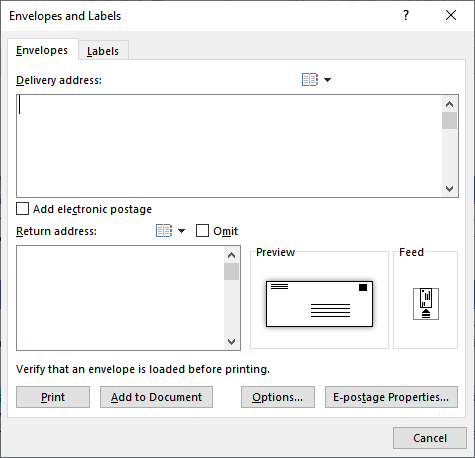
Figure 1. The Envelopes tab of the Envelopes and Labels dialog box.
If you simply want to remove the return address temporarily, you could click on the Omit check box in step 3. The contents of the return address are retained, but it should not print.
If this doesn't work, take a look in the Word options for the return address stored there. You can get to it and get rid of it by following these steps:

Figure 2. The General section of the Word Options dialog box.
Finally, there is one other place to look if you still cannot get rid of the return address. Word allows you to define special building blocks that print as part of your return address. These entries normally have the names EnvelopeExtra1 and EnvelopeExtra2. To get rid of them, follow these steps:
For more information on the special EnvelopeExtra1 AutoText entry, see this page:
https://www.gmayor.com/Alternative_Return_Addresses.htm
WordTips is your source for cost-effective Microsoft Word training. (Microsoft Word is the most popular word processing software in the world.) This tip (10176) applies to Microsoft Word 2007, 2010, 2013, 2016, 2019, and 2021. You can find a version of this tip for the older menu interface of Word here: Removing Return Addresses.

Discover the Power of Microsoft Office This beginner-friendly guide reveals the expert tips and strategies you need to skyrocket your productivity and use Office 365 like a pro. Mastering software like Word, Excel, and PowerPoint is essential to be more efficient and advance your career. Simple lessons guide you through every step, providing the knowledge you need to get started. Check out Microsoft Office 365 For Beginners today!
When you create envelopes in Word, you may want to adjust where the return address and main address are printed. Doing so ...
Discover MoreWord includes a feature that allows you to easily create and print envelopes, based on the addresses you insert in your ...
Discover MoreWhen you create envelopes with Word, it normally displays a return address by default. If you can't get Word to retain ...
Discover MoreFREE SERVICE: Get tips like this every week in WordTips, a free productivity newsletter. Enter your address and click "Subscribe."
There are currently no comments for this tip. (Be the first to leave your comment—just use the simple form above!)
Got a version of Word that uses the ribbon interface (Word 2007 or later)? This site is for you! If you use an earlier version of Word, visit our WordTips site focusing on the menu interface.
Visit the WordTips channel on YouTube

FREE SERVICE: Get tips like this every week in WordTips, a free productivity newsletter. Enter your address and click "Subscribe."
Copyright © 2026 Sharon Parq Associates, Inc.
 Please Note:
This article is written for users of the following Microsoft Word versions: 2007, 2010, 2013, 2016, 2019, and 2021. If you are using an earlier version (Word 2003 or earlier), this tip may not work for you. For a version of this tip written specifically for earlier versions of Word, click here:
Please Note:
This article is written for users of the following Microsoft Word versions: 2007, 2010, 2013, 2016, 2019, and 2021. If you are using an earlier version (Word 2003 or earlier), this tip may not work for you. For a version of this tip written specifically for earlier versions of Word, click here:
Comments