Please Note: This article is written for users of the following Microsoft Word versions: 2007, 2010, 2013, 2016, 2019, and 2021. If you are using an earlier version (Word 2003 or earlier), this tip may not work for you. For a version of this tip written specifically for earlier versions of Word, click here: Understanding WordArt.
Written by Allen Wyatt (last updated February 29, 2024)
This tip applies to Word 2007, 2010, 2013, 2016, 2019, and 2021
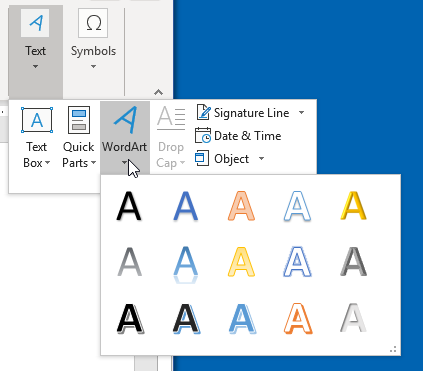
WordArt is a program that allows you to treat text as a graphic. You can use the program to add special effects and flourishes to text, and then insert the text in your document. It is useful for creating special text elements such as logos, mastheads, or titles. Here's how you use WordArt in your document:

Figure 1. The WordArt Gallery.
After step 3 you should also have noticed the Format tab appear on the ribbon. This tab is available anytime a WordArt object is selected. It provides tools that you can use to change how your WordArt appears. To hide the Format tab on the ribbon, simply click a different place in your document, so that the WordArt object isn't selected.
You should also understand that any text you place into a WordArt object may not be strictly considered text. For example, the words in the WordArt object won't be considered when generating a word count unless you have the Include Textboxes, Footnotes and Endnotes checkbox selected in the Word Count dialog box. Instead, the text is considered a graphic object.
WordTips is your source for cost-effective Microsoft Word training. (Microsoft Word is the most popular word processing software in the world.) This tip (12658) applies to Microsoft Word 2007, 2010, 2013, 2016, 2019, and 2021. You can find a version of this tip for the older menu interface of Word here: Understanding WordArt.

Discover the Power of Microsoft Office This beginner-friendly guide reveals the expert tips and strategies you need to skyrocket your productivity and use Office 365 like a pro. Mastering software like Word, Excel, and PowerPoint is essential to be more efficient and advance your career. Simple lessons guide you through every step, providing the knowledge you need to get started. Check out Microsoft Office 365 For Beginners today!
One of the lesser-known drawing tools provided in Word is the drawing grid. You can easily turn this feature on and use ...
Discover MoreIt is no secret that Word allows you to add images to your documents. However, those images might be low resolution and ...
Discover MorePictures and their titles go together like peanut butter and jelly. (Wow, did I just say that?) Seriously, pictures and ...
Discover MoreFREE SERVICE: Get tips like this every week in WordTips, a free productivity newsletter. Enter your address and click "Subscribe."
2019-12-20 08:45:16
PatL
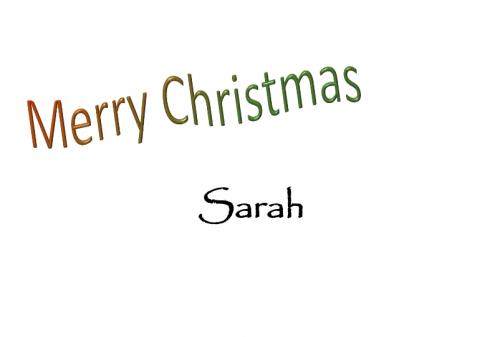
I used WordArt but I can't get it to print. I followed all the instructions I found on wordribbon.tips.net/T007554_Images_Wont_Print.html but it still won't print.
(see Figure 1 below)

Figure 1. Christmas Card Envelope
Got a version of Word that uses the ribbon interface (Word 2007 or later)? This site is for you! If you use an earlier version of Word, visit our WordTips site focusing on the menu interface.
Visit the WordTips channel on YouTube
FREE SERVICE: Get tips like this every week in WordTips, a free productivity newsletter. Enter your address and click "Subscribe."
Copyright © 2026 Sharon Parq Associates, Inc.
Comments