Please Note: This article is written for users of the following Microsoft Word versions: 2007, 2010, 2013, 2016, 2019, 2021, and Word in Microsoft 365. If you are using an earlier version (Word 2003 or earlier), this tip may not work for you. For a version of this tip written specifically for earlier versions of Word, click here: Replacing Hidden Text.
If you have a document full of hidden text, you may wonder how to convert all that text so it is non-hidden. The answer is to use Word's Find and Replace feature. Follow these steps:
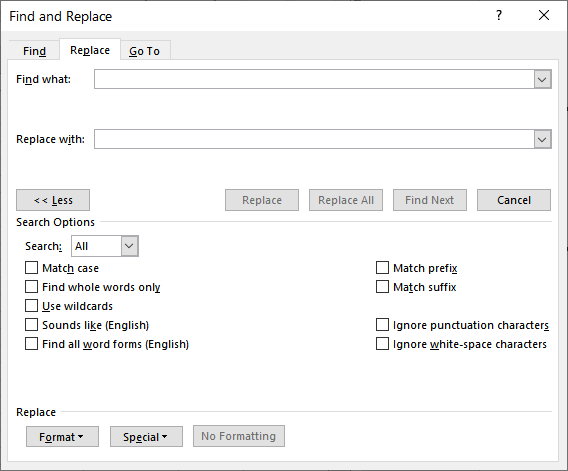
Figure 1. The Replace tab of the Find and Replace dialog box.
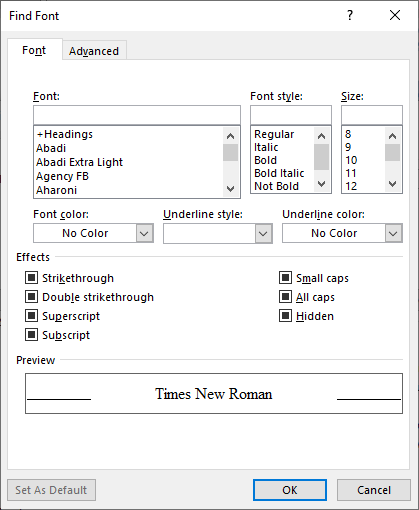
Figure 2. The Find Font dialog box.
This series of steps finds all the text in the document that has the Hidden attribute set. It then turns off the attribute, so that none of your text is hidden any more.
WordTips is your source for cost-effective Microsoft Word training. (Microsoft Word is the most popular word processing software in the world.) This tip (12252) applies to Microsoft Word 2007, 2010, 2013, 2016, 2019, 2021, and Word in Microsoft 365. You can find a version of this tip for the older menu interface of Word here: Replacing Hidden Text.

Do More in Less Time! An easy-to-understand guide to the more advanced features available in the Microsoft 365 version of Word. Enhance the quality of your documents and boost productivity in any field with this in-depth resource. Complete your Word-related tasks more efficiently as you unlock lesser-known tools and learn to quickly access the features you need. Check out Microsoft 365 Word For Professionals For Dummies today!
The Find and Replace tool can get rid of trailing spaces in paragraphs quite nicely. If those spaces are at the end of ...
Discover MoreIf you have a document that was produced in a country where decimal commas are used instead of decimal points, you may be ...
Discover MoreWhen doing an advanced search in Word, the program provides special codes you can use in your searching or replacing. ...
Discover MoreFREE SERVICE: Get tips like this every week in WordTips, a free productivity newsletter. Enter your address and click "Subscribe."
2023-02-18 06:15:59
Tom
Hi Allen,
Thanks for Word Tips - I always find them interesting, even if I am not really at the level to use a lot of them. The reversing hidden text activity seemed a bit tricky, so I had a bit of a play. I seem to be able to do it by Ctrl A, then open Font; all the Effects boxes are blue with a white dash inside, not sure what that means, but if you click twice they go to a white box, which is what you want for all of them, including Hidden. Then OK and that's it. Of course, if you only want to unhide some stuff, a variant of your method may be superior, depending if you can actually see what you are unhiding in advance. I use Word 2019.
Cheers
Got a version of Word that uses the ribbon interface (Word 2007 or later)? This site is for you! If you use an earlier version of Word, visit our WordTips site focusing on the menu interface.
Visit the WordTips channel on YouTube

FREE SERVICE: Get tips like this every week in WordTips, a free productivity newsletter. Enter your address and click "Subscribe."
Copyright © 2026 Sharon Parq Associates, Inc.
 Please Note:
This article is written for users of the following Microsoft Word versions: 2007, 2010, 2013, 2016, 2019, 2021, and Word in Microsoft 365. If you are using an earlier version (Word 2003 or earlier), this tip may not work for you. For a version of this tip written specifically for earlier versions of Word, click here:
Please Note:
This article is written for users of the following Microsoft Word versions: 2007, 2010, 2013, 2016, 2019, 2021, and Word in Microsoft 365. If you are using an earlier version (Word 2003 or earlier), this tip may not work for you. For a version of this tip written specifically for earlier versions of Word, click here:
Comments