Please Note: This article is written for users of the following Microsoft Word versions: 2007, 2010, 2013, 2016, 2019, and 2021. If you are using an earlier version (Word 2003 or earlier), this tip may not work for you. For a version of this tip written specifically for earlier versions of Word, click here: Hiding and Displaying Hidden Text.
Hidden text is text that has the hidden attribute applied. In Word, hidden is a text attribute just like italics or bold. You can control whether hidden text is displayed or printed. When the display of hidden text is turned off, the text is not deleted, its display is simply suppressed—it is not shown. When you later display hidden text, it will all be displayed again.
To turn off the display of hidden text on the screen, follow these steps:
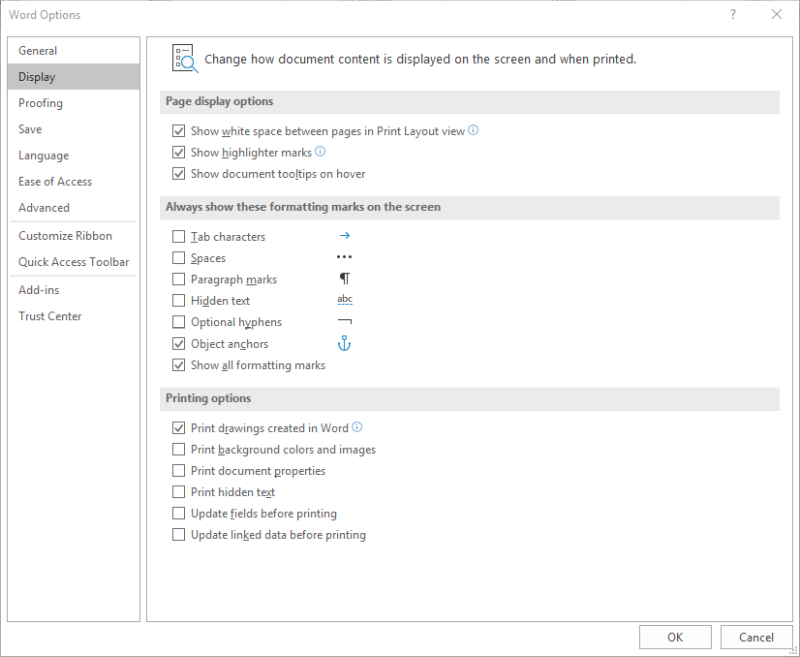
Figure 1. The display options in the Word Options dialog box.
Note that if the Show All Formatting Marks check box is selected in the Word Options dialog box, it doesn't really matter whether the Hidden Text check box is selected or not (step 3). The reason is that if the Show All Formatting Marks check box is selected, then all the check boxes that appear just above it (in the "Always Show These Formatting Marks On the Screen" section) are displayed.
After hidden text is hidden, you can later display it by following the same steps, but make sure the Hidden Text check box (step 3) is selected. (Same caveat about the Show All Formatting Marks check box applies.)
You can also control the display of hidden text (along with all other non-printing characters) by clicking on the Home tab of the ribbon, in the Paragraph group. (This is the tool that contains the paragraph symbol; it looks like a backwards P and is technically called a pilcrow.) This tool is directly attached to the Show All Formatting Marks option in the Word Options dialog box; it toggles the setting of the check box.
Turning off the display of hidden text presents a danger that you need to be aware of, however. When you turn it off, it doesn't show up at all on your screen. This makes it very easy to delete hidden text without even realizing it. This is especially true if you delete larger blocks of text, such as entire paragraphs.
The best way to guard against this is to make sure hidden text is always displayed when you are developing or editing your document. In this way you can be certain you won't inadvertently delete hidden text.
WordTips is your source for cost-effective Microsoft Word training. (Microsoft Word is the most popular word processing software in the world.) This tip (8998) applies to Microsoft Word 2007, 2010, 2013, 2016, 2019, and 2021. You can find a version of this tip for the older menu interface of Word here: Hiding and Displaying Hidden Text.

Learning Made Easy! Quickly teach yourself how to format, publish, and share your content using Word 2021 or Microsoft 365. With Step by Step, you set the pace, building and practicing the skills you need, just when you need them! Check out Microsoft Word Step by Step today!
The ribbon, displayed at the top of the Word window, is very handy with all the tools it allows you to access, but it can ...
Discover MoreScreen tips can be helpful to people reading your document on-screen. Using the technique described here, you can add ...
Discover MoreUnicode is a character-encoding scheme that works with a huge variety of characters. This tip explains what Unicode is ...
Discover MoreFREE SERVICE: Get tips like this every week in WordTips, a free productivity newsletter. Enter your address and click "Subscribe."
There are currently no comments for this tip. (Be the first to leave your comment—just use the simple form above!)
Got a version of Word that uses the ribbon interface (Word 2007 or later)? This site is for you! If you use an earlier version of Word, visit our WordTips site focusing on the menu interface.
Visit the WordTips channel on YouTube

FREE SERVICE: Get tips like this every week in WordTips, a free productivity newsletter. Enter your address and click "Subscribe."
Copyright © 2026 Sharon Parq Associates, Inc.
 Please Note:
This article is written for users of the following Microsoft Word versions: 2007, 2010, 2013, 2016, 2019, and 2021. If you are using an earlier version (Word 2003 or earlier), this tip may not work for you. For a version of this tip written specifically for earlier versions of Word, click here:
Please Note:
This article is written for users of the following Microsoft Word versions: 2007, 2010, 2013, 2016, 2019, and 2021. If you are using an earlier version (Word 2003 or earlier), this tip may not work for you. For a version of this tip written specifically for earlier versions of Word, click here:
Comments