Please Note: This article is written for users of the following Microsoft Word versions: 2007, 2010, 2013, 2016, 2019, and 2021. If you are using an earlier version (Word 2003 or earlier), this tip may not work for you. For a version of this tip written specifically for earlier versions of Word, click here: Starting a New Section on an Odd Page Number.
When writing a document that is divided into sections or chapters, it is not unusual to have each new chapter or section start on an odd-numbered page. Word makes it very easy to accommodate this need when you are creating a document. You control this through the use of sections. All you need to do is create a new document section whenever you want to start a new chapter in your document. Follow these steps:
Anything that is typed immediately after the section break will appear on an odd-numbered page when printed. If necessary, Word will insert a blank page between information in the previous section and the information in the new section to achieve this directive.
If you already have your document divided into sections (you have already inserted section breaks, in other words), you can make sure that a section will start on an odd-numbered page by following these steps:
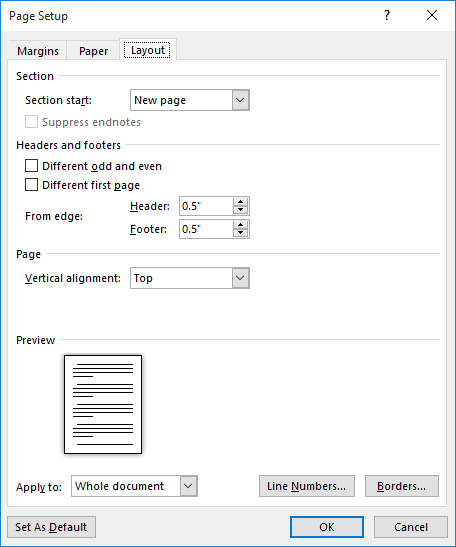
Figure 1. The Layout tab of the page Setup dialog box.
WordTips is your source for cost-effective Microsoft Word training. (Microsoft Word is the most popular word processing software in the world.) This tip (8725) applies to Microsoft Word 2007, 2010, 2013, 2016, 2019, and 2021. You can find a version of this tip for the older menu interface of Word here: Starting a New Section on an Odd Page Number.

Learning Made Easy! Quickly teach yourself how to format, publish, and share your content using Word 2021 or Microsoft 365. With Step by Step, you set the pace, building and practicing the skills you need, just when you need them! Check out Microsoft Word Step by Step today!
Enter a page break in Word, and that page break may not appear on the screen as you expect it to appear. This has to do ...
Discover MoreMost everyone knows that Word allows you to set top, bottom, left, and right margins for your document. There is another ...
Discover MoreMost of the time we print on whatever is a standard paper size for our area, such as letter size or A4 paper. However, ...
Discover MoreFREE SERVICE: Get tips like this every week in WordTips, a free productivity newsletter. Enter your address and click "Subscribe."
2019-10-28 10:11:51
Jessica Davis
I use odd-section breaks frequently and was annoyed by the fact that Word does not propagate the headers and footers on the blank page it inserts. It makes the blank page look like an error. However, I found a tip online with a field code that automatically returns a page break and a blank-page string when the section ends on an odd page. This might be a helpful addition to this tip or even warrant a separate tip. Here's the field code:
{IF{ =MOD({Page \* Arabic },2) } = 0 " " "[page break]This page in intentionally blank." }
Here is a link to the article in case you want to give credit: https://wordmvp.com/FAQs/TblsFldsFms/InsEvnPgEndChap.htm
Thanks,
Jessica Davis
Got a version of Word that uses the ribbon interface (Word 2007 or later)? This site is for you! If you use an earlier version of Word, visit our WordTips site focusing on the menu interface.
Visit the WordTips channel on YouTube

FREE SERVICE: Get tips like this every week in WordTips, a free productivity newsletter. Enter your address and click "Subscribe."
Copyright © 2026 Sharon Parq Associates, Inc.
 Please Note:
This article is written for users of the following Microsoft Word versions: 2007, 2010, 2013, 2016, 2019, and 2021. If you are using an earlier version (Word 2003 or earlier), this tip may not work for you. For a version of this tip written specifically for earlier versions of Word, click here:
Please Note:
This article is written for users of the following Microsoft Word versions: 2007, 2010, 2013, 2016, 2019, and 2021. If you are using an earlier version (Word 2003 or earlier), this tip may not work for you. For a version of this tip written specifically for earlier versions of Word, click here:
Comments