Please Note: This article is written for users of the following Microsoft Word versions: 2007, 2010, 2013, 2016, 2019, 2021, and Word in Microsoft 365. If you are using an earlier version (Word 2003 or earlier), this tip may not work for you. For a version of this tip written specifically for earlier versions of Word, click here: Understanding Mirror Margins.
Word includes a unique setting that allows you to "mirror" the margins of a page depending on whether the page is an odd or even. Mirror margins are typically used to designate a page layout that will eventually be two-sided.
You set up mirror margins by using the Page Setup dialog box. To display the dialog box, display the Page Layout, or Layout tab (depending on your version of Word) of the ribbon and click the small icon in the lower-right corner of the Page Setup group. (See Figure 1.)
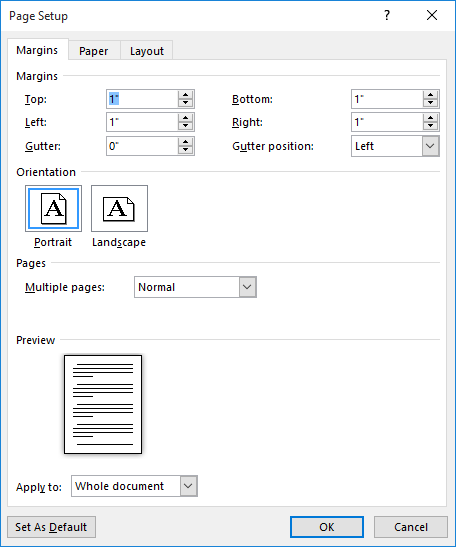
Figure 1. The Margins tab of the Page Setup dialog box.
In the Pages section of the dialog box, click on the dropdown list that's to the right of Multiple Pages (it will likely have Normal selected). From the dropdown list, select Mirror Margins. (See Figure 2.)
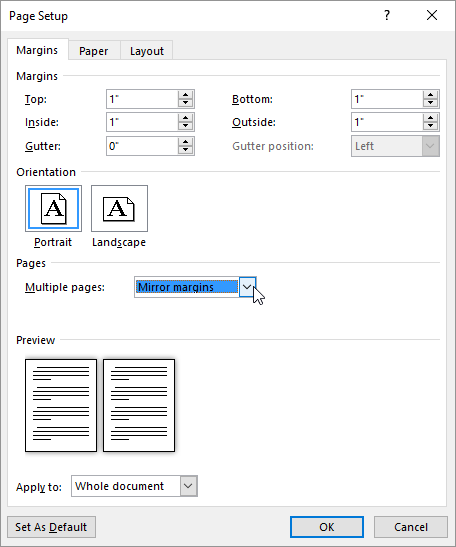
Figure 2. The Margins tab of the Page Setup dialog box after specifying Mirror Margins.
With Mirror Margins selected, you can set top, bottom, inside (towards the binding) and outside (left and right) margins. You can also specify a gutter margin, which sets the amount of space added to the inside margins to allow for binding of the final book.
If your document won't be printed on both sides of a piece of paper and you are not worried about any particular binding of the final output (including punching holes for use in a binder), then mirror margins won't be of any real value for you; you can safely ignore it. If, however, you will be duplexing your output and you do need to worry about binding, then choose mirror margins and play with your margin settings to get just the output that you need.
WordTips is your source for cost-effective Microsoft Word training. (Microsoft Word is the most popular word processing software in the world.) This tip (6707) applies to Microsoft Word 2007, 2010, 2013, 2016, 2019, 2021, and Word in Microsoft 365. You can find a version of this tip for the older menu interface of Word here: Understanding Mirror Margins.

Create Custom Apps with VBA! Discover how to extend the capabilities of Office 365 applications with VBA programming. Written in clear terms and understandable language, the book includes systematic tutorials and contains both intermediate and advanced content for experienced VB developers. Designed to be comprehensive, the book addresses not just one Office application, but the entire Office suite. Check out Mastering VBA for Microsoft Office 365 today!
Word allows you to easily apply numbered lists to your paragraphs. You may decide that you want the numbers in the list ...
Discover MoreNeed to have a great looking fraction in a document? It's relatively easy to do if you apply the formatting techniques ...
Discover MoreWhen adjusting the position of things on the Ruler (like tab stops), you can use the Alt key to get very precise in your ...
Discover MoreFREE SERVICE: Get tips like this every week in WordTips, a free productivity newsletter. Enter your address and click "Subscribe."
2023-09-29 21:47:29
Margaret Korn
I have a document which contains a table that runs over several pages. The table uses both the left and right hand side pages, owing to this I had to place a section break at the end of each page so that the alternating pages would each time have a fresh piece of table. It was very important to have the smallest possible margin on the inside so the table would be seamless in the middle. However, no matter how many times I've tried (including all the tips on Google), setting the Mirror Margin in Page Setup does not result in the margins becoming mirrored - they just stay the same on both left and right pages. What am I doing wrong? I mentioned the section breaks because I suspect they may be causing this, but on the other hand the Page Set-up allows you to choose whether you want MM for whole document OR just selected sections, so it should be able to cope with either scenario. (see Figure 1 below)
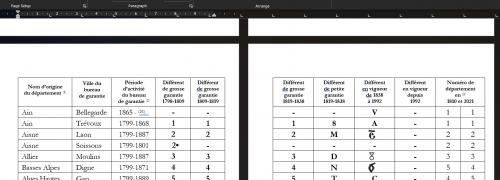
Figure 1.
Got a version of Word that uses the ribbon interface (Word 2007 or later)? This site is for you! If you use an earlier version of Word, visit our WordTips site focusing on the menu interface.
Visit the WordTips channel on YouTube

FREE SERVICE: Get tips like this every week in WordTips, a free productivity newsletter. Enter your address and click "Subscribe."
Copyright © 2026 Sharon Parq Associates, Inc.
 Please Note:
This article is written for users of the following Microsoft Word versions: 2007, 2010, 2013, 2016, 2019, 2021, and Word in Microsoft 365. If you are using an earlier version (Word 2003 or earlier), this tip may not work for you. For a version of this tip written specifically for earlier versions of Word, click here:
Please Note:
This article is written for users of the following Microsoft Word versions: 2007, 2010, 2013, 2016, 2019, 2021, and Word in Microsoft 365. If you are using an earlier version (Word 2003 or earlier), this tip may not work for you. For a version of this tip written specifically for earlier versions of Word, click here:
Comments