Please Note: This article is written for users of the following Microsoft Word versions: 2007, 2010, 2013, 2016, 2019, 2021, and Word in Microsoft 365. If you are using an earlier version (Word 2003 or earlier), this tip may not work for you. For a version of this tip written specifically for earlier versions of Word, click here: Turning Off Proofing for Superscripts.
Superscript text can be used for many purposes in a document. For instance, it is routinely used for footnote and endnote references. Some people use superscript text for "reference cues." These are not the same as regular footnote or endnote marks. For instance, the document may contain the text "productgreen" where "product" is normal text and "green" is superscript. The spell-check feature sees "productgreen" as one word and marks it as incorrect. If you use superscript in this manner frequently, this can result in an avalanche of spell-check errors in the document.
The easiest way to get around this problem is to simply search for all the superscript text in your document and turn off proofing for it. Follow these steps:
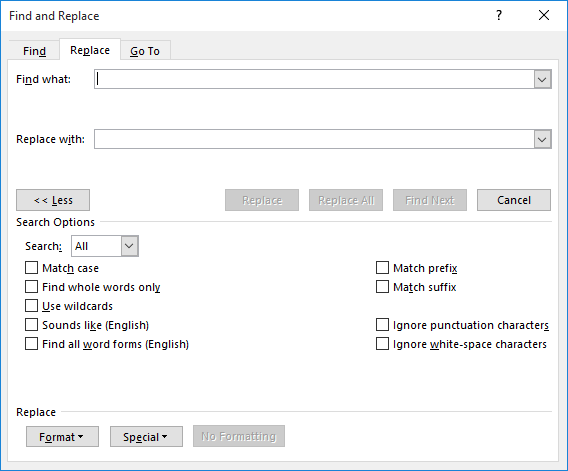
Figure 1. The Replace tab of the Find and Replace dialog box.
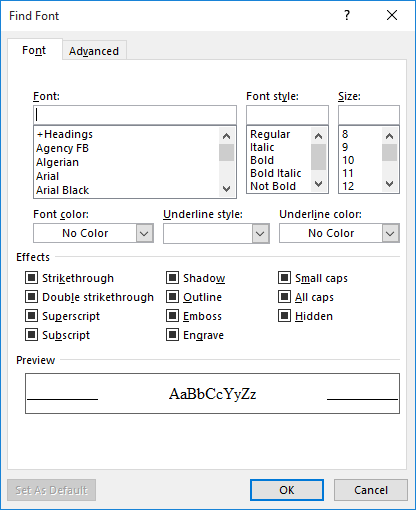
Figure 2. The Font tab of the Find Font dialog box.

Figure 3. The Replace Language dialog box.
Word goes through the document and changes the language associated with any superscript text so it is exempt from the spell check or grammar checking features of Word.
For those of you who use styles, the even simpler approach is to set up a style for your reference cues, and then use it to format them. Follow these steps to set up the style:
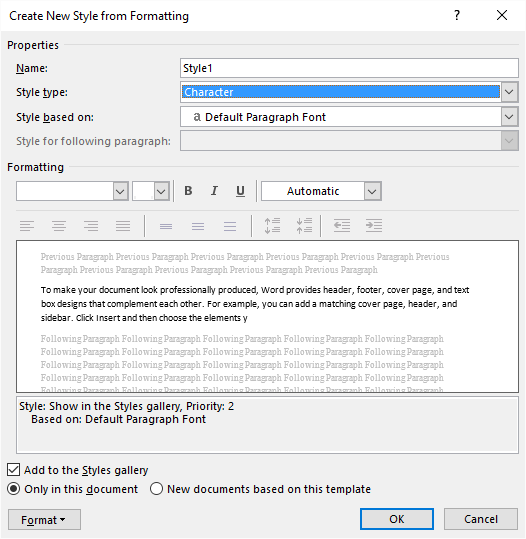
Figure 4. The Create New Style from Formatting dialog box.
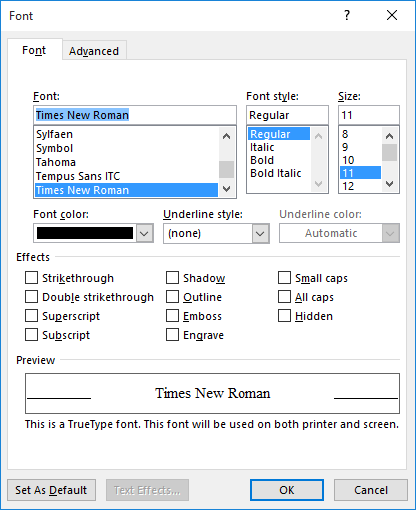
Figure 5. The Font dialog box.
With your new style defined, you simply need to apply it to any reference cue in your document. The style then takes care of superscripting your cues, as well as turning off proofing for them.
WordTips is your source for cost-effective Microsoft Word training. (Microsoft Word is the most popular word processing software in the world.) This tip (6109) applies to Microsoft Word 2007, 2010, 2013, 2016, 2019, 2021, and Word in Microsoft 365. You can find a version of this tip for the older menu interface of Word here: Turning Off Proofing for Superscripts.

Discover the Power of Microsoft Office This beginner-friendly guide reveals the expert tips and strategies you need to skyrocket your productivity and use Office 365 like a pro. Mastering software like Word, Excel, and PowerPoint is essential to be more efficient and advance your career. Simple lessons guide you through every step, providing the knowledge you need to get started. Check out Microsoft Office 365 For Beginners today!
Word allows you to accept words as correctly spelled, even if they aren't. This tip explains how to track down those ...
Discover MoreIf you hate to take your hands from the keyboard, even to right-click on a word, you'll love the information in this tip. ...
Discover MoreWant to add words easily to the spelling exclusion list? Here's a macro that can make the task completely painless.
Discover MoreFREE SERVICE: Get tips like this every week in WordTips, a free productivity newsletter. Enter your address and click "Subscribe."
There are currently no comments for this tip. (Be the first to leave your comment—just use the simple form above!)
Got a version of Word that uses the ribbon interface (Word 2007 or later)? This site is for you! If you use an earlier version of Word, visit our WordTips site focusing on the menu interface.
Visit the WordTips channel on YouTube

FREE SERVICE: Get tips like this every week in WordTips, a free productivity newsletter. Enter your address and click "Subscribe."
Copyright © 2026 Sharon Parq Associates, Inc.
 Please Note:
This article is written for users of the following Microsoft Word versions: 2007, 2010, 2013, 2016, 2019, 2021, and Word in Microsoft 365. If you are using an earlier version (Word 2003 or earlier), this tip may not work for you. For a version of this tip written specifically for earlier versions of Word, click here:
Please Note:
This article is written for users of the following Microsoft Word versions: 2007, 2010, 2013, 2016, 2019, 2021, and Word in Microsoft 365. If you are using an earlier version (Word 2003 or earlier), this tip may not work for you. For a version of this tip written specifically for earlier versions of Word, click here:
Comments