Please Note: This article is written for users of the following Microsoft Word versions: 2007, 2010, 2013, 2016, 2019, 2021, and Word in Microsoft 365. If you are using an earlier version (Word 2003 or earlier), this tip may not work for you. For a version of this tip written specifically for earlier versions of Word, click here: Changing the Formatting of All Instances of a Word.
Written by Allen Wyatt (last updated March 23, 2024)
This tip applies to Word 2007, 2010, 2013, 2016, 2019, 2021, and Word in Microsoft 365
If you are developing a document that will be used to instruct a reader how to use a program, you can make the document more functional by using color. For instance, you could make every occurrence of a given word red or blue. This would help draw the user's eye to that area of the document.
As an example, suppose you had a special warning paragraph as a design element in your document. Every one of these paragraphs starts with the word Warning! (with the exclamation mark), and you wanted this word to be in red. You can use Word to quickly search for all occurrences of the word and change its color. To do this, follow these steps:
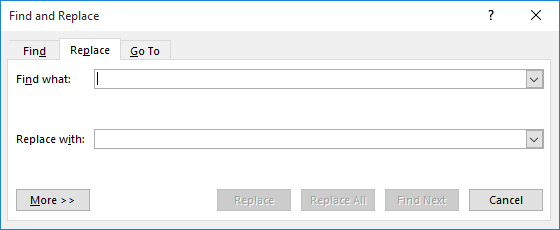
Figure 1. The Replace tab of the Find and Replace dialog box.
If you don't have a color printer, color words will do you little good when you print a document. You could achieve close to the same effect, however, by changing all occurrences of a certain word to a special format that will be noticeable on your printout.
For instance, let's assume you have a special warning paragraph as a design element in your document. Every one of these paragraphs starts with the word Warning! (with the exclamation mark), and you want this word to be in bold italics. You can use Word to quickly search for all occurrences of the word and change its formatting. To do this, follow these steps:
This will result in all occurrences of Warning! being formatted as bold and italic.
So far this tip has illustrated how to use Find and replace to do your formatting changes. If you are creating a longer document, it may actually be more appropriate to use styles to apply your formatting. Styles are very powerful, as they allow you to define how your text should look. If you later change the style, then all text in your document to which you previously applied that style is automatically updated to reflect the modified style definition. Using and creating your own custom styles has been covered in other issues of WordTips.
WordTips is your source for cost-effective Microsoft Word training. (Microsoft Word is the most popular word processing software in the world.) This tip (3072) applies to Microsoft Word 2007, 2010, 2013, 2016, 2019, 2021, and Word in Microsoft 365. You can find a version of this tip for the older menu interface of Word here: Changing the Formatting of All Instances of a Word.

The First and Last Word on Word! Bestselling For Dummies author Dan Gookin puts his usual fun and friendly candor back to work to show you how to navigate Word 2019. Spend more time working and less time trying to figure it all out! Check out Word 2019 For Dummies today!
Do you want to quickly search for any footnote or endnote marks in your document? Word makes it easy using the Word's ...
Discover MoreWord allows you to use its searching capabilities to easily find multiple items in a document. What if you want to copy ...
Discover MoreThe Find and Replace capabilities of Word are quite powerful. If you want to change the formatting of just a part of text ...
Discover MoreFREE SERVICE: Get tips like this every week in WordTips, a free productivity newsletter. Enter your address and click "Subscribe."
There are currently no comments for this tip. (Be the first to leave your comment—just use the simple form above!)
Got a version of Word that uses the ribbon interface (Word 2007 or later)? This site is for you! If you use an earlier version of Word, visit our WordTips site focusing on the menu interface.
Visit the WordTips channel on YouTube

FREE SERVICE: Get tips like this every week in WordTips, a free productivity newsletter. Enter your address and click "Subscribe."
Copyright © 2026 Sharon Parq Associates, Inc.
 Please Note:
This article is written for users of the following Microsoft Word versions: 2007, 2010, 2013, 2016, 2019, 2021, and Word in Microsoft 365. If you are using an earlier version (Word 2003 or earlier), this tip may not work for you. For a version of this tip written specifically for earlier versions of Word, click here:
Please Note:
This article is written for users of the following Microsoft Word versions: 2007, 2010, 2013, 2016, 2019, 2021, and Word in Microsoft 365. If you are using an earlier version (Word 2003 or earlier), this tip may not work for you. For a version of this tip written specifically for earlier versions of Word, click here:
Comments