Please Note: This article is written for users of the following Microsoft Word versions: 2007, 2010, 2013, 2016, 2019, and 2021. If you are using an earlier version (Word 2003 or earlier), this tip may not work for you. For a version of this tip written specifically for earlier versions of Word, click here: Adjusting Bottoms of Pages.
When presenting some types of writing, it is very helpful that the last line of each page end at the same vertical position as the other ending lines on other pages. For instance, when working with poetry it is common for the last lines of each page to line up vertically.
If you want to align information vertically in this manner, follow these steps:
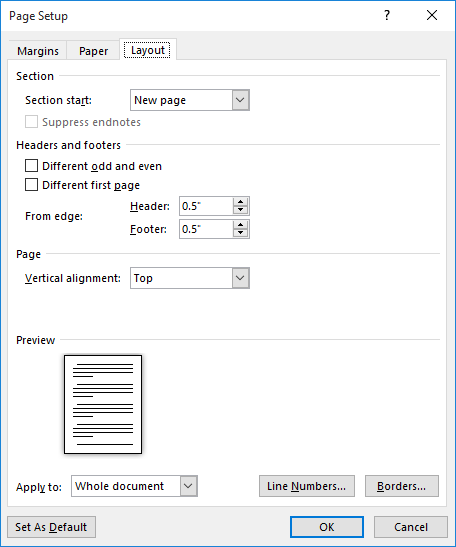
Figure 1. The Layout tab of the Page Setup dialog box.
Now the paragraphs on a page are adjusted vertically so they are evenly spaced between the top and bottom margin. This is helpful for poetry, where most paragraphs consist of a single line. It is a bit less helpful for other types of writing, since the Vertical Alignment specification doesn't affect spacing inside a paragraph (between lines), only the spacing between paragraphs.
If your writing requires different length paragraphs and you want increased spacing between actual lines, you will need to experiment with line spacing to get a "look" that matches your needs. Once you settle on the appropriate line spacing, you can define a style that can then be applied to all your paragraphs. When combined with the Vertical Alignment setting already discussed, you may achieve the desired appearance.
Also, you may not like the appearance of your writing when you are using a large page size and your text consists of only a few lines. With justified vertical alignment set, this results in huge white areas between paragraphs. There are only two ways around this: You must either increase the amount of text on the page or decrease the page length.
WordTips is your source for cost-effective Microsoft Word training. (Microsoft Word is the most popular word processing software in the world.) This tip (13172) applies to Microsoft Word 2007, 2010, 2013, 2016, 2019, and 2021. You can find a version of this tip for the older menu interface of Word here: Adjusting Bottoms of Pages.

Discover the Power of Microsoft Office This beginner-friendly guide reveals the expert tips and strategies you need to skyrocket your productivity and use Office 365 like a pro. Mastering software like Word, Excel, and PowerPoint is essential to be more efficient and advance your career. Simple lessons guide you through every step, providing the knowledge you need to get started. Check out Microsoft Office 365 For Beginners today!
You can highlight words and phrases in your document, much the same as you can mark printed words and phrases with a ...
Discover MoreWord allows you to define your own custom paper sizes. It is possible, though, that those sizes may change on their own. ...
Discover MoreWhen you open a document on a system other than your own, it is very possible that the document will look different than ...
Discover MoreFREE SERVICE: Get tips like this every week in WordTips, a free productivity newsletter. Enter your address and click "Subscribe."
There are currently no comments for this tip. (Be the first to leave your comment—just use the simple form above!)
Got a version of Word that uses the ribbon interface (Word 2007 or later)? This site is for you! If you use an earlier version of Word, visit our WordTips site focusing on the menu interface.
Visit the WordTips channel on YouTube

FREE SERVICE: Get tips like this every week in WordTips, a free productivity newsletter. Enter your address and click "Subscribe."
Copyright © 2026 Sharon Parq Associates, Inc.
 Please Note:
This article is written for users of the following Microsoft Word versions: 2007, 2010, 2013, 2016, 2019, and 2021. If you are using an earlier version (Word 2003 or earlier), this tip may not work for you. For a version of this tip written specifically for earlier versions of Word, click here:
Please Note:
This article is written for users of the following Microsoft Word versions: 2007, 2010, 2013, 2016, 2019, and 2021. If you are using an earlier version (Word 2003 or earlier), this tip may not work for you. For a version of this tip written specifically for earlier versions of Word, click here:
Comments