Please Note: This article is written for users of the following Microsoft Word versions: 2007, 2010, 2013, 2016, 2019, 2021, and Word in Microsoft 365. If you are using an earlier version (Word 2003 or earlier), this tip may not work for you. For a version of this tip written specifically for earlier versions of Word, click here: Keeping a Picture Title with the Picture.
Written by Allen Wyatt (last updated October 29, 2022)
This tip applies to Word 2007, 2010, 2013, 2016, 2019, 2021, and Word in Microsoft 365
Denis has a document that uses landscape orientation. He inserted a picture in the document and, following the picture, added the title for the picture. The title line was separated from the picture by one blank line and the title line was followed by one blank line. To ensure that the picture occupied as much of the page as possible without exceeding the page margins, Denis increased the picture size in Word until the final blank line disappeared from the page, and then he saved the file. (The final blank line overflowed onto the next page.)
When Denis reopened the file, the title curiously appeared on the following page rather than following the picture, as desired. When he repeated the sizing operation, although he can reduce the size of the picture by as much as fifty percent or more, he cannot get the title to move back to the same page as the picture.
It is most likely that this problem is caused by paragraph formatting. In order to see what is happening in Word, you'll want to turn on non-printing characters so you can see where the actual paragraph breaks are. (You turn on the display of non-printing characters by clicking the Show/Hide tool on the toolbar. When you do, you should see a backwards P character appear at the end of each paragraph. These don't print; they are purely for information.)
With the non-printing characters displayed and based on the description of the problem, you should see only two of the backwards P characters—one to the right of your picture and one to the right of your picture title. If you see any additional backwards P characters, delete them. This action alone may solve the problem.
If it does not solve the problem, then perform the following steps:

Figure 1. The Line and Page Breaks tab of the Paragraph dialog box.
Your picture and picture title should now stay together on the same page.
You may also want to consider modifying how you group your pictures and titles together. Some people find it handy to create a text box and size the text box so that it is as large as you want your picture to be. Then, insert the picture into the text box, press Enter once, and type your picture title. The picture and the title are, in this way, contained within a single text box. The benefit is that the text box is treated as a single unit by Word, allowing you to ensure that it remains on a single page.
Another option to make sure the titles stay with your pictures is to use captions for the titles. Follow these steps:
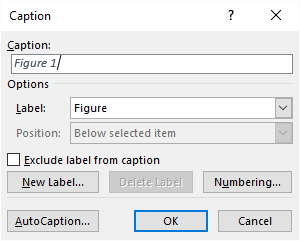
Figure 2. The Caption dialog box.
Finally, you could always load your picture into a graphics program and add your title within that program. In this way the title becomes a part of the image itself and you wouldn't need to worry about trying to add the title within Word.
WordTips is your source for cost-effective Microsoft Word training. (Microsoft Word is the most popular word processing software in the world.) This tip (9717) applies to Microsoft Word 2007, 2010, 2013, 2016, 2019, 2021, and Word in Microsoft 365. You can find a version of this tip for the older menu interface of Word here: Keeping a Picture Title with the Picture.

Do More in Less Time! An easy-to-understand guide to the more advanced features available in the Microsoft 365 version of Word. Enhance the quality of your documents and boost productivity in any field with this in-depth resource. Complete your Word-related tasks more efficiently as you unlock lesser-known tools and learn to quickly access the features you need. Check out Microsoft 365 Word For Professionals For Dummies today!
Rotating graphics in Word is not always straight-forward, but it can be done. This tip examines a special need to ...
Discover MoreIt is no secret that Word allows you to add images to your documents. However, those images might be low resolution and ...
Discover MoreIf you are doing work with a lot of graphics, it may be helpful to create a summary page that contains thumbnail ...
Discover MoreFREE SERVICE: Get tips like this every week in WordTips, a free productivity newsletter. Enter your address and click "Subscribe."
2024-06-11 09:19:30
Paul Stregevsky
Marty,
Q1a answer (numbering sequence): Are your figures in textboxes? That could be the source of your sequencing problem. Make sure your captions are in the text layer (not in textboxes).
If your captions are still numbering out of order, set each figure's position to "Inline," not wrapped. A wrapped figure (or table) might confuse Word as it tries to determine the caption order.
Q1b answer: Yeah, you're seldom better off replacing a shaded caption number with a manually entered number. It's better to find the root of the problem.
Q2 (skipping a number): Try updating your fields: Select File, then Print. After you reach Print Preview, cancel out (return to Edit mode). Your caption numbers have updated. If that doesn't help, I'm afraid I have no other theories.
2024-06-10 13:49:43
Marty Grundy
I've been using captions for years now, with word 2008 for mac. Two problems are endemic.
1. When there is more than one Figure on the page, captions insists on numbering from the bottom of the page instead of the top. If i manually change them word cannot "see" them and they are not included in the List of Figures.
2. Numbering sometimes skips a number and can't seem to reorganize the numbering of captions.
Anything you can do to help will be much appreciated.
-Marty
2024-02-08 23:02:27
Tomek
I did not test it fully but captions get inserted differently for in-line and floating pictures.
1 - For in-line pictures inserting a caption makes sense only if there is no other text in the paragraph with the picture. Then, the caption gets inserted as the next paragraph, and the paragraph with the picture is automatically set to be kept with next. That way they stay together on the page.
If the in-line picture is in the middle of the text of a paragraph, the things get messy: the paragraph is broken just after the picture into two paragraphs, and the caption is inserted as another paragraph between the two broken ones. Aligning the caption with the picture may take some effort.
2 - For floating pictures the caption is inserted in a text box that is sized to match the picture. Both the picture and the text box are initially anchored to the same paragraph, so generally would move together if the text around them changes. On the other hand, you can easily drag independently them over the page and mis-align them, or you can re-scale one of them making them mismatched. So, before adjusting their position it is best to group them (select both and in Format Shape select Group, then again chose Group). The effect is similar to putting both the the picture and its caption inside the text box, as Allen described.
2024-02-07 07:30:21
Paul Stregevsky
As Nick From London does, I used to use an invisible table to keep a picture with its caption. But my documents must be accessible (Section 508-compliant), so I had to stop. Undet the guidelines for accessibility, tables used strictly for formatting are not permitted.
2024-02-06 10:05:22
Ceylan
Thank you very much.
2022-11-02 10:26:14
Nick From London
I use tables to show pictures and titles and sometimes comments in word.
You can switch off the lines so they don't print if you want.
2022-11-01 06:12:11
Nev Percy
@Ken Endacott
I confess to having been put off by the unfamiliarity of the Canvas when it was first introduced, and not really gone back there since. (Even as an oldie, I have far more Word ability than the work in my current department requires.)
This is good to hear, and I'll try to engineer an opportunity to put it to use. Thank you very much!
2022-11-01 05:08:07
Ken Endacott
Nev Percy
In earlier versions of Word grouping was achieved by drawing a “rubber band” around the objects and clicking Group. From 2016 the Canvas was introduced as a way of grouping objects but the group feature still exists however the rubber band method is no longer available. To group shapes select each shape to be included (hold down CTRL and click each shape) and click the Group in the Shape Format ribbon. The group is itself a shape and can be moved and text wrapped.
The following macro emulates the rubber band method. Select a range that includes the shapes to be grouped and run the macro. It will ignore any text in the selection.
Sub GroupShapes()
Dim aRange As Range
Set aRange = Selection.Range
If aRange.ShapeRange.Count < 2 Then
MsgBox "ERROR: Need 2 or more shapes non inline shapes in order to group"
Exit Sub
End If
On Error GoTo Gerr2
aRange.ShapeRange.Group
DoEvents
If MsgBox("Confirm the grouping of these shapes." & vbCr & vbCr & _
"Note: inline shapes cannot be included", vbYesNo) = vbNo Then
aRange.ShapeRange.Ungroup
aRange.Select
End If
Exit Sub
Gerr2:
MsgBox "Cannot group this selection"
End Sub
2022-10-31 08:12:04
Nev Percy
I clicked through from the email into this tip in case it was going to say anything about Grouping objects -- when they're included with a positioning other than 'flow with text'.
I've been struggling to find this in later versions of Word... (I'm mostly on Word 2016 on my original Desktop, but get it so many other ways now, Office 365, via Teams, via SharePoint which may or may not use quite the _same_ Office 365... etc.?)
But it used to be my method of choice to right-click on items and select Grouping to keep them together, wherever I might put them on the page.
Is that gone altogether these days, and can anyone share any insight into why?
Many thanks,
--Nev.
Got a version of Word that uses the ribbon interface (Word 2007 or later)? This site is for you! If you use an earlier version of Word, visit our WordTips site focusing on the menu interface.
Visit the WordTips channel on YouTube

FREE SERVICE: Get tips like this every week in WordTips, a free productivity newsletter. Enter your address and click "Subscribe."
Copyright © 2026 Sharon Parq Associates, Inc.
 Please Note:
This article is written for users of the following Microsoft Word versions: 2007, 2010, 2013, 2016, 2019, 2021, and Word in Microsoft 365. If you are using an earlier version (Word 2003 or earlier), this tip may not work for you. For a version of this tip written specifically for earlier versions of Word, click here:
Please Note:
This article is written for users of the following Microsoft Word versions: 2007, 2010, 2013, 2016, 2019, 2021, and Word in Microsoft 365. If you are using an earlier version (Word 2003 or earlier), this tip may not work for you. For a version of this tip written specifically for earlier versions of Word, click here:
Comments