Didi wonders if there is a way to have a text box with both text and its outline hidden when printing. She wants to be able to keep document formatting info for novice users noticeably available in the document, but not print.
There are a few ways you can approach this issue. The traditional approach is to format the text box so that there is no border and the background (fill) of the text box is transparent. Then you can select the text in the text box and format it has hidden. In that way you can print the document and, as long as you have Word configured to not print hidden text, you'll not have the text boxes show up on the printout, yet still show on the screen.
If you have a lot of text boxes in your document, you can use macros to automate the hiding and unhiding of them:
Sub HideTextBox()
    Dim aShape As Shape
    For Each aShape In ActiveDocument.Shapes
        If aShape.Type = msoTextBox Then
            aShape.Fill.Visible = False
            aShape.TextFrame.TextRange.Font.Hidden = True
            aShape.Line.Visible = False
        End If
    Next
End Sub
Sub RestoreTextBox()
    Dim aShape As Shape
    For Each aShape In ActiveDocument.Shapes
        If aShape.Type = msoTextBox Then
            aShape.Fill.Visible = True
            aShape.TextFrame.TextRange.Font.Hidden = False
            aShape.Line.Visible = True
        End If
    Next
End Sub
These macros could be added to the Quick Access Toolbar so that you can turn them off before printing and then turn them back on after printing.
Of course, you could utilize hidden text for your document formatting info without the need to utilize text boxes at all. An approach to doing this is detailed in this tip:
https://wordribbon.tips.net/T008056_Using_Non-Printing_Notes
Another approach is to configure Word so that drawing objects (such as text boxes) don't print. Follow these steps:
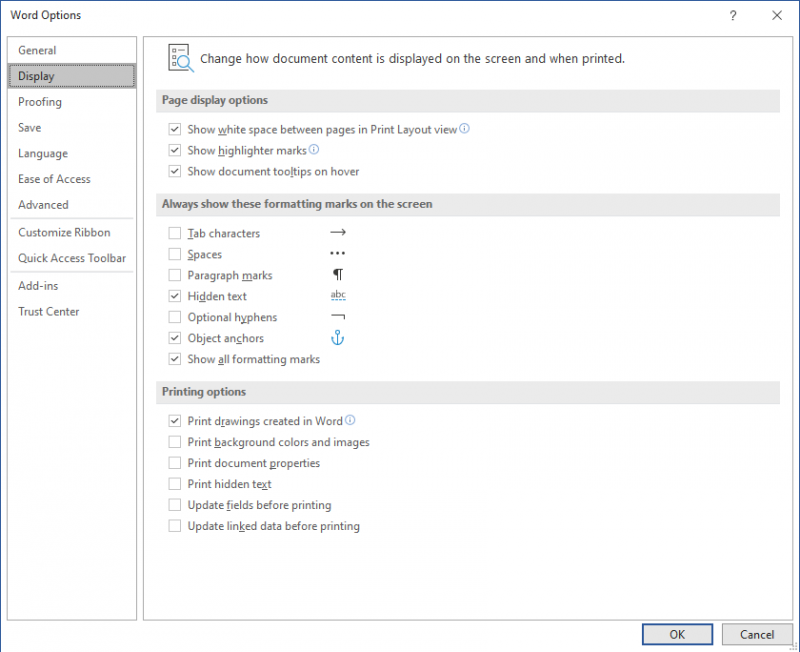
Figure 1. The Display options of the Word Options dialog box.
Now text boxes are displayed on the screen, but they won't be printed. You need to be aware, though, that no other drawings will be printed either. So, it is best to check out this option with your document to make sure it will do what you want.
Note:
WordTips is your source for cost-effective Microsoft Word training. (Microsoft Word is the most popular word processing software in the world.) This tip (8905) applies to Microsoft Word 2007, 2010, 2013, 2016, 2019, 2021, and Word in Microsoft 365.

Discover the Power of Microsoft Office This beginner-friendly guide reveals the expert tips and strategies you need to skyrocket your productivity and use Office 365 like a pro. Mastering software like Word, Excel, and PowerPoint is essential to be more efficient and advance your career. Simple lessons guide you through every step, providing the knowledge you need to get started. Check out Microsoft Office 365 For Beginners today!
Do you find yourself frequently creating text boxes and callouts? This tip describes how to change the default settings ...
Discover MoreInsert a text box and it is automatically formatted to have a border around it. Getting rid of the border is easy if you ...
Discover MoreNeed to search for various text boxes in your document? It's easy to do with the handy macro provided in this tip.
Discover MoreFREE SERVICE: Get tips like this every week in WordTips, a free productivity newsletter. Enter your address and click "Subscribe."
There are currently no comments for this tip. (Be the first to leave your comment—just use the simple form above!)
Got a version of Word that uses the ribbon interface (Word 2007 or later)? This site is for you! If you use an earlier version of Word, visit our WordTips site focusing on the menu interface.
Visit the WordTips channel on YouTube

FREE SERVICE: Get tips like this every week in WordTips, a free productivity newsletter. Enter your address and click "Subscribe."
Copyright © 2026 Sharon Parq Associates, Inc.
Comments