Steven often has a Word document open and can't remember where it came from (i.e., what folder it is located in). The title bar for the document's window shows the document's title, but not the folder in which it is stored. He wonders about the easiest way to figure out the folder for a document that is already open.
It turns out that there are several different ways you can determine the folder for a document. Based on the huge number of people that supplied ideas, the most popular (and, therefore, commonly used) method is to simply press F12. Word displays the Save As dialog box, which includes as the default location the path of the currently active document. Once you glean the information you like, you can press Esc to dismiss the Save As dialog box without actually saving.
If you are using Word 2007, you can display the properties for a document, which includes its location. You do this by clicking the Office button, then clicking Prepare | Properties. Word displays a Properties pane at the top of the document, which includes a yellow bar showing the location for the document.
If you are using Word 2010 or a later version of the program, you can see the folder in which a document is stored by simply clicking the File tab of the ribbon. Near the top of the screen you can see the location, the detail of which will vary based on the version of Word you are using. For instance, if you are using Word 2010 you can see the traditional full path name. (See Figure 1.)
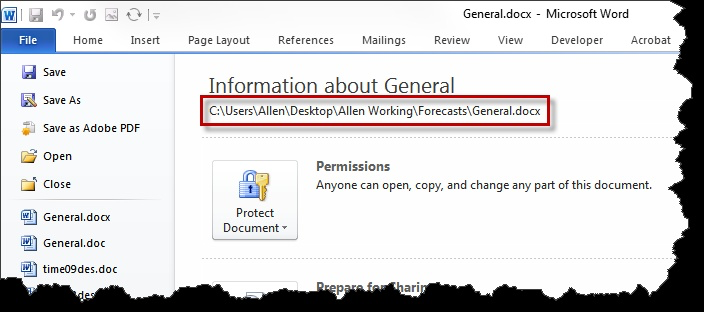
Figure 1. File location in Word 2010.
If you are using Word 2016 or a later version, though, then the full path may appear truncated. (See Figure 2.)
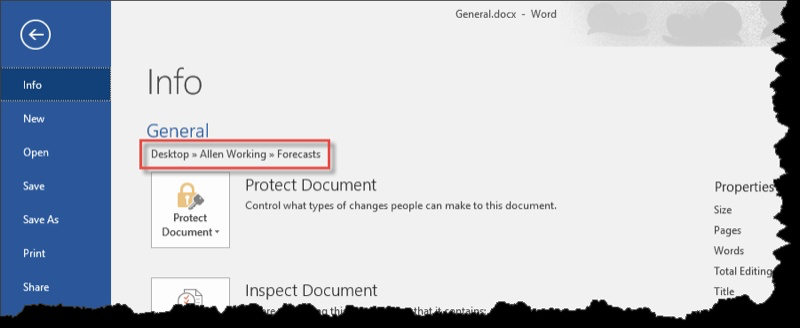
Figure 2. File location in Word 2016 and later versions.
Interestingly, if you look at what you see when the File tab is displayed, near the bottom of the right side of the screen you should see an option named Open File Location. If you hover over this with the mouse pointer, you'll see the full path for the folder. You can also click the option and thereby open a window that shows the contents of the folder.
There's also a tool you can add to the Quick Access Toolbar that will show you the document's location. Follow these steps:

Figure 3. Adding a command to the Quick Access Toolbar.
The Document Address tool is actually a drop-down list. It lists lots of different addresses, including places you've visited on the Internet. The top option, however (the one shown when you don't drop-down the list), is the folder location of the currently active document.
Finally, if you prefer a macro-oriented approach, you could create a very simple one that displays the path to the folder:
Sub GetPath()
     MsgBox ActiveDocument.FullName
End Sub
The macro could be easily assigned to a shortcut key or to a tool on the ribbon or Quick Access Toolbar.
Note:
WordTips is your source for cost-effective Microsoft Word training. (Microsoft Word is the most popular word processing software in the world.) This tip (4869) applies to Microsoft Word 2007, 2010, 2013, 2016, 2019, 2021, and Word in Microsoft 365.

Create Custom Apps with VBA! Discover how to extend the capabilities of Office 365 applications with VBA programming. Written in clear terms and understandable language, the book includes systematic tutorials and contains both intermediate and advanced content for experienced VB developers. Designed to be comprehensive, the book addresses not just one Office application, but the entire Office suite. Check out Mastering VBA for Microsoft Office 365 today!
Imagine trying to open a familiar document one day, only to find that Word gives you an error message that the file is ...
Discover MoreThe newest versions of Word have a feature called AutoSave, which should not be confused with the much older version of ...
Discover MoreUse Word long enough and you eventually will lose some of your work. (And, it seems to be a rule that this will occur ...
Discover MoreFREE SERVICE: Get tips like this every week in WordTips, a free productivity newsletter. Enter your address and click "Subscribe."
2025-02-04 23:14:20
Over the years your website has been consistently very helpful, with clear and useful information. Thank you.
I'm using Windows 365. When I want to find the location of a document (i.e., which folder it is stored in) my practice has been to go to File tab at top left in document, drop down to 'info' and click on 'open file location". In the past, it would open the folder and highlight the file. Recently I noticed that it no longer highlights the file, it opens the folder only. So now I need to scroll down and locate the file name, which is much less convenient.
In trying to regain the convenience, I found this article on your website. I looked for 'document address' as described above, but it does not exist (I looked in 'all commands'). I did find 'address [document location]' as noted in the comments, and added it to the Quick Access Toolbar. But, as also noted in the comments, it is too short to be useful. Yes, I can click in it to highlight, but using Control C to copy and paste does not work. Yes, I can scroll to the right to see the full filename, but this may be more tedious than scrolling down in the folder to search for the filename, so not a solution to my admittedly minor problem.
I'll be interested to see the results of this discussion.
2024-10-23 09:17:03
Paul Stregevsky
Here's the screenshot that I meant to attach in the comment just below this one. (see Figure 1 below)
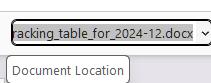
Figure 1. Select the address and sweep right to see the end of the address.
2024-10-23 09:14:26
Paul Stregevsky
By selecting the path in the QAT display, you can see more of the address. But you can't see all of it at once. {fig}]
2024-10-23 09:11:32
Paul Stregevsky
This is what the dashboard readout looks like in Word for Office 365 when you add "Address [Document Location]" to your Quick Access Toolbar. As William noted, it can show no more than 28 or (in my case) 30 characters. (see Figure 1 below)
Selecting the dropdown list will not reveal the full path; it appears to show the first 38 characters of the most recent pages that I opened in my Chrome browser. (see Figure 2 below)
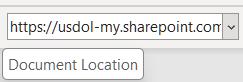
Figure 1. Document Location in the QAT, showing 30 characters

Figure 2. Document Location, selected, listing recent browser pages
2024-10-22 12:53:15
Phil Reinemann
I have Office/Word 2019 and it does not have "Document Address", even in All Commands.
I've been using a macro for years. It also lets you copy the path to the clipboard. Real handy if you're letting someone know where it is on which server. I seem to recall if you open the document from an email (not saved to disk first) there may be an issue with the path as it seems to be in "temporary space".
Update! William was right, "Address [Document Location]" is in my "commands not in ribbon", and it let's you copy the full path too!
2024-10-20 21:57:06
William
I've got the same experience that Paul noted. There is, however, an "Address [Document Location]" command listed in "All Commands" for the QAT. It seems to be the same as the command described in this tip, but it's not very useful as it's too short to show, at once, the full folder location for most documents I use, and it doesn't seem possible to make it any bigger (as far as I can tell, it can show only 28 characters at once).
If it's relevant, my current version of Word is:
"Microsoft® Word for Microsoft 365 MSO (Version 2402 Build 16.0.17328.20550) 32-bit".
2024-10-19 15:37:23
Paul McGregor
I am using the current version of Microsoft 365. I followed the advice on adding document address to the quick access toolbar for an open document. I repeated the procedure several times. However no "Document Address" comand is listed - only Document (with oprions that do not include document address) and Document Map. I repeated the procedure several times. (see Figure 1 below)
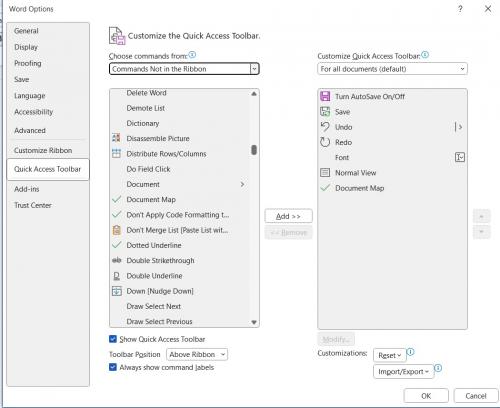
Figure 1.
2024-10-19 10:15:22
Beepee
All good ways to get the path. Another option is to place the document path info into the document footer - its there when you want it without any clicking to go someplace else!
Got a version of Word that uses the ribbon interface (Word 2007 or later)? This site is for you! If you use an earlier version of Word, visit our WordTips site focusing on the menu interface.
Visit the WordTips channel on YouTube

FREE SERVICE: Get tips like this every week in WordTips, a free productivity newsletter. Enter your address and click "Subscribe."
Copyright © 2026 Sharon Parq Associates, Inc.
Comments