Please Note: This article is written for users of the following Microsoft Word versions: 2007, 2010, 2013, 2016, 2019, 2021, and Word in Microsoft 365. If you are using an earlier version (Word 2003 or earlier), this tip may not work for you. For a version of this tip written specifically for earlier versions of Word, click here: Engraving Text.
Written by Allen Wyatt (last updated February 11, 2023)
This tip applies to Word 2007, 2010, 2013, 2016, 2019, 2021, and Word in Microsoft 365
If you've been a Word user for years and years (okay, for decades and decades), you may remember that you used to be able to "engrave" or "emboss" text, just as you can apply italic or bold to the text. Word removed this type of formatting in Word 2010, but there is a very simple way to get it back: Just save the document in the old DOC format.
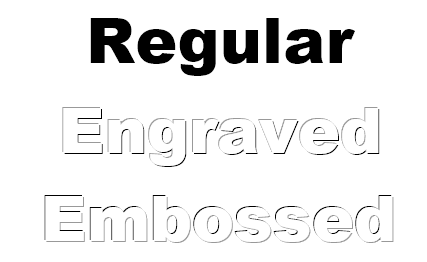
When you engrave text, it appears to be sunken into the page, with shadowing at the edges. Engraved text is the opposite of embossed text. (See Figure 1.)

Figure 1. Regular, engraved, and embossed text.
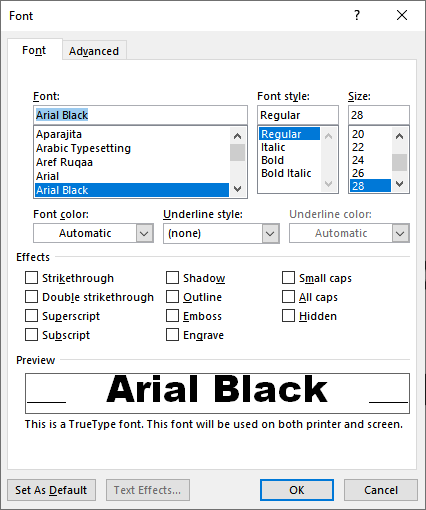
Once you've saved your document in the DOC format, you can then follow these steps:

Figure 2. The Font tab of the Font dialog box.
You can also play with different font colors and background colors to make the engraved text appear different.
If you don't see the Engrave or Emboss check boxes in your Font dialog box (steps 4 and 5), then it simply means you didn't first save your document in the DOC format.
WordTips is your source for cost-effective Microsoft Word training. (Microsoft Word is the most popular word processing software in the world.) This tip (7793) applies to Microsoft Word 2007, 2010, 2013, 2016, 2019, 2021, and Word in Microsoft 365. You can find a version of this tip for the older menu interface of Word here: Engraving Text.

The First and Last Word on Word! Bestselling For Dummies author Dan Gookin puts his usual fun and friendly candor back to work to show you how to navigate Word 2013. Spend more time working and less time trying to figure it all out! Check out Word 2013 For Dummies today!
When sharing your documents with others, you may occasionally have a problem where some of the symbols used in your ...
Discover MoreMonospace fonts allow you to easily achieve a specific "look" with your text or to line up information in a certain way. ...
Discover MoreWord allows you to shade entire paragraphs or simple selections of text. This is a great way to highlight information on ...
Discover MoreFREE SERVICE: Get tips like this every week in WordTips, a free productivity newsletter. Enter your address and click "Subscribe."
There are currently no comments for this tip. (Be the first to leave your comment—just use the simple form above!)
Got a version of Word that uses the ribbon interface (Word 2007 or later)? This site is for you! If you use an earlier version of Word, visit our WordTips site focusing on the menu interface.
Visit the WordTips channel on YouTube
FREE SERVICE: Get tips like this every week in WordTips, a free productivity newsletter. Enter your address and click "Subscribe."
Copyright © 2025 Sharon Parq Associates, Inc.
Comments