As David types, Word pops up what he considers as efficiency-destroying and very unhelpful help menus in the middle of his work. If he's editing, he knows there are temporary spelling errors, etc. He doesn't want Word to tell him as he is typing. David wonders how to turn off all this help that Word wants to provide so he can simply focus on his writing.
Word provides lots of what Microsoft considers "helpful" tools that are actively running whenever you are using the program. How much these tools intrude in your work can be controlled by using the Word Options dialog box. How you display the dialog box depends on the version of Word you are using:
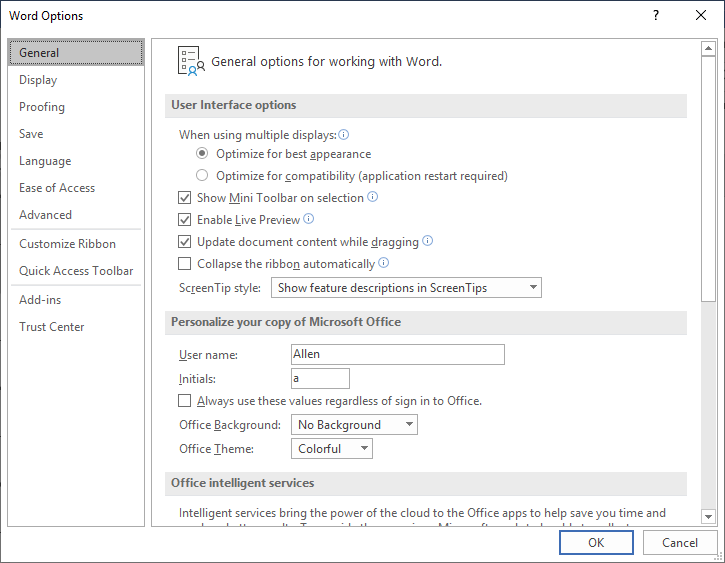
Figure 1. The General tab of the Word Options dialog box.
Note that each tab on in the dialog box can contain settings that control what you might consider intrusive tools. For instance, on the General tab of the dialog box, near the top, there is a Show Mini Toolbar on Selection option. You'll probably want to turn this off, as with it on, Word displays a, well, "mini toolbar" near whatever you have selected in your document.
Similar settings are available on other tabs. I suspect, for instance, that since you mentioned how Word notifies you about spelling errors that you'll want to display the Proofing tab of the dialog box. (See Figure 2.)
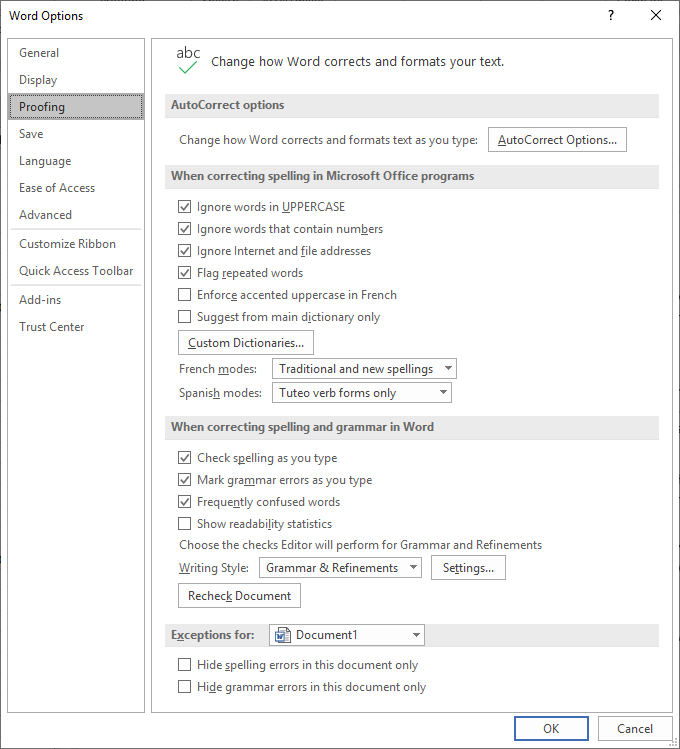
Figure 2. The Proofing tab of the Word Options dialog box.
At a minimum on this tab you'll want to clear the checkbox next to two options: Check Spelling As You Type and Mark Grammar Errors As You Type.
Any of these changes you make are made immediately upon closing the Word Options dialog box. You will, again, want to carefully consider all of the options available on all tabs of the Word Options dialog box. Doing so will allow you to make sure that Word behaves as you want it to behave, without surprises or interruptions.
If you are using Word on a device that relies on a software keyboard (such as a touch-screen computer or tablet), then there is one other place you'll want to make some changes. This time, however, the changes are within Windows 10, not within Word itself. Follow these steps:
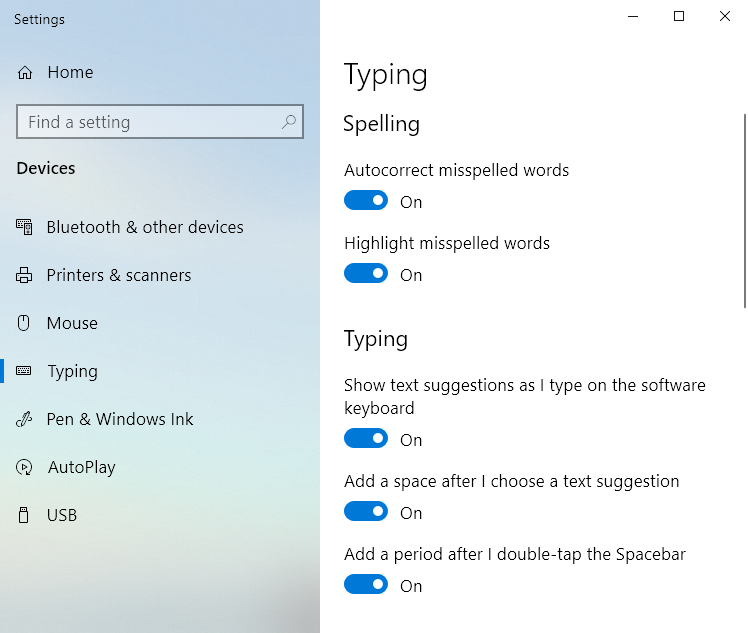
Figure 3. The Settings dialog box.
WordTips is your source for cost-effective Microsoft Word training. (Microsoft Word is the most popular word processing software in the world.) This tip (13729) applies to Microsoft Word 2007, 2010, 2013, 2016, 2019, and 2021.

Discover the Power of Microsoft Office This beginner-friendly guide reveals the expert tips and strategies you need to skyrocket your productivity and use Office 365 like a pro. Mastering software like Word, Excel, and PowerPoint is essential to be more efficient and advance your career. Simple lessons guide you through every step, providing the knowledge you need to get started. Check out Microsoft Office 365 For Beginners today!
There are scores of keyboard shortcuts built into both Windows and Word. If you run into a conflict between shortcut ...
Discover MoreFunction keys are often used, in Word, for common operations. You can, if desired, change the way in which a function key ...
Discover MoreThe ubiquitous ruler appears at the top of every Word document. It is so commonplace, that you may forget that it is easy ...
Discover MoreFREE SERVICE: Get tips like this every week in WordTips, a free productivity newsletter. Enter your address and click "Subscribe."
There are currently no comments for this tip. (Be the first to leave your comment—just use the simple form above!)
Got a version of Word that uses the ribbon interface (Word 2007 or later)? This site is for you! If you use an earlier version of Word, visit our WordTips site focusing on the menu interface.
Visit the WordTips channel on YouTube

FREE SERVICE: Get tips like this every week in WordTips, a free productivity newsletter. Enter your address and click "Subscribe."
Copyright © 2026 Sharon Parq Associates, Inc.
Comments