In order to prepare a document for sharing with others, Dola often uses the Document Inspector to delete personal information from a file. This causes Word to change the name associated with comments to the generic name "Author." She wonders if there is a way to make the Document Inspector change it to something else, such as "Editor."
There is no easy way to do this; we could not find any setting within Word that makes this happen. That being said, there is a much more difficult way to do this (provided you are working with a DOCX file) which may be worth doing if you don't have to do it often and if it is critical that it be done. With that in mind, let's take a long and winding road...
I'm going to start by creating a testing document. I put some boilerplate text in the document, and I added a few comments to it. You'll note that the comments include information that show me as their author. (See Figure 1.)
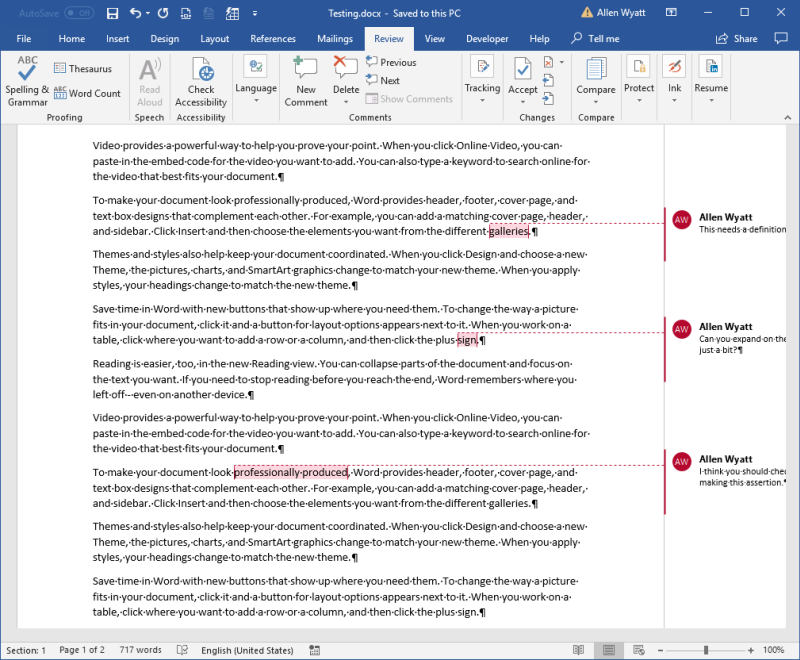
Figure 1. My testing document with some comments visible.
There may be a difference in how the comments appear in your document depending on which version of Word you are using. The image above shows a document created with my Word 2016 version and the image below shows a document created with my Word in Microsoft 365 version. (See Figure 2.)
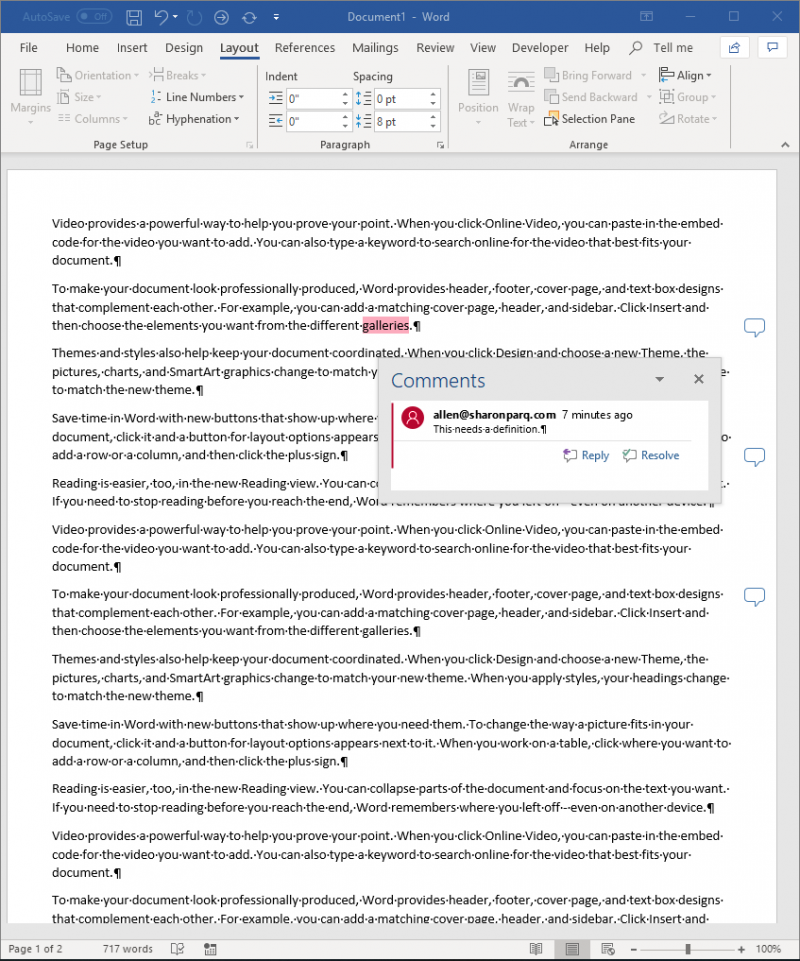
Figure 2. My testing document with some comments visible in Word in Microsoft 365.
After saving the document, I'm ready to start by using the Document Inspector. If you're using Word 2007, display the Document Inspector by clicking the Office button, Prepare, and then Inspect Document. If you're using Word 2010 or a later version, display the File tab of the ribbon, click on Check for Issues, and then select Inspect Document from the drop-down menu. Word displays the Document Inspector dialog box. (See Figure 3.)
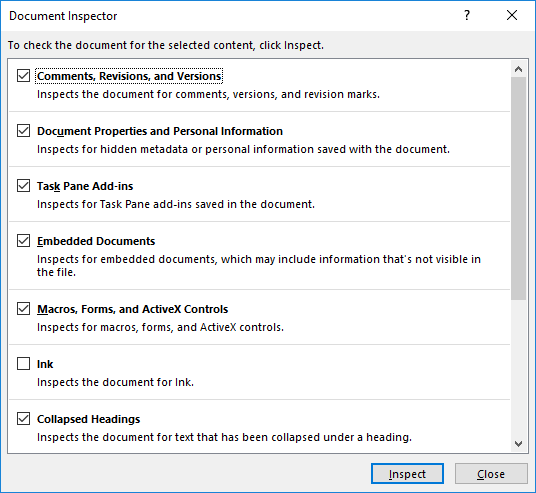
Figure 3. The Document Inspector.
I typically leave all the check boxes selected, then click the Inspect button. In the case of my testing document, the Document Inspector noted that there were some things that could be removed to make the document more anonymous. (See Figure 4.)
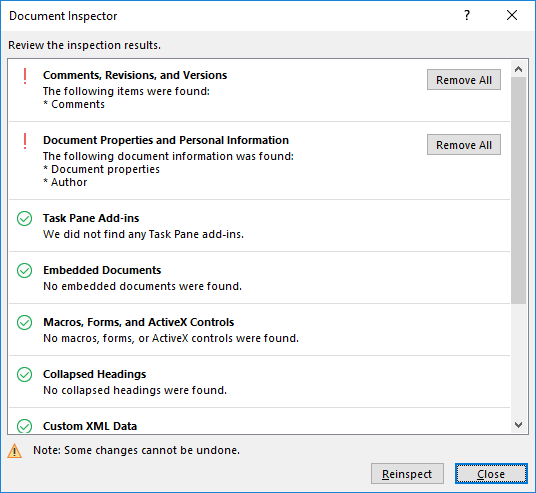
Figure 4. The Document Inspector's report.
Normally, what I do is to click Remove All button for the second option, Document Properties and Personal Information. (This is apparently what Dola does, as well.) After doing so, I click Close to dismiss the Document Inspector, return to the document, save it, and then reopen the document. Upon doing so, the authorship of the comments is "genericized," meaning that my name is expunged and the generic "Author" replaces my name. (See Figure 5.)
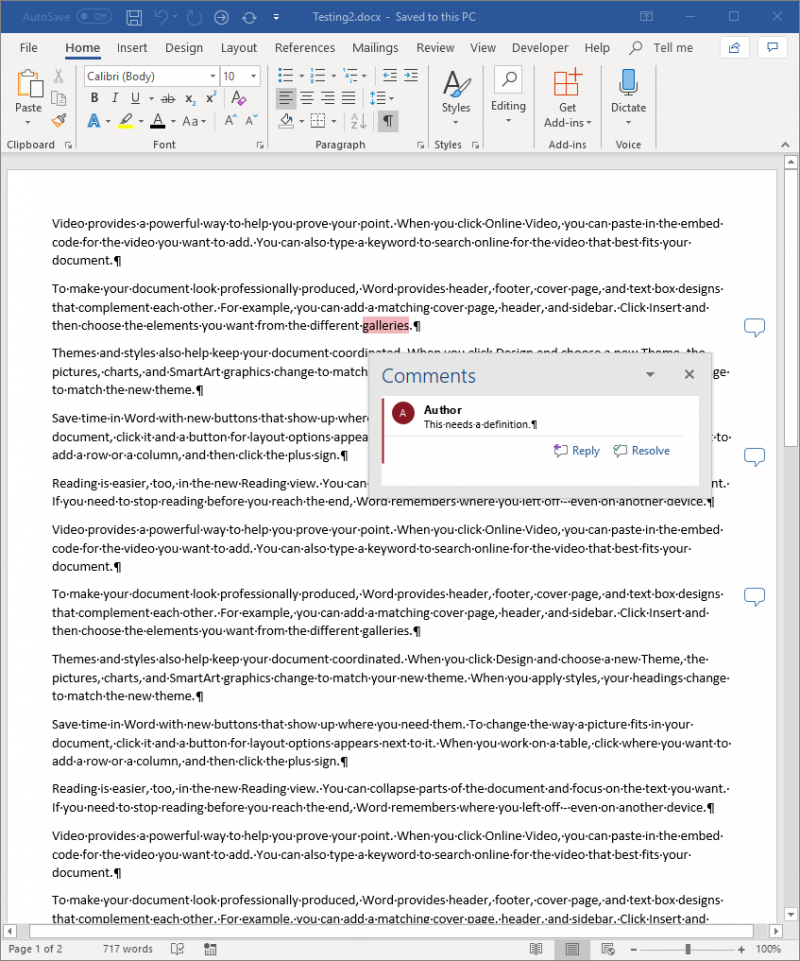
Figure 5. My testing document after a pass through the Document Inspector.
It is this generic name that Dola wants to change. Word provides no mechanism to make such a change. There is a way around this, however.
My first step is to get out of Word entirely. In the case of my testing document, I have it on my desktop, and I want to change its name. Currently it is Testing2.docx, and I'm going to change it to Testing2.zip. The only thing I'm doing is changing the filename extension. (If you cannot see filename extensions on your system, you might want to display them.)
Once changed, all I then need to do is double-click on the renamed document, and Windows opens the document so I can see what is within it. (See Figure 6.)
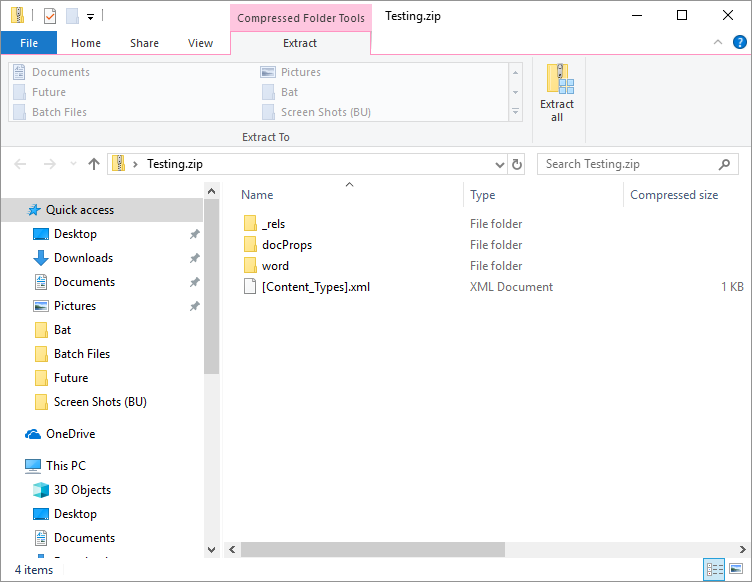
Figure 6. Opening the Zip file that used to be a Word document.
Important side note: Office files these days (including Word documents) are nothing but Zip files by a different name. The Zip files contain lots of XML files and other proprietary information that defines how the document should be put together.
You want to open the word folder, and you should see within that a file named comments.xml. This file contains the XML coding necessary to display all the comments in the document. (See Figure 7.)
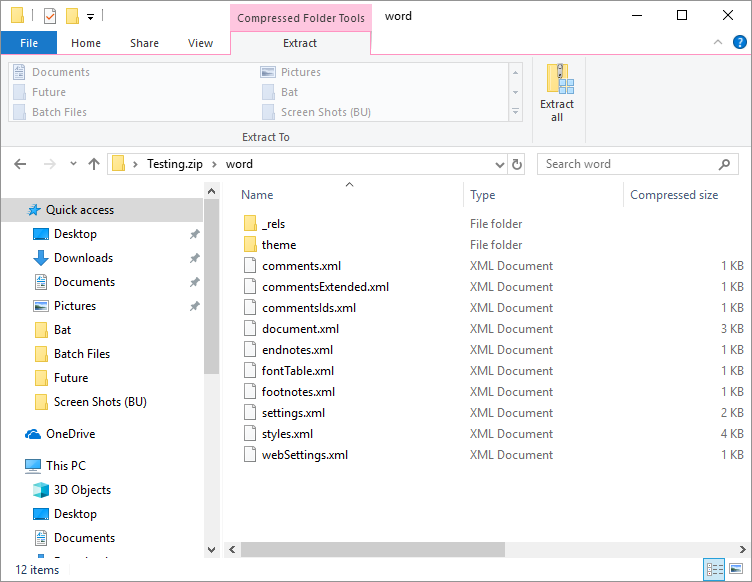
Figure 7. The contents of the Word folder.
What I want to do is to edit the comments.xml file. I cannot do it within the Zip file, so I need to drag it from the folder to my desktop. Once copied to the desktop, I just need to right-click on the file and choose Open With | Notepad. This opens the comments.xml file in Notepad. (See Figure 8.)
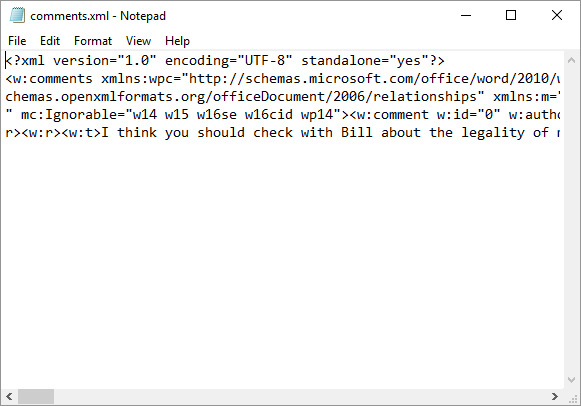
Figure 8. The comments.xml file open in Notepad.
Your comments.xml file will, of course, look different than mine. The idea, though, is that you want to search for two recurring XML entries in the file:
w:author="Author"
w:initials="A"
The first of these is the displayed author's name for the comment and the second is the initials for the author. You want to use Notepad's search capabilities to change all of these to whatever you want. For instance, you might do a search for w:author="Author" and replace it with w:author="Editor", then do a search for w:initials="A" and replace it with w:initials="Ed". Make sure you only change the text between the quote marks; it is important to leave everything else as it is.
When you are done, save the comments.xml file and close Notepad. You should still have the Zip file open to the Comments folder, so you want to drag comments.xml back to that folder. You are asked if you want to replace the original comments.xml file. (See Figure 9.)
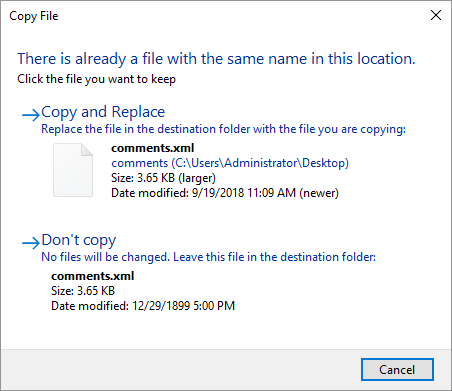
Figure 9. Being asked if you want to replace the file.
The correct answer is that you want to copy and replace the original comments.xml. When this is done, you can close the File Explorer window that displays your Zip file. Now, you just need to rename the Zip file back to a DOCX file. In my case, this means renaming Testing2.zip as Testing2.docx.
With this done, I can then open the document in Word, and you'll note that the previous comment author's name (Author) has been changed to the desired name (Editor.) (See Figure 10.)
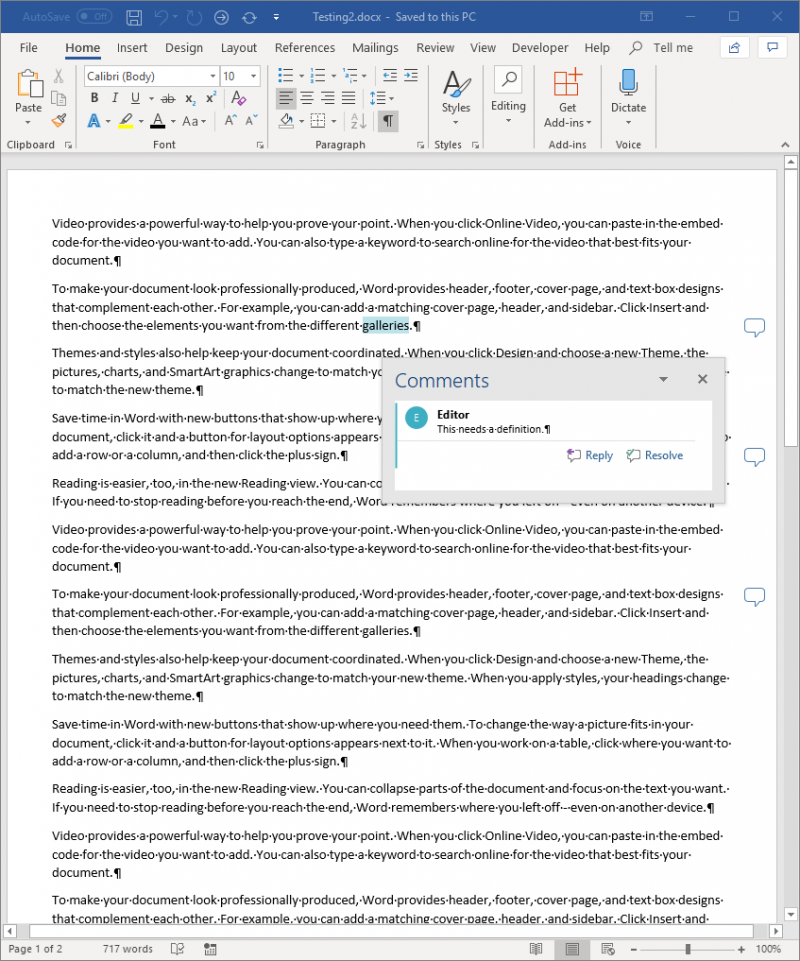
Figure 10. The changed comment author names.
Lots of work? You bet. But, again, it may be something you deem necessary for how you are sharing the document with others.
WordTips is your source for cost-effective Microsoft Word training. (Microsoft Word is the most popular word processing software in the world.) This tip (13562) applies to Microsoft Word 2007, 2010, 2013, 2016, 2019, and 2021.

The First and Last Word on Word! Bestselling For Dummies author Dan Gookin puts his usual fun and friendly candor back to work to show you how to navigate Word 2019. Spend more time working and less time trying to figure it all out! Check out Word 2019 For Dummies today!
Does it bother you that when you press Ctrl+Page Up or Ctrl+Page Down you aren't always taken to the top of the previous ...
Discover MoreOne of the viewing modes you can use for a document involves the use of the Navigation pane. This shows a quick outline ...
Discover MoreWord does a semi-decent job when it comes to automatically hyphenating your documents. It even lets you exclude certain ...
Discover MoreFREE SERVICE: Get tips like this every week in WordTips, a free productivity newsletter. Enter your address and click "Subscribe."
2025-12-28 23:11:11
Tomek
Wouldn't it be simpler to just change your name and initials in the Word Options? In the General tab there is a section to Personalize your copy of Microsoft Office, where you can put your name and initials. From that point on the comments and tracked changes are stamped with the new values. It affects also the name shown as Last Modified by, but keeps the name of the original author.
Revert to your own after you're finished with the document.
2025-12-27 15:44:40
jamies
Thanks - for the process,
and the indication that .docx is actually a container in .zip format !
Also as you can replace a file (even with a larger one) within that structure and winword still processes the file that gives more possibilities to the manipulations within the .zip contained files!
Got a version of Word that uses the ribbon interface (Word 2007 or later)? This site is for you! If you use an earlier version of Word, visit our WordTips site focusing on the menu interface.
Visit the WordTips channel on YouTube

FREE SERVICE: Get tips like this every week in WordTips, a free productivity newsletter. Enter your address and click "Subscribe."
Copyright © 2026 Sharon Parq Associates, Inc.
Comments