Please Note: This article is written for users of the following Microsoft Word versions: 2007, 2010, 2013, 2016, 2019, and 2021. If you are using an earlier version (Word 2003 or earlier), this tip may not work for you. For a version of this tip written specifically for earlier versions of Word, click here: ScreenTips without Hyperlinks.
Written by Allen Wyatt (last updated November 19, 2025)
This tip applies to Word 2007, 2010, 2013, 2016, 2019, and 2021
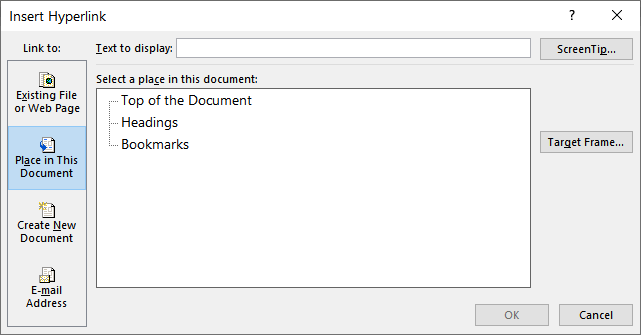
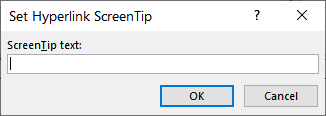
Mark wants to have a ScreenTip appear when someone hovers the mouse pointer over a word in his document. The problem is, when he tries to create a ScreenTip using the Insert Hyperlink dialog box, he can't create a ScreenTip unless he provides a destination (such as a path, bookmark, or URL). Without the destination, the OK button remains grayed out.
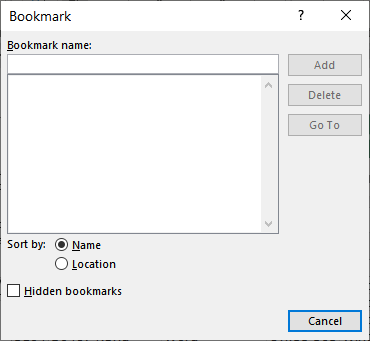
This behavior, as described, is built into Word and there doesn't seem to be a way around it. There are several workarounds that could be tried, but perhaps the best solution is to simply create a hyperlink that goes nowhere. Follow these steps:

Figure 1. The Bookmark dialog box.

Figure 2. The Insert Hyperlink dialog box.

Figure 3. The Set Hyperlink ScreenTip dialog box.
Now when someone hovers over the word or phrase (from step 1), the ScreenTip appears. If they decide to "follow" the hyperlink, all they do is end up right back at the bookmark you defined in step 3—your original word or phrase.
Of course, the phrase you selected when you created the hyperlink will appear as a link—normally blue underlined text. If you don't want this type of treatment, apply a different format to the hyperlinked phrase or change the characteristics of the Hyperlink style.
WordTips is your source for cost-effective Microsoft Word training. (Microsoft Word is the most popular word processing software in the world.) This tip (13230) applies to Microsoft Word 2007, 2010, 2013, 2016, 2019, and 2021. You can find a version of this tip for the older menu interface of Word here: ScreenTips without Hyperlinks.

Do More in Less Time! An easy-to-understand guide to the more advanced features available in the Microsoft 365 version of Word. Enhance the quality of your documents and boost productivity in any field with this in-depth resource. Complete your Word-related tasks more efficiently as you unlock lesser-known tools and learn to quickly access the features you need. Check out Microsoft 365 Word For Professionals For Dummies today!
Want to use phone numbers in your documents and have those numbers be clickable links? This tip discusses all the ins and ...
Discover MoreWhen you click a hyperlink in a Word document, the color of the hyperlink changes. If you want to change the color back ...
Discover MoreSometimes you may receive documents from others that you need to process in some way. Word's Find and Replace ...
Discover MoreFREE SERVICE: Get tips like this every week in WordTips, a free productivity newsletter. Enter your address and click "Subscribe."
2025-11-19 09:08:43
David in Mississippi
Isn't there a keyboard shortcut for inserting a bookmark at the current selection? I seem to remember there is.
2023-10-20 22:41:48
dave
Rather than using hyperlinks, a more elegant approach is to use AutoTextList entries. I always have a two-column Glossary table in my documents, with the phrase in the first column and the definition in the second column (note that the definition should be <250 words). I would like to be able to add each glossary entry as ToolTips automatically by selecting the glossary table and executing a VBA macro.
The macro would step through the table row by row, using the first column text as #term# and the second column text as #defn# in the VBA entry below:
Selection.Fields.Add Range:=Selection.Range, Type:=wdFieldEmpty, Text:= _
"AUTOTEXTLIST #term# \t ""#defn#"" ", _
PreserveFormatting:=False
I feel like it should be pretty easy to step through a table row by row, but haven't been able to figure it out. This avoids the messiness of having bookmarks or hyperlinks strewn throughout your document.
If this looks like an interesting application, I appreciate your expertise!
Got a version of Word that uses the ribbon interface (Word 2007 or later)? This site is for you! If you use an earlier version of Word, visit our WordTips site focusing on the menu interface.
Visit the WordTips channel on YouTube
FREE SERVICE: Get tips like this every week in WordTips, a free productivity newsletter. Enter your address and click "Subscribe."
Copyright © 2026 Sharon Parq Associates, Inc.
Comments