Written by Allen Wyatt (last updated September 21, 2024)
This tip applies to Word 2007, 2010, 2013, 2016, 2019, 2021, and Word in Microsoft 365
Stuart has a document with a TOC where all the TOC lines also appear in the Navigation pane. He can turn this off temporarily, but every time the TOC is refreshed, the lines again appear in the Navigation pane. He wonders if there is a way to create a TOC that won't appear in the Navigation pane.
In order to address Stuart's question, it is important to understand how things end up in the Navigation pane. Inclusion is based on styles applied to paragraphs within your document. If you look at the Paragraph dialog box for a style, you can see an Outline Level drop-down list. (See Figure 1.)
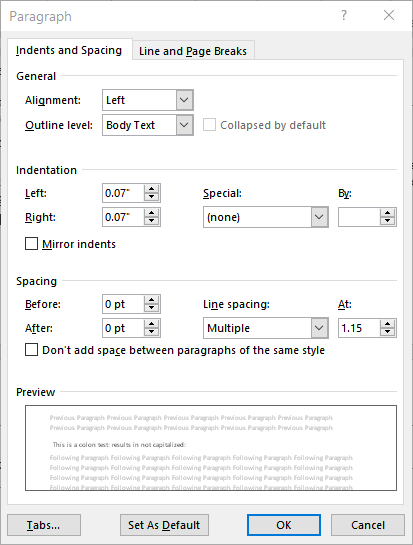
Figure 1. The Paragraph dialog box.
The setting of this drop-down list controls whether the paragraph shows up in the Navigation pane or not. If you choose Body Text, then it doesn't show up there. If you choose something else, then it may show up in the Navigation pane depending on how many heading levels you choose to display in the pane.
By default in Word, any paragraphs formatted with the Heading 1, Heading 2, Heading 3, etc. styles can show up in the Navigation pane because they are the styles that have the Outline Level control set to something other than Body Text.
And that brings me back to Stuart's question, which is a bit ambiguous. So, I'm going to come at it from two angles. First, Stuart may mean that when he generates a TOC, the document headings are included twice in the Navigation pane—once for the actual heading, and once for the heading within the TOC.
The only way I could get this to happen was if the TOC heading styles that correspond to the actual heading styles were messed up. For instance, TOC 1 is the style that corresponds to Heading 1, TOC 2 to Heading 2, etc. If the style definition for TOC 1 has the Outline Level control set to Level 1, then it will show up in the Navigation pane. Thus, both the heading (formatted with Heading 1) and the TOC entry for that heading (formatted with TOC 1) will end up in the Navigation pane.
The solution to this is simple—for each TOC style, make sure the Outline Level control is set to Body Text. Once this is done, the Navigation pane should self-correct, and you should only see your headings.
Now, Stuart's question could also have a different meaning. (Remember that I said it was a bit ambiguous?) It could mean that he doesn't want the TOC to show up in the Navigation pane at all. There is a way to do this, but it means changing how you put your TOC together.
A normal TOC is based on the heading styles in your document; Stuart no doubt already knows this. Heading 1, Heading 2, and so on are all included in the TOC, based upon how many levels you instruct Word to include. And, since the heading level styles have their Outline Level control set to something other than Body Level, they will appear in the Navigation pane.
So, if you create your own styles for your headings and set their Outline Level control to Body Text, they won't appear in your Navigation pane. The final step is to generate your TOC using these custom heading styles.
For instance, let's say that I create styles AWH1, AWH2, AWH3, etc., and use them for my headings. When I create these styles, I need to do two things: make sure the styles are not based on Word's built-in heading styles and make sure that the Outline Level (again, in the Paragraph dialog box for the style) is set to Body Text.
When it comes time to generate the TOC, all I need to do is follow these steps:
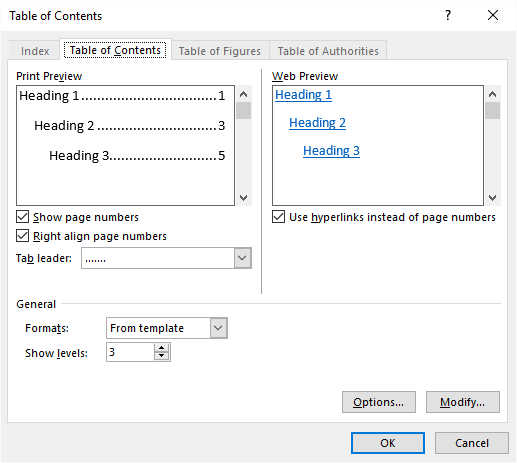
Figure 2. The Table of Contents tab of the Table of Contents dialog box.
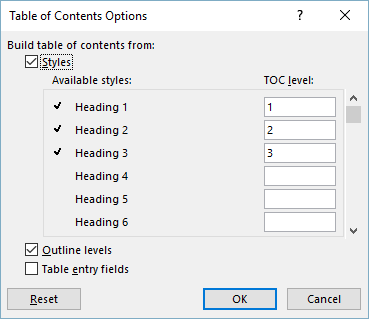
Figure 3. The Table of Contents Options dialog box.
My custom styles are now used to generate the TOC, and since they have their Outline Level control set to Body Text, they won't appear in the Navigation pane. If they do appear in the Navigation pane, then it means you have the Outline Level control still set incorrectly for the TOC 1, TOC 2, TOC 3, etc., styles, as described earlier.
WordTips is your source for cost-effective Microsoft Word training. (Microsoft Word is the most popular word processing software in the world.) This tip (11889) applies to Microsoft Word 2007, 2010, 2013, 2016, 2019, 2021, and Word in Microsoft 365.

Create Custom Apps with VBA! Discover how to extend the capabilities of Office 365 applications with VBA programming. Written in clear terms and understandable language, the book includes systematic tutorials and contains both intermediate and advanced content for experienced VB developers. Designed to be comprehensive, the book addresses not just one Office application, but the entire Office suite. Check out Mastering VBA for Microsoft Office 365 today!
If you use the TC field to mark what goes in a TOC, you may wonder why if you mark two lines together with the field, ...
Discover MoreAdding dot leaders before page numbers in a table of contents or table of authorities can make the finished table look ...
Discover MoreAdding multiple tables of contents is a must for some types of document design. Here's a great overview of how you can ...
Discover MoreFREE SERVICE: Get tips like this every week in WordTips, a free productivity newsletter. Enter your address and click "Subscribe."
There are currently no comments for this tip. (Be the first to leave your comment—just use the simple form above!)
Got a version of Word that uses the ribbon interface (Word 2007 or later)? This site is for you! If you use an earlier version of Word, visit our WordTips site focusing on the menu interface.
Visit the WordTips channel on YouTube

FREE SERVICE: Get tips like this every week in WordTips, a free productivity newsletter. Enter your address and click "Subscribe."
Copyright © 2026 Sharon Parq Associates, Inc.
Comments