Roxanne wants to create a Word document with artwork locked in place permanently and then allow the user to type directly on top of that artwork. She doesn't want them to mistakenly move the artwork at all, so she is wondering how she can lock it in place permanently.
There are a couple of different ways that you can approach this problem. One is to simply lock the graphic in place and make sure that it is set to be behind text. Follow these steps:
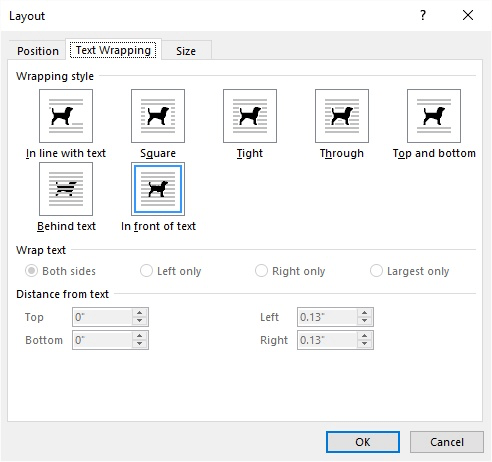
Figure 1. The Text Wrapping tab of the Layout dialog box.
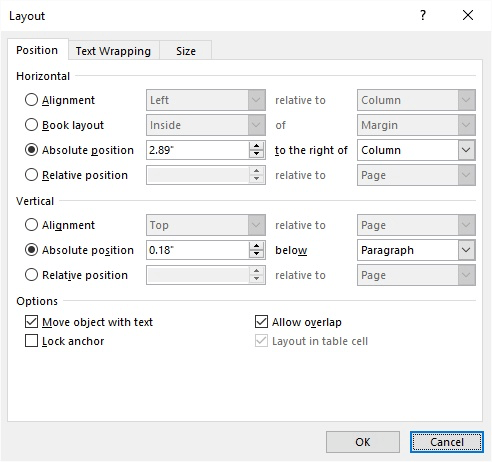
Figure 2. The Position tab of the Layout dialog box.
If you make these settings, Word theoretically positions the graphic behind your text and doesn't move it. I say theoretically because it is possible that this won't work in all instances—the graphic is still fairly accessible to a user.
Another approach is to make your graphic even a bit harder to get to. The easiest way to do this is to place the graphic in either the header or the footer of the page. You could, if desired, also set a watermark for your document, which places the watermark image (which you choose) into the header of the page. You achieve the same thing and have greater flexibility if you simply insert the graphic in the header or footer yourself.
First, if you are working with a multi-page document and you don't want the graphic to appear on every page, you'll need to place a section break before and after the page on which you want the graphic to appear. Then, follow these general steps:
With the graphic in the header or footer, it is much more difficult for the user to mess up the graphic, and anything that is typed on the page will appear "over" the image. There are a few drawbacks, however. First, it is much more difficult to have other, meaningful information in the header or footer in which the graphic was placed. Second, if you want the image to appear on a printed output, you'll need to set Word's printing settings so that background images are printed.
As with many things in Word, getting your graphic to appear exactly as you want, with the desired relationship between the image and your document text, will take some experimentation. Don't be surprised if your first attempts don't produce what you want, but through trial and error you should be able to get it pretty darn close.
WordTips is your source for cost-effective Microsoft Word training. (Microsoft Word is the most popular word processing software in the world.) This tip (11357) applies to Microsoft Word 2007, 2010, 2013, 2016, 2019, and 2021.

Do More in Less Time! An easy-to-understand guide to the more advanced features available in the Microsoft 365 version of Word. Enhance the quality of your documents and boost productivity in any field with this in-depth resource. Complete your Word-related tasks more efficiently as you unlock lesser-known tools and learn to quickly access the features you need. Check out Microsoft 365 Word For Professionals For Dummies today!
If you need to make sure that the graphics in a document are all scaled similarly, you'll love the macros presented in ...
Discover MoreWhen you insert an object into your document, it is anchored to a paragraph. If you want to change the paragraph to which ...
Discover MoreWhat are you to do if you can't see all the pictures you know are in your document? The answer may lie in where those ...
Discover MoreFREE SERVICE: Get tips like this every week in WordTips, a free productivity newsletter. Enter your address and click "Subscribe."
There are currently no comments for this tip. (Be the first to leave your comment—just use the simple form above!)
Got a version of Word that uses the ribbon interface (Word 2007 or later)? This site is for you! If you use an earlier version of Word, visit our WordTips site focusing on the menu interface.
Visit the WordTips channel on YouTube

FREE SERVICE: Get tips like this every week in WordTips, a free productivity newsletter. Enter your address and click "Subscribe."
Copyright © 2026 Sharon Parq Associates, Inc.
Comments