Please Note: This article is written for users of the following Microsoft Word versions: 2007, 2010, 2013, 2016, 2019, 2021, and Word in Microsoft 365. If you are using an earlier version (Word 2003 or earlier), this tip may not work for you. For a version of this tip written specifically for earlier versions of Word, click here: Removing All Text Boxes In a Document.
If you do a lot of work with documents from other people, you may have a need to remove text boxes in those documents. If there are only one or two text boxes in the document, it is not that difficult to select them and delete them. What if there are 30, 40, or more text boxes, though? Deleting them individually can quickly get tedious.
One potential solution is a "brute force" method. Follow these steps:
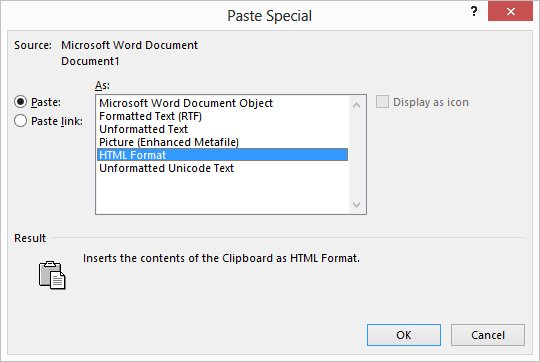
Figure 1. The Paste Special dialog box.
The document text, minus the text boxes, is now in the new document. The obvious drawback to this approach is that the other formatting of the original document is also lost, and you must reformat the entire document. (I told you this was a brute force method.)
If you want to get rid of only the text boxes, then the quickest solution is to use a macro. The following macro will quickly remove all text boxes in your document:
Sub RemoveTextBox()
    Dim shp As Shape
    Dim stry As Range
    Dim oTxtFrame As TextFrame
    Dim j As Long
    Dim k As Long

    For Each stry In ActiveDocument.StoryRanges
        j = stry.ShapeRange.Count
        For k = j To 1 Step -1
            Set shp = stry.ShapeRange(k)
            If shp.Type = msoTextBox Then
                shp.Delete
            Else
                Set oTxtFrame = shp.TextFrame
                If oTxtFrame Is Nothing Then
                    ' shape does not have a text frame
                Else
                    If oTxtFrame.HasText Then shp.Delete
                End If
            End If
        Next k
    Next stry
End Sub
You should realize that this macro removes all of the text boxes and their contents, along with any other shapes that contain text. In other words, if a text box is used for placement of text, then the text in that text box is deleted along with the text box itself.
If you prefer to transfer the text from the text boxes to the document, prior to deleting the text box, then the following macro should do the trick:
Sub RemoveTextBox2()
    Dim shp As Shape
    Dim oRngAnchor As Range
    Dim sString As String
    Dim stry As Range

    For Each stry In ActiveDocument.StoryRanges
        For Each shp In stry.ShapeRange
            If shp.Type = msoTextBox Then
                ' copy text to string, without last paragraph mark
                sString = Left(shp.TextFrame.TextRange.Text, _
                  shp.TextFrame.TextRange.Characters.Count - 1)
                sString = Trim(sString)
                If Len(sString) > 0 Then
                    ' set the range to insert the text
                    Set oRngAnchor = shp.Anchor.Paragraphs(1).Range
                    ' insert the text before the range object
                    oRngAnchor.InsertBefore _
                      "Textbox start << " & sString & " >> Textbox end"
                End If
                shp.Delete
            End If
        Next shp
    Next stry
End Sub
When this macro is done, you can do a search for "Textbox start" and you will be at the beginning of text that used to be in the text boxes that are now gone from your document. You can then edit the text so that it appears as you want. Understand, as well, that anything "special" in the text—such as tables—is converted to regular text by the macro. Also, the text is inserted where the text box was anchored, which may be at a different point on the page than where the text box appeared before it was deleted. All of this means that the macro may result in a fair amount of work that needs to be done in formatted the transferred text.
Note:
WordTips is your source for cost-effective Microsoft Word training. (Microsoft Word is the most popular word processing software in the world.) This tip (9169) applies to Microsoft Word 2007, 2010, 2013, 2016, 2019, 2021, and Word in Microsoft 365. You can find a version of this tip for the older menu interface of Word here: Removing All Text Boxes In a Document.

Do More in Less Time! An easy-to-understand guide to the more advanced features available in the Microsoft 365 version of Word. Enhance the quality of your documents and boost productivity in any field with this in-depth resource. Complete your Word-related tasks more efficiently as you unlock lesser-known tools and learn to quickly access the features you need. Check out Microsoft 365 Word For Professionals For Dummies today!
When designing your document, you may want to use sidebars like you see in magazines and some books. This tip explains ...
Discover MoreDrop shadows add a nice touch to text boxes, making it seem like they are hovering above the page. Here are the simple ...
Discover MoreText boxes are designed to hold text. (Makes sense, right?) If you want to get rid of a text box, yet still keep the ...
Discover MoreFREE SERVICE: Get tips like this every week in WordTips, a free productivity newsletter. Enter your address and click "Subscribe."
There are currently no comments for this tip. (Be the first to leave your comment—just use the simple form above!)
Got a version of Word that uses the ribbon interface (Word 2007 or later)? This site is for you! If you use an earlier version of Word, visit our WordTips site focusing on the menu interface.
Visit the WordTips channel on YouTube

FREE SERVICE: Get tips like this every week in WordTips, a free productivity newsletter. Enter your address and click "Subscribe."
Copyright © 2026 Sharon Parq Associates, Inc.
 Please Note:
This article is written for users of the following Microsoft Word versions: 2007, 2010, 2013, 2016, 2019, 2021, and Word in Microsoft 365. If you are using an earlier version (Word 2003 or earlier), this tip may not work for you. For a version of this tip written specifically for earlier versions of Word, click here:
Please Note:
This article is written for users of the following Microsoft Word versions: 2007, 2010, 2013, 2016, 2019, 2021, and Word in Microsoft 365. If you are using an earlier version (Word 2003 or earlier), this tip may not work for you. For a version of this tip written specifically for earlier versions of Word, click here:
Comments