Please Note: This article is written for users of the following Microsoft Word versions: 2007, 2010, 2013, 2016, 2019, and 2021. If you are using an earlier version (Word 2003 or earlier), this tip may not work for you. For a version of this tip written specifically for earlier versions of Word, click here: Understanding Point Sizes.
A point is a typographical term for a unit of measure. It is equivalent to 1/72 of an inch. Points are understood and used extensively by everyone in the publishing trade, particularly in design, typesetting, and printing. They are most commonly used with type specifications. Word uses point sizes to specify the height of all the fonts it uses. Thus, when you use a 12-point type, you are using one that occupies a character box approximately 12/72 (or 1/6) of an inch high from the top of the highest riser, to the bottom of the lowest descender. Likewise, 72-point type uses a character box that is about one inch tall.
In typesetting, points are also the measurement of choice when specifying line leading (as discussed in a different tip). It is not uncommon to specify type in the format 10/12, meaning 10-point type on 12-point line leading.
If you are familiar with points, you can use them as a standard measurement in Word. When entering a measurement in points, simply use the characters pt at the end of the measurement. Alternately, you can set your default measurement to points by following these steps:
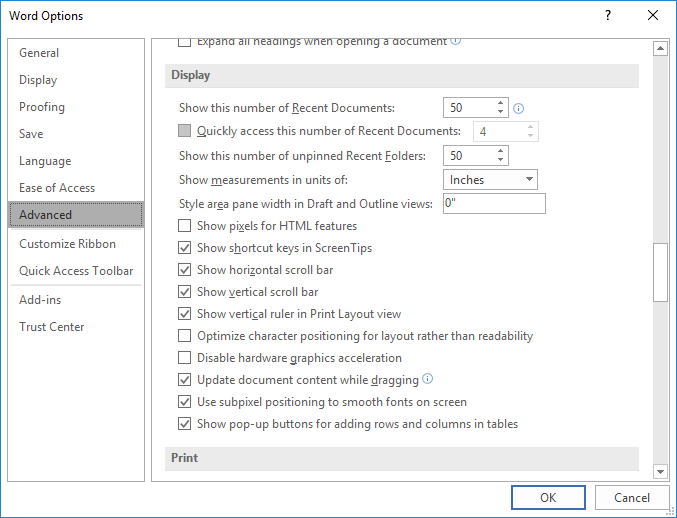
Figure 1. The Advanced options of the Word Options dialog box.
WordTips is your source for cost-effective Microsoft Word training. (Microsoft Word is the most popular word processing software in the world.) This tip (8797) applies to Microsoft Word 2007, 2010, 2013, 2016, 2019, and 2021. You can find a version of this tip for the older menu interface of Word here: Understanding Point Sizes.

The First and Last Word on Word! Bestselling For Dummies author Dan Gookin puts his usual fun and friendly candor back to work to show you how to navigate Word 2019. Spend more time working and less time trying to figure it all out! Check out Word 2019 For Dummies today!
Once you are done formatting your document, you may want to make changes to part of that formatting without messing up ...
Discover MoreIf your document is more than a couple of pages long, adding page numbers is a nice finishing touch. If you want, you can ...
Discover MoreWant your company name to always appear in a particular formatted manner? Word provides two ways you can approach the ...
Discover MoreFREE SERVICE: Get tips like this every week in WordTips, a free productivity newsletter. Enter your address and click "Subscribe."
There are currently no comments for this tip. (Be the first to leave your comment—just use the simple form above!)
Got a version of Word that uses the ribbon interface (Word 2007 or later)? This site is for you! If you use an earlier version of Word, visit our WordTips site focusing on the menu interface.
Visit the WordTips channel on YouTube

FREE SERVICE: Get tips like this every week in WordTips, a free productivity newsletter. Enter your address and click "Subscribe."
Copyright © 2026 Sharon Parq Associates, Inc.
 Please Note:
This article is written for users of the following Microsoft Word versions: 2007, 2010, 2013, 2016, 2019, and 2021. If you are using an earlier version (Word 2003 or earlier), this tip may not work for you. For a version of this tip written specifically for earlier versions of Word, click here:
Please Note:
This article is written for users of the following Microsoft Word versions: 2007, 2010, 2013, 2016, 2019, and 2021. If you are using an earlier version (Word 2003 or earlier), this tip may not work for you. For a version of this tip written specifically for earlier versions of Word, click here:
Comments