Please Note: This article is written for users of the following Microsoft Word versions: 2007, 2010, 2013, 2016, 2019, and 2021. If you are using an earlier version (Word 2003 or earlier), this tip may not work for you. For a version of this tip written specifically for earlier versions of Word, click here: Hiding Table Gridlines, by Default.
Written by Allen Wyatt (last updated October 19, 2019)
This tip applies to Word 2007, 2010, 2013, 2016, 2019, and 2021
Ben said that he was having a problem with gridlines. He wanted them to be turned off (invisible) by default but could not get that to occur.
The setting of the gridlines option is persistent from one session of Word to another. If you Hide Gridlines, that setting remains for future sessions with Word. The obvious way the setting is reset is if you have a macro that resets the option. If you are sure that the gridlines option is, indeed, being reset, then a startup macro is the first thing to check.
You do not see the command to hide gridlines until a table has focus, and even then, it is rather obscure since it is not on the first tab displayed. When you click on a table, two conditional tabs are displayed on the ribbon: Design and Layout. The View Gridlines tool is found on the Layout tab, in the Table group. Clicking on the tool toggles the gridlines on and off. When the gridlines are enabled the control is highlighted.
One thing to check is whether you are possibly confusing gridlines with borders. When you insert a table into a document, Word adds borders to that table by default. Only if you remove the borders can you see the underlying gridlines, provided you turn off the display of gridlines. Borders print, but gridlines do not print; they are only visible for reference purposes.
If you want to turn off borders by default, you need to add a tool to the Quick Access Toolbar. Follow these steps:
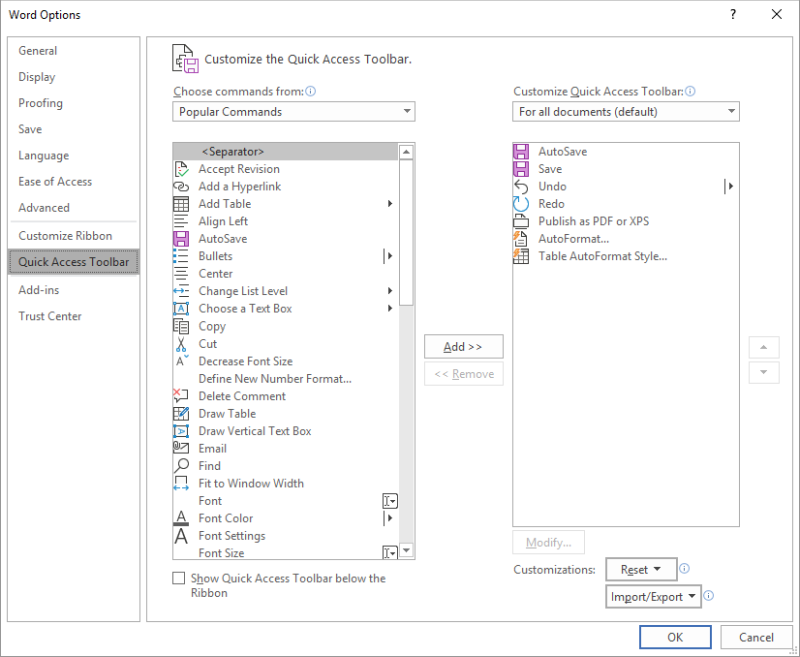
Figure 1. The Quick Access Toolbar portion of the Word Options dialog box.
At this point you are ready to turn the borders off:
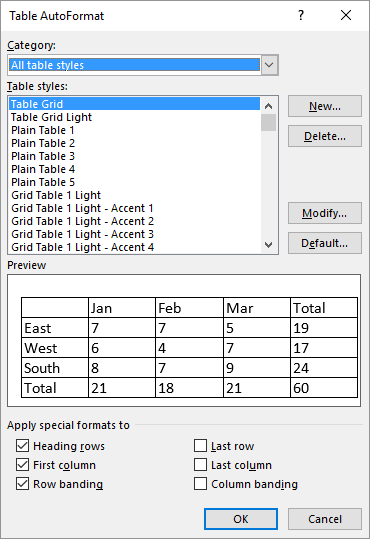
Figure 2. The Table AutoFormat dialog box.
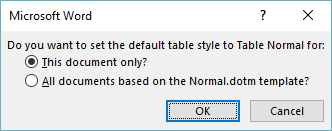
Figure 3. Choosing how table style defaults are applied.
WordTips is your source for cost-effective Microsoft Word training. (Microsoft Word is the most popular word processing software in the world.) This tip (8618) applies to Microsoft Word 2007, 2010, 2013, 2016, 2019, and 2021. You can find a version of this tip for the older menu interface of Word here: Hiding Table Gridlines, by Default.

Discover the Power of Microsoft Office This beginner-friendly guide reveals the expert tips and strategies you need to skyrocket your productivity and use Office 365 like a pro. Mastering software like Word, Excel, and PowerPoint is essential to be more efficient and advance your career. Simple lessons guide you through every step, providing the knowledge you need to get started. Check out Microsoft Office 365 For Beginners today!
Insert a table into your document and it normally appears aligned with the left margin. Word allows you to indent the ...
Discover MoreWord can adjust the height of individual rows in a table based on the information you put in each row. This may not ...
Discover MoreIf you've got a table that spans multiple printed pages, you probably want to repeat a row or two of that table as a ...
Discover MoreFREE SERVICE: Get tips like this every week in WordTips, a free productivity newsletter. Enter your address and click "Subscribe."
2019-10-19 08:16:53
Moray
Hi friends. Although the view gridlines option is meant to be sticky, I've found that it does occasionally get reset by mysterious means. A tool I've found very helpful in the QAT is Table (GroupTable), which adds an arrow pointing up and to the left. This opens a menu (see Figure 1 below) for several useful table options, including View gridlines.
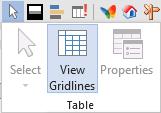
Figure 1. Table-menu
Got a version of Word that uses the ribbon interface (Word 2007 or later)? This site is for you! If you use an earlier version of Word, visit our WordTips site focusing on the menu interface.
Visit the WordTips channel on YouTube

FREE SERVICE: Get tips like this every week in WordTips, a free productivity newsletter. Enter your address and click "Subscribe."
Copyright © 2026 Sharon Parq Associates, Inc.
 Please Note:
This article is written for users of the following Microsoft Word versions: 2007, 2010, 2013, 2016, 2019, and 2021. If you are using an earlier version (Word 2003 or earlier), this tip may not work for you. For a version of this tip written specifically for earlier versions of Word, click here:
Please Note:
This article is written for users of the following Microsoft Word versions: 2007, 2010, 2013, 2016, 2019, and 2021. If you are using an earlier version (Word 2003 or earlier), this tip may not work for you. For a version of this tip written specifically for earlier versions of Word, click here:
Comments