Please Note: This article is written for users of the following Microsoft Word versions: 2007, 2010, 2013, 2016, 2019, and 2021. If you are using an earlier version (Word 2003 or earlier), this tip may not work for you. For a version of this tip written specifically for earlier versions of Word, click here: Embedding an Excel Worksheet.
Written by Allen Wyatt (last updated February 5, 2025)
This tip applies to Word 2007, 2010, 2013, 2016, 2019, and 2021
Word allows you to embed a worksheet directly from Excel. The link established between your document and the Excel worksheet can be updated whenever you desire. To embed a worksheet in your document, follow these steps:
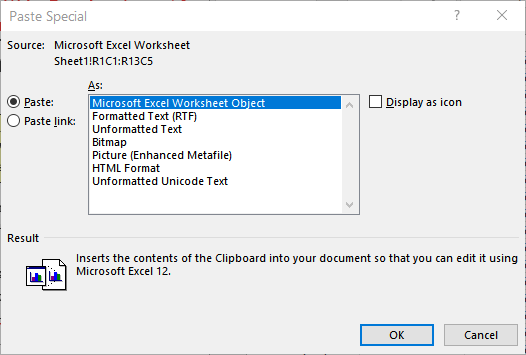
Figure 1. The Paste Special dialog box.
When you later want to modify the Excel worksheet, simply double-click your mouse on it within your document. You can edit it using tools you are familiar with in Excel, and you can then click your mouse outside of the worksheet (elsewhere in your Word document) to return to regular Word editing. Any changes you make to the embedded spreadsheet are automatically saved in the original Excel spreadsheet.
WordTips is your source for cost-effective Microsoft Word training. (Microsoft Word is the most popular word processing software in the world.) This tip (8518) applies to Microsoft Word 2007, 2010, 2013, 2016, 2019, and 2021. You can find a version of this tip for the older menu interface of Word here: Embedding an Excel Worksheet.

The First and Last Word on Word! Bestselling For Dummies author Dan Gookin puts his usual fun and friendly candor back to work to show you how to navigate Word 2019. Spend more time working and less time trying to figure it all out! Check out Word 2019 For Dummies today!
When Excel charts are linked in a Word document, they update every time the document is opened. Here's how to unlink the ...
Discover MoreWord makes it easy to establish links between documents. If you need to change the locations for a lot of links at once, ...
Discover MoreWord and Excel are both programs within the Microsoft Office suite. If you use both of these programs often, you may ...
Discover MoreFREE SERVICE: Get tips like this every week in WordTips, a free productivity newsletter. Enter your address and click "Subscribe."
2025-02-05 06:38:12
jamies
While the tip is to insert the workSHEET,
note the link that will get access to the entire workbook,
BUT beware of using SaveAs to save a modified version of the workbook -
the link will show text indicating the name of the workbook that the link was created for,
but the hyperlink that is not actually shown is (usually) to the version of the file that was last saved !
So when clicking on the displayed hyperlink description,
you may not get shown the content of the indicated file !
Same happens with all links, not just those for workbooks.
Got a version of Word that uses the ribbon interface (Word 2007 or later)? This site is for you! If you use an earlier version of Word, visit our WordTips site focusing on the menu interface.
Visit the WordTips channel on YouTube

FREE SERVICE: Get tips like this every week in WordTips, a free productivity newsletter. Enter your address and click "Subscribe."
Copyright © 2026 Sharon Parq Associates, Inc.
 Please Note:
This article is written for users of the following Microsoft Word versions: 2007, 2010, 2013, 2016, 2019, and 2021. If you are using an earlier version (Word 2003 or earlier), this tip may not work for you. For a version of this tip written specifically for earlier versions of Word, click here:
Please Note:
This article is written for users of the following Microsoft Word versions: 2007, 2010, 2013, 2016, 2019, and 2021. If you are using an earlier version (Word 2003 or earlier), this tip may not work for you. For a version of this tip written specifically for earlier versions of Word, click here:
Comments