Written by Allen Wyatt (last updated February 27, 2021)
This tip applies to Word 2007, 2010, 2013, 2016, 2019, and 2021
Roy works for a legal firm, and he needs to file documents regularly with various clerks' offices. One particular office requires that only documents containing "non-embedded fonts" can be filed. The documents Roy files are PDFs created from Word documents, and he cannot seem to find a way to make sure that the documents contain only non-embedded fonts.
Word has a configuration setting that controls whether fonts are embedded in the document or not. If you want to make sure that a PDF file contains no embedded fonts, then try following these steps:
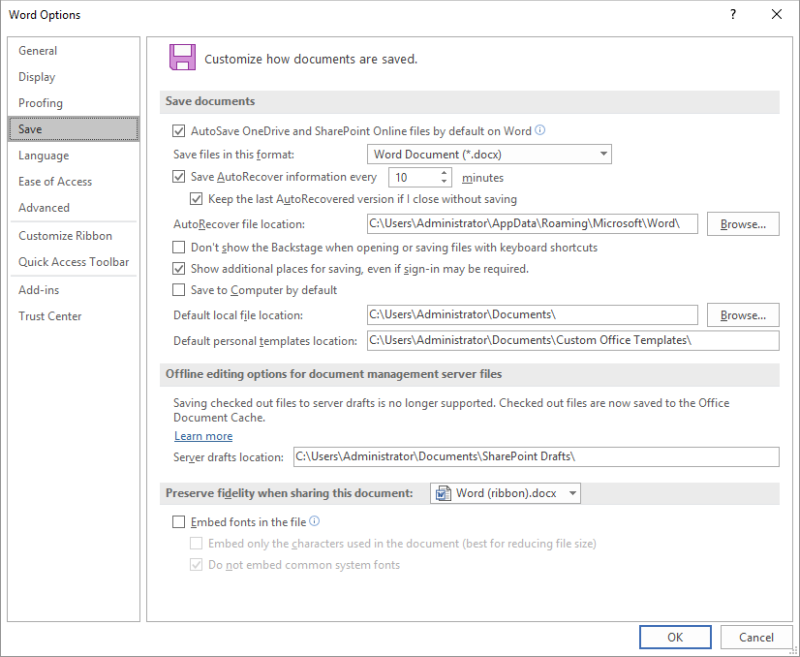
Figure 1. The Save options in the Word Options dialog box.
At this point, the PDF file should not contain any embedded fonts. This works because the Word file on which the PDF is based—the one you created using the Save As command in steps 5-6—does not contain any embedded fonts.
If, for some reason, the PDF does still contain embedded fonts, then it is very possible that whatever PDF creation process you are using is adding them. If you use the Save As approach, in Word, to create the PDF file, then you should not have a problem. You also should not have a problem if you use Adobe Acrobat to create your PDF file. If you are using a different method for creating the PDF file, then you will need to test that method to see if it is doing something squirrely with the fonts.
You should also check to make sure your document doesn't use any fonts may possible need to be embedded. This means you should check to make sure your document uses only "plain vanilla" Microsoft fonts, such as Times New Roman, Arial, Calibri, etc. These would never be embedded with a document because Microsoft assumes they are always available. It is only other fonts—ones you may have installed on your system—that would possibly be embedded.
Finally, one drastic step you can take is to create your PDF file and then open it in a program designed to allow editing of PDFs, such as Adobe Acrobat. You can then use the capabilities of that program to save the PDF as an "image only" file. This, essentially, means that your PDF will contain nothing but pictures of each page with absolutely no font information at all.
WordTips is your source for cost-effective Microsoft Word training. (Microsoft Word is the most popular word processing software in the world.) This tip (13827) applies to Microsoft Word 2007, 2010, 2013, 2016, 2019, and 2021.

Discover the Power of Microsoft Office This beginner-friendly guide reveals the expert tips and strategies you need to skyrocket your productivity and use Office 365 like a pro. Mastering software like Word, Excel, and PowerPoint is essential to be more efficient and advance your career. Simple lessons guide you through every step, providing the knowledge you need to get started. Check out Microsoft Office 365 For Beginners today!
When you link parts of your document to other sources (such as an Excel workbook), you can make opening your document ...
Discover MoreWord and Excel are both programs within the Microsoft Office suite. If you use both of these programs often, you may ...
Discover MoreWhen Excel charts are linked in a Word document, they update every time the document is opened. Here's how to unlink the ...
Discover MoreFREE SERVICE: Get tips like this every week in WordTips, a free productivity newsletter. Enter your address and click "Subscribe."
There are currently no comments for this tip. (Be the first to leave your comment—just use the simple form above!)
Got a version of Word that uses the ribbon interface (Word 2007 or later)? This site is for you! If you use an earlier version of Word, visit our WordTips site focusing on the menu interface.
Visit the WordTips channel on YouTube

FREE SERVICE: Get tips like this every week in WordTips, a free productivity newsletter. Enter your address and click "Subscribe."
Copyright © 2026 Sharon Parq Associates, Inc.
Comments