Please Note: This article is written for users of the following Microsoft Word versions: 2007, 2010, 2013, 2016, 2019, and 2021. If you are using an earlier version (Word 2003 or earlier), this tip may not work for you. For a version of this tip written specifically for earlier versions of Word, click here: Changing Defaults for Text Boxes and Callouts.
Word allows you to easily add text boxes and callouts to your documents. These can be used for a variety of purposes, and you can format the text box or callout to appear just about any way you desire. Word refers to text boxes and callouts, collectively, as shapes. If you find yourself making a lot of similar changes to shapes, you can set the default values of them in the following manner:
Now, the next time you insert a shape, it will retain many of the same default settings that you defined in step 1. It won't retain them all, however. Word remembers things like line weight, line type, and color, but it does not remember things like text attributes within the text box or the direction and length of callout tails.
There are several ways around this problem, however. If you are using the exact same shape multiple times in the same document, simply select the one that is formatted as you want, hold down the Ctrl key, and drag the shape to a new location. By holding down the Ctrl key you inform Word that you want to copy the shape rather than move it.
A more versatile solution is to simply define your shape as a Building Block. Follow these steps:
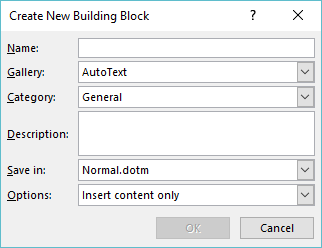
Figure 1. The Create New Building Block dialog box.
Later, when you want to use the Building Block entry, simply type its name in the document (the name you provided in step 4) where you want to use the Building Block entry, and then press F3. In the case being discussed here, the shape, complete with all formatting settings, is inserted in your document.
WordTips is your source for cost-effective Microsoft Word training. (Microsoft Word is the most popular word processing software in the world.) This tip (8137) applies to Microsoft Word 2007, 2010, 2013, 2016, 2019, and 2021. You can find a version of this tip for the older menu interface of Word here: Changing Defaults for Text Boxes and Callouts.

Learning Made Easy! Quickly teach yourself how to format, publish, and share your content using Word 2021 or Microsoft 365. With Step by Step, you set the pace, building and practicing the skills you need, just when you need them! Check out Microsoft Word Step by Step today!
If your document has quite a few text boxes within it, you may want to extract the contents of those text boxes to a new ...
Discover MoreText boxes are often used as design elements in a document layout. If you have linked text boxes, you may have noticed ...
Discover MoreWord allows you to wrap text around a graphic or around a text box, but it won't allow you to wrap text in a text box ...
Discover MoreFREE SERVICE: Get tips like this every week in WordTips, a free productivity newsletter. Enter your address and click "Subscribe."
There are currently no comments for this tip. (Be the first to leave your comment—just use the simple form above!)
Got a version of Word that uses the ribbon interface (Word 2007 or later)? This site is for you! If you use an earlier version of Word, visit our WordTips site focusing on the menu interface.
Visit the WordTips channel on YouTube

FREE SERVICE: Get tips like this every week in WordTips, a free productivity newsletter. Enter your address and click "Subscribe."
Copyright © 2026 Sharon Parq Associates, Inc.
 Please Note:
This article is written for users of the following Microsoft Word versions: 2007, 2010, 2013, 2016, 2019, and 2021. If you are using an earlier version (Word 2003 or earlier), this tip may not work for you. For a version of this tip written specifically for earlier versions of Word, click here:
Please Note:
This article is written for users of the following Microsoft Word versions: 2007, 2010, 2013, 2016, 2019, and 2021. If you are using an earlier version (Word 2003 or earlier), this tip may not work for you. For a version of this tip written specifically for earlier versions of Word, click here:
Comments