Please Note: This article is written for users of the following Microsoft Word versions: 2007, 2010, 2013, 2016, 2019, and 2021. If you are using an earlier version (Word 2003 or earlier), this tip may not work for you. For a version of this tip written specifically for earlier versions of Word, click here: Chopped Off Page Borders.
Written by Allen Wyatt (last updated March 24, 2026)
This tip applies to Word 2007, 2010, 2013, 2016, 2019, and 2021
Gwen is having problems printing her page borders. It seems that the left and right borders print fine, but the top and bottom portions don't print at all—they are chopped off on the printout.
There are a number of things you can check, any of which could be causing the problem. The first thing to check is whether you have the document formatted for A4 paper but are actually printing on letter-sized paper. This can cause some weird behavior, unless you instruct Word to do some automatic document conversion for you:
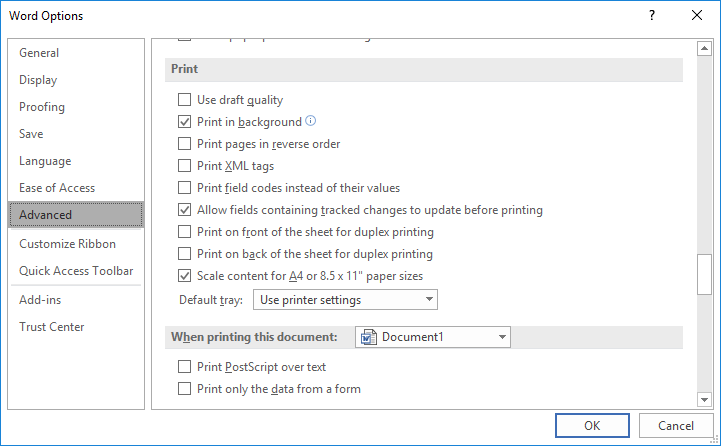
Figure 1. The Advanced settings in the Word Options dialog box.
Another thing to check is to make sure that the page border is formatted to always display in front of anything else on your document. Follow these steps:
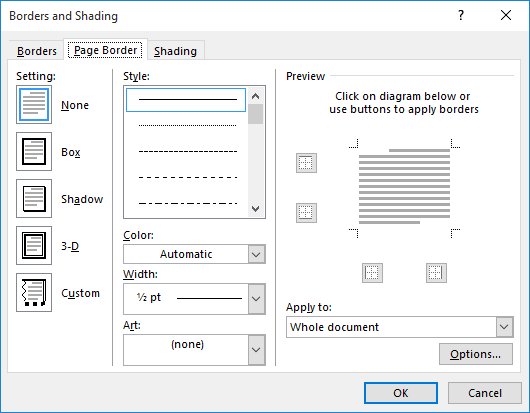
Figure 2. The Page Border tab of the Borders and Shading dialog box.
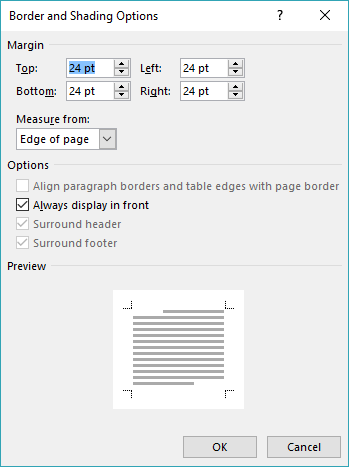
Figure 3. The Borders and Shading Options dialog box.
You should now be able to print like normal. If this doesn't work, it could be because your printer cannot physically handle printing as close to the edge of the paper as your borders require. For instance, a default installation of Word prints headers and footers at one-half inch from the top and bottom of the paper. If you didn't adjust this position, then the page border prints even closer to the paper's edge than this—approximately 5/16 of an inch. Some printers, however, can't print anything this close to the paper's edge.
The solution is to adjust the position of your headers and footers, allowing the page border to move further from the paper edge.
WordTips is your source for cost-effective Microsoft Word training. (Microsoft Word is the most popular word processing software in the world.) This tip (7917) applies to Microsoft Word 2007, 2010, 2013, 2016, 2019, and 2021. You can find a version of this tip for the older menu interface of Word here: Chopped Off Page Borders.

Discover the Power of Microsoft Office This beginner-friendly guide reveals the expert tips and strategies you need to skyrocket your productivity and use Office 365 like a pro. Mastering software like Word, Excel, and PowerPoint is essential to be more efficient and advance your career. Simple lessons guide you through every step, providing the knowledge you need to get started. Check out Microsoft Office 365 For Beginners today!
Need to have a series of documents customized for individual users? Mail merge may be overkill, but the macro presented ...
Discover MorePutting words on the printed page is easy in Word. Rotating those words in different manners can be a bit trickier. This ...
Discover MoreWhen you process a document in a macro, you may also want to print that document from within the same macro. Here's how ...
Discover MoreFREE SERVICE: Get tips like this every week in WordTips, a free productivity newsletter. Enter your address and click "Subscribe."
2021-02-04 11:15:23
Rachel
Thanks for the great tips.
I tried everything you suggested and it still didn't work for me. I then got another word doc I have and printed it to see if I was getting the same issue with the content being cut off at the bottom.
I went into the Ribbon menu: Layout and compared each of those settings in the line item by item: Margins, Orientation, Size.
At the size is where I found my issue: In the doc that was printing correctly it had it set at: 8.5 X 11" which is what my paper size is.
In the Incorrectly printing doc it had that set to: Legal Paper at: 8.5 x 14" <<<< This was my issue.
I wanted to share it with you, so that you add it to your very well documented Tips above.
Thanks for a great page/Forum by the way.
Rachel
Got a version of Word that uses the ribbon interface (Word 2007 or later)? This site is for you! If you use an earlier version of Word, visit our WordTips site focusing on the menu interface.
Visit the WordTips channel on YouTube

FREE SERVICE: Get tips like this every week in WordTips, a free productivity newsletter. Enter your address and click "Subscribe."
Copyright © 2026 Sharon Parq Associates, Inc.
 Please Note:
This article is written for users of the following Microsoft Word versions: 2007, 2010, 2013, 2016, 2019, and 2021. If you are using an earlier version (Word 2003 or earlier), this tip may not work for you. For a version of this tip written specifically for earlier versions of Word, click here:
Please Note:
This article is written for users of the following Microsoft Word versions: 2007, 2010, 2013, 2016, 2019, and 2021. If you are using an earlier version (Word 2003 or earlier), this tip may not work for you. For a version of this tip written specifically for earlier versions of Word, click here:
Comments