Please Note: This article is written for users of the following Microsoft Word versions: 2007, 2010, 2013, 2016, 2019, 2021, 2024, and Word in Microsoft 365. If you are using an earlier version (Word 2003 or earlier), this tip may not work for you. For a version of this tip written specifically for earlier versions of Word, click here: Inserting the Date Your Document Was Last Printed.
Written by Allen Wyatt (last updated March 15, 2025)
This tip applies to Word 2007, 2010, 2013, 2016, 2019, 2021, 2024, and Word in Microsoft 365
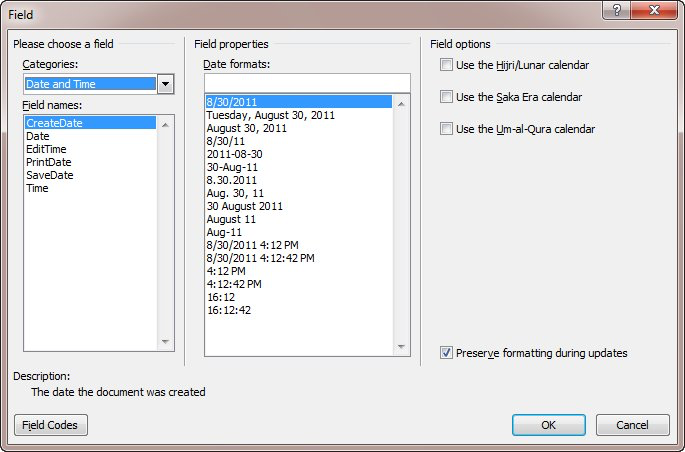
One of the pieces of information that Word maintains about documents is when they were last printed. Every time you print your document, this piece of information is updated. There may be times when you want to display this "last printed" date in your document. To do this, follow these steps:

Figure 1. The Field dialog box.
There needs to be a bit of explanation as to what this last-printed date actually does. This date is saved with the document itself so that it is available when you later open the document. What this means is that when you print your document, the date is updated, but it is not saved until you save your document. Thus, if you open a document, print it, and close the document without saving, then the next time you open the document, the last-printed date won't really reflect when the document was last printed—it always reflects when it was last printed and saved.
WordTips is your source for cost-effective Microsoft Word training. (Microsoft Word is the most popular word processing software in the world.) This tip (6060) applies to Microsoft Word 2007, 2010, 2013, 2016, 2019, 2021, 2024, and Word in Microsoft 365. You can find a version of this tip for the older menu interface of Word here: Inserting the Date Your Document Was Last Printed.

Learning Made Easy! Quickly teach yourself how to format, publish, and share your content using Word 2021 or Microsoft 365. With Step by Step, you set the pace, building and practicing the skills you need, just when you need them! Check out Microsoft Word Step by Step today!
Fields are used for a variety of dynamic purposes in a document. There are a couple of ways you can easily insert fields, ...
Discover MoreFields can be a great way of adding small snippets of dynamic data to your documents. However, you may want to get rid of ...
Discover MoreWord allows you to place all sorts of fields in your documents. If you want to search for only specific types of fields, ...
Discover MoreFREE SERVICE: Get tips like this every week in WordTips, a free productivity newsletter. Enter your address and click "Subscribe."
There are currently no comments for this tip. (Be the first to leave your comment—just use the simple form above!)
Got a version of Word that uses the ribbon interface (Word 2007 or later)? This site is for you! If you use an earlier version of Word, visit our WordTips site focusing on the menu interface.
Visit the WordTips channel on YouTube
FREE SERVICE: Get tips like this every week in WordTips, a free productivity newsletter. Enter your address and click "Subscribe."
Copyright © 2026 Sharon Parq Associates, Inc.
Comments