Please Note: This article is written for users of the following Microsoft Word versions: 2007, 2010, 2013, 2016, 2019, 2021, and Word in Microsoft 365. If you are using an earlier version (Word 2003 or earlier), this tip may not work for you. For a version of this tip written specifically for earlier versions of Word, click here: Preventing Styles from Changing.
Don has run into a problem in his office regarding styles. It seems that when there are multiple authors using a single document, the styles sometimes change unexpectedly. If Don saves a file with certain styles in place and someone else with access to the server opens and saves the same file, then when Don subsequently opens the file, invariably the style definitions have changed.
There are a couple of things to check when this happens. First of all, you need to check to make sure that all users have dynamic style updating turned off. This feature of Word causes changes to a style definition when someone applies an explicit formatting change to something in the document. Thus, with the feature turned on, if someone makes a change to an individual paragraph, the change is also applied to the underlying style, which in turn affects every other paragraph in the document that uses that style. To turn this feature off, all of the users will need to perform these steps:
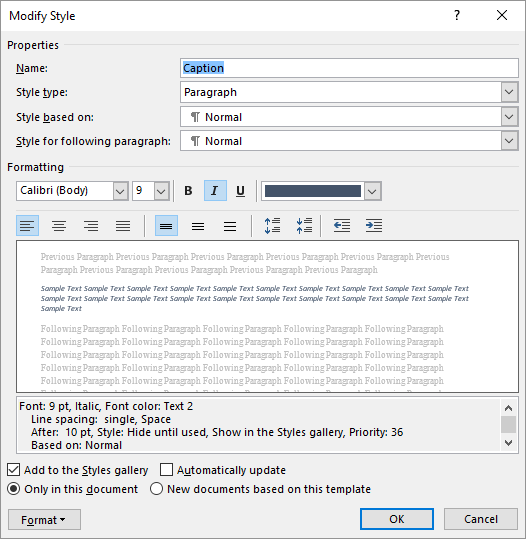
Figure 1. The Modify Style dialog box.
Notice that these steps affect only a single style in a document. That's right—Word allows dynamic style updating to be set on a style-by-style basis. This means that you will need to go through each and every style in your document and follow these same steps. That can obviously get rather tedious if you have a lot of styles in the document. In that case, you may want to use a macro to go through all the styles and change the setting. The following macro will do this rather nicely:
Sub RemoveAutoUpdate()
    Dim s As Style
    For Each s In ActiveDocument.Styles
        If s.Type = wdStyleTypeParagraph Then
            s.AutomaticallyUpdate = False
        End If
    Next s
End Sub
The problem could also be related to the template attached to your document. If, for instance, the document uses the Normal template and each user's Normal template is different, then this can affect the appearance of the document. The way around this problem is to make sure that the document uses a template other than Normal (preferably one stored on the server and accessible by all users) or that everyone's Normal template is the same.
You might also check to make sure that all of the users have the same fonts installed on their systems. If a document uses a font that is on your system, and then that document is opened on a system that doesn't have the same font, Word will substitute a different font for the missing one. This can affect the appearance of the document, even when you subsequently open it back on your original system. To stave off this issue, make sure that you have Word configured so it will embed TrueType fonts with the document:
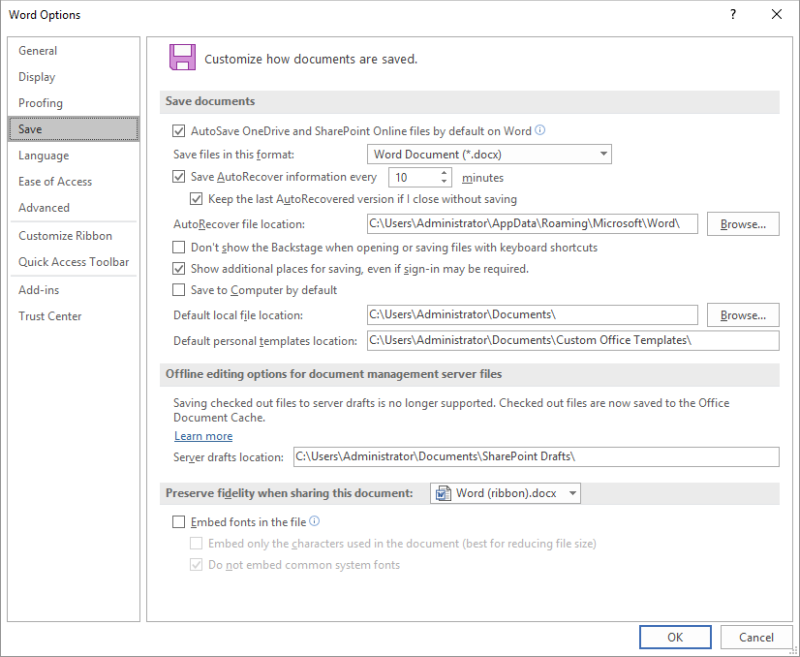
Figure 2. The Save option of the Word Options dialog box.
Note:
WordTips is your source for cost-effective Microsoft Word training. (Microsoft Word is the most popular word processing software in the world.) This tip (997) applies to Microsoft Word 2007, 2010, 2013, 2016, 2019, 2021, and Word in Microsoft 365. You can find a version of this tip for the older menu interface of Word here: Preventing Styles from Changing.

The First and Last Word on Word! Bestselling For Dummies author Dan Gookin puts his usual fun and friendly candor back to work to show you how to navigate Word 2019. Spend more time working and less time trying to figure it all out! Check out Word 2019 For Dummies today!
If you use styles in your documents, you know it can take a good investment of time to get them just the way you want. ...
Discover MoreWhen you add formatting to some text in your document, Word may apply your formatting to every other part of your ...
Discover MoreShortcut keys are a great way to apply styles to text in a document. You can easily create a shortcut key assignment for ...
Discover MoreFREE SERVICE: Get tips like this every week in WordTips, a free productivity newsletter. Enter your address and click "Subscribe."
2023-11-04 07:50:04
Allen
Jim,
Yes, the tools on the ribbon "trump" styles. That is because the tools on the ribbon apply explicit formatting, and explicit formatting beats implicit formatting (styles) every time.
It is like this: You can apply a style, which applies formatting to a paragraph. Select a word or words in that paragraph and click the Bold tool on the ribbon, and you've now overridden the style's formatting. Change the paragraph's style later, and Word thinks "oh, he wants the style changed, but he really wanted these words to be bold because he told us he did." So, it leaves them bold. Even though you applied a new style.
Here's how you remove the explicit formatting: Just select the paragraph and press Ctrl+Spacebar. That clears the explicit formatting and returns the text in the paragraph to whatever is defined by the style applied to the paragraph.
I should point out that changing paragraph attributes (border, indents, space before/after, etc.) works pretty much the same way. If you want to clear any explicit stuff you've applied, select the paragraph and press Ctrl+Q.
2023-11-03 18:07:09
Jim Bryson
Allen: Can I ask you a question? Can I change priority of text attributes such that Styles attributes override Ribbon attributes?
Details:
I change text attributes using the Ribbon. But if I later try to change the same text by modifying the style attributes of the assigned style (i.e. NORMAL or a style I created), nothing happens. The text attributes remain whatever was selected on the Ribbon, regardless of what I change in the styles attributes.
It seems that Ribbon trumps Styles.
The trial and error fix I've found is to highlight the text and apply CLEAR ALL from the style menu. Then the text will automatically update based on modifying the styles attributes. But this wipes out all Ribbon attributes, and every defaults to Normal. I'd like to keep some of those attributes and only modify portions of the text.
Is there a way to make Style attributes priority over Ribbon attributes?
Thanks.
PS: this comment apparently goes to 11.
2023-02-10 01:27:24
cow_zone
Along a similar vein, for a very specific purpose, I was seeking a way to copy content from one document to another, where the documents are based on different templates using different styles, and have the formatting from the source document maintained in the destination document.
I landed at:
- set up the styles in the source document to have no dependency on standard styles. i.e. "Style based on" = none
- ensure that the Style's font dialogue specifies and actual font face (rather than heading / body).
(- paste settings are default, and standard paste was used to replicate how my colleagues work)
- copy from source document
- paste in destination document
I believe removing the dependencies on other fonts will mean the pasted text formatting will remain intact, even if the standard styles in the destination document are altered after pasting in the new text. Initial testing supports this theory.
Yes, I could have pasted using '"Keep source formatting." But I was told this process had to be foolproof for my colleagues whose Word skills range from "why are there marks all over the document?" (hidden formatting symbols) and "I know how to insert a table of contents, but why doesn't it show what I want it to?" to "I hate columns because I can't make them do what I want."
Got a version of Word that uses the ribbon interface (Word 2007 or later)? This site is for you! If you use an earlier version of Word, visit our WordTips site focusing on the menu interface.
Visit the WordTips channel on YouTube

FREE SERVICE: Get tips like this every week in WordTips, a free productivity newsletter. Enter your address and click "Subscribe."
Copyright © 2026 Sharon Parq Associates, Inc.
 Please Note:
This article is written for users of the following Microsoft Word versions: 2007, 2010, 2013, 2016, 2019, 2021, and Word in Microsoft 365. If you are using an earlier version (Word 2003 or earlier), this tip may not work for you. For a version of this tip written specifically for earlier versions of Word, click here:
Please Note:
This article is written for users of the following Microsoft Word versions: 2007, 2010, 2013, 2016, 2019, 2021, and Word in Microsoft 365. If you are using an earlier version (Word 2003 or earlier), this tip may not work for you. For a version of this tip written specifically for earlier versions of Word, click here:
Comments