Numbering Equations

Written by Allen Wyatt (last updated October 4, 2025)
This tip applies to Word 2007, 2010, 2013, 2016, 2019, 2021, 2024, and Word in Microsoft 365


One WordTips reader expressed a desire to number the various equations appearing in his document. The desire was to have the equation centered on the page, and the equation's number appear at the right margin within brackets. When a new equation is added to the document, the subsequent equations should be renumbered.

There are several ways you can approach this problem, but the possible solutions can be broken down into two general methods. The first method accomplishes the numbering using a combination of tables and fields, and the second uses tabs and fields. If you want to use the table approach, you can do so as follows:

  1. At the point where you wish to insert an equation, create a table with one row and three columns. Make the right column just wide enough to contain the number style you wish to use (for numbering the equation). Make the left-hand column the same width in order to balance the space left for the equation number. Format the table so its borders are not visible.
  2. In the center column enter your equation. (Choose Equation from the Insert tab of the ribbon.)
  3. With the insertion point still located in the center column of your table, click on the Center tool on the formatting toolbar. This centers the equation in the column. (If you made your left and right columns the same width, as pointed out in step 1, then this also results in the equation being centered on the page.)
  4. Position the insertion point in the right-hand column, then click the Align Right tool in the Paragraph group on the Home tab of the ribbon.
  5. Type the left bracket that you want to appear around the equation number.
  6. Display the Insert tab of the ribbon.
  7. Click the Quick Parts tool in the Text group and then choose Field. Word displays the Field dialog box.
  8. In the Categories list, choose Numbering. (See Figure 1.)
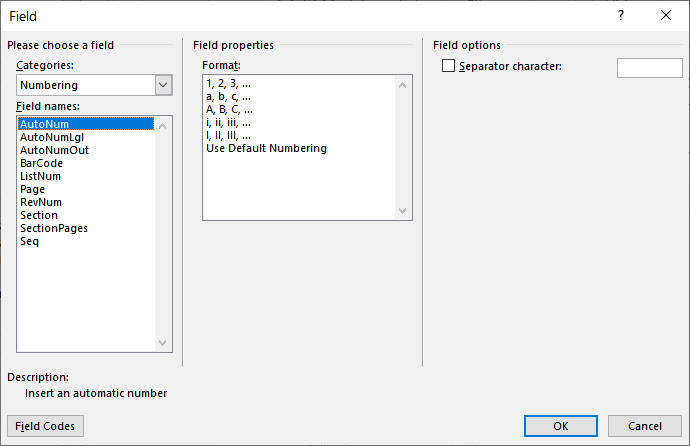
  9. Figure 1. The Field dialog box.

  10. In the Field Names list, choose Seq. The letters SEQ should appear in the Field Codes box at the bottom of the dialog box.
  11. Click on the Field Codes box and make sure the insertion point appears at the end of the field.
  12. Type a name for this sequence of numbers, such as Equation.
  13. Click on OK. A number appears in your document at the right of your bracket.
  14. Type the right bracket to finish out the equation number.

If you want to use tabs to accomplish the same task, you can easily do that, as well. For instance, let's say you are using 8.5 x 11 paper, with 1-inch left and right margins. In this case, you would follow these steps:

  1. Position the insertion point where you want to insert the equation.
  2. Display the Home tab of the ribbon.
  3. Click the small icon at the bottom-right of the Paragraph group to display the Paragraph dialog box.
  4. Click the Tabs button. Word displays the Tabs dialog box. (See Figure 2.)
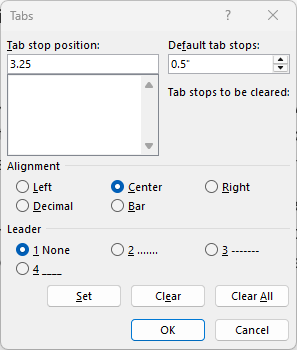
  5. Figure 2. The Tabs dialog box.

  6. If there are any existing tabs in the paragraph, click on Clear All.
  7. In the Tab Stop Position box, type the position of the first tab (3.25).
  8. For an Alignment, select Center.
  9. Click on Set.
  10. In the Tab Stop Position box, type the position of the second tab (6.5).
  11. For an Alignment, select Right.
  12. Click on Set.
  13. Click on OK to close the Tabs dialog box.
  14. Press Tab to advance to the first (centered) tab stop and insert your equation.
  15. Press Tab to advance to the second (right-justified) tab stop.
  16. Type the left bracket that you want to appear around the equation number.
  17. Display the Insert tab of the ribbon.
  18. Click the Quick Parts tool in the Text group and then choose Field. Word displays the Field dialog box.
  19. In the Categories list, choose Numbering.
  20. In the Field Names list, choose Seq. The letters SEQ should appear in the Field Codes box at the bottom of the dialog box.
  21. Click on the Field Codes box and make sure the insertion pointer appears at the end of the field.
  22. Type a name for this sequence of numbers, such as Equation.
  23. Click on OK. A number appears in your document at the right of your bracket.
  24. Type the right bracket to finish out the equation number.

The advantage of using the tab method (as just described) is that you can define a paragraph style that already has the two tab stops set. You can then format any paragraph with the style and simply type your information. You can take it one step further and also save the brackets and sequence field as a Building Block entry. In this way you could very quickly enter your sequence numbers.

When you add new equations in the middle of your document, it is very possible that not all of your subsequent equations will automatically increment. If you want to make sure that all the sequence numbers are correct, you can select the entire document and press F9 to update the fields.

WordTips is your source for cost-effective Microsoft Word training. (Microsoft Word is the most popular word processing software in the world.) This tip (273) applies to Microsoft Word 2007, 2010, 2013, 2016, 2019, 2021, 2024, and Word in Microsoft 365.

Author Bio

Allen Wyatt

With more than 50 non-fiction books and numerous magazine articles to his credit, Allen Wyatt is an internationally recognized author. He is president of Sharon Parq Associates, a computer and publishing services company. ...

MORE FROM ALLEN

Detecting an Open Dialog Box

Macros can be used to perform all sorts of tasks within Word. Some tasks can even occur at whatever time interval you ...

Discover More

Understanding Master and Subdocuments

Most people use Word to create regular documents that you edit, view, and print. The program also allows you to create a ...

Discover More

Replacing Commas with Periods

Want to replace all commas in a formatted number with periods, and vice-versa? There are a couple of approaches you can ...

Discover More

Learning Made Easy! Quickly teach yourself how to format, publish, and share your content using Word 2021 or Microsoft 365. With Step by Step, you set the pace, building and practicing the skills you need, just when you need them! Check out Microsoft Word Step by Step today!

More WordTips (ribbon)

Displaying the Navigation Pane

One of the viewing modes you can use for a document involves the use of the Navigation pane. This shows a quick outline ...

Discover More

Updating Document Links

If you establish dynamic links between documents, then you can force Word to update those links whenever you want. How ...

Discover More

Displaying Quick Document Statistics

Need to see how many pages, words, paragraphs, or lines are in your document? Word makes it easy to retrieve such ...

Discover More
Subscribe

FREE SERVICE: Get tips like this every week in WordTips, a free productivity newsletter. Enter your address and click "Subscribe."

View most recent newsletter.

Comments

If you would like to add an image to your comment (not an avatar, but an image to help in making the point of your comment), include the characters [{fig}] (all 7 characters, in the sequence shown) in your comment text. You’ll be prompted to upload your image when you submit the comment. Maximum image size is 6Mpixels. Images larger than 600px wide or 1000px tall will be reduced. Up to three images may be included in a comment. All images are subject to review. Commenting privileges may be curtailed if inappropriate images are posted.

What is 9 - 1?

There are currently no comments for this tip. (Be the first to leave your comment—just use the simple form above!)


This Site

Got a version of Word that uses the ribbon interface (Word 2007 or later)? This site is for you! If you use an earlier version of Word, visit our WordTips site focusing on the menu interface.

Videos
Subscribe

FREE SERVICE: Get tips like this every week in WordTips, a free productivity newsletter. Enter your address and click "Subscribe."

(Your e-mail address is not shared with anyone, ever.)

View the most recent newsletter.