Marie notes that the grammar check tool in Word is frequently wrong. When it underlines a word or phrase in blue, she can click on "Ignore" or "Ignore All" and the blue goes away. However, when she reopens the document, the blue squiggly underlines are back. This is embarrassing, as her clients get that same blue underline and think she's made an error when she hasn't. Marie wonders how she can keep the blue ink away while maintaining the grammar check feature.
At least a partial answer to this question has been covered in a different WordTip. (See the tip entitled Getting Rid of Blue Squiggly Underlines. I note this as a partial answer only, because Ivan (in that tip) wanted to get rid of the blue underlines only on his own system, whereas Marie seems more concerned with getting rid of them on her clients' systems. In other words, she wants a document she has worked on (and on which she has resolved blue underlines by clicking "Ignore" or "Ignore All") to not show those blue underlines when her clients open the same document.
This, unfortunately, cannot be done. Why? Because when you are clicking "Ignore" or "Ignore All" on your system, you are telling the grammar checker what to do only on your system. When the document is opened on a different system (like, perhaps, your client's system), it is his or her grammar checker that adds the blue underlines. Word does not store the "Ignore" or "Ignore All" determinations with the document itself.
There is another thing to keep in mind here: Word bases those blue underlines on a series of settings that are configurable within each installation of Word. You can see those rules by following these three steps:
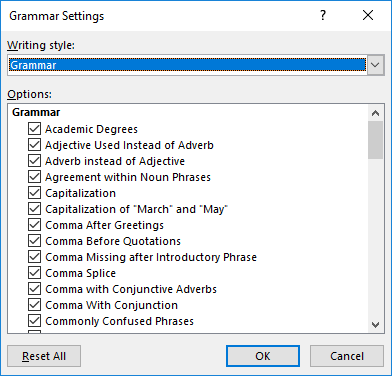
Figure 1. The Grammar Settings dialog box.
All of these "rule settings" can be changed on a system-by-system basis. Thus, you could have different rule settings than are used on your clients' systems, which means that on their systems grammar will be checked (and marked with blue underlines) differently than on your system.
Of course, one potential solution is to reword your prose to satisfy Word's grammar checker, which will remove the blue underline. This is probably not a satisfactory approach, though, because (1) Word can be wrong in its marking, as Marie notes, and (2) different rule settings may cause blue underlines to appear on the client systems even though they don't appear on yours.
A more permanent solution would be to add a macro to the document to turn off grammar checking when the document is loaded and turn it back on when it is closed. A better solution, though, might be to simply generate a PDF from your document and let the clients work with the PDF rather than the actual Word document.
WordTips is your source for cost-effective Microsoft Word training. (Microsoft Word is the most popular word processing software in the world.) This tip (13534) applies to Microsoft Word 2007, 2010, 2013, 2016, 2019, and 2021.

The First and Last Word on Word! Bestselling For Dummies author Dan Gookin puts his usual fun and friendly candor back to work to show you how to navigate Word 2019. Spend more time working and less time trying to figure it all out! Check out Word 2019 For Dummies today!
When Word checks the grammar it thinks you are using in your prose, it follows a set of rules. Fortunately, the program ...
Discover MoreWhile you are typing in a document, Word is typically busy checking what you type for errors. If an error is found, Word ...
Discover MoreWord provides some handy document analysis that can help improve your writing. One such tool is the readability ...
Discover MoreFREE SERVICE: Get tips like this every week in WordTips, a free productivity newsletter. Enter your address and click "Subscribe."
2018-06-05 21:15:58
Ken Endacott
As well as supressing grammar error underlines it is often desirable to supress spelling error underlines because there maybe proper nouns or the client may be using a different language or English version.
Setting NoProofing for the whole document will prevent any error underlining being displayed and the 50 paragraph limit makes it difficult for the client to overrule. A further advantage is that the document opens quicker because the spell checker has nothing to work on.
2018-06-04 04:05:53
Richard Price
Thank you Ken Endacott - I was unaware of that 50 paragraph limit, and it does explain some erratic behaviour I've seen in the past.
There is a good solution available if the document uses styles that are based directly or indirectly on one master style, e.g. the Normal style (or equally, if the author hasn't intentionally applied styles at all, so the whole document is in the Normal style plus direct formatting). In that case you can turn off proofing for the whole document at once, regardless of how many paragraphs it has, by modifying the Normal style: on the Home tab, right-click on the master style in the Styles Gallery (or if it's not there, click the arrow in the bottom-right corner of the Styles pane and find it in the full list of styles) then select Modify -> Format -> Language -> Do not check spelling or grammar.
In principle you can easily reverse this change in order to check for spelling mistakes in the finished document then reapply it to hide the blue squiggly underlines. In practice you might notice that these changes don't take effect immediately, e.g. after re-enabling proofing you have to select File -> Options -> Proofing -> Recheck Document before any spelling errors show up. So it might be worth creating macros for turning proofing off and on in this way.
2018-06-02 11:55:04
Ken Endacott
It is possible to use NoProofing to achieve what Marie wants.
NoProofing settings travel with the document and prevent spelling and grammar checking irrespective of the settings of the client’s system. To apply NoProofing to selected text:
Review > Language > Set Proofing Language and tick Do not check spelling of grammar.
There are some issues.
It may be required that spelling errors should be displayed but not grammar errors, however NoProofing prevents both spelling and grammar checking. This can be overcome by applying NoProofing only to words or phrases that raise grammar errors and hopefully contain no spelling errors.
It is not obvious where in a document NoProofing is set. This can lead to puzzlement when spell checking works in some parts of the document but not others.
There is a maximum of 50 paragraphs at a time that can be set or unset, if a large block of text is to have NoProofing applied then successive 50 paragraph blocks must be set. If you try to set or unset more than 50 paragraphs at a time, nothing happens and Word does not tell you that the action has failed. If you want to clear all NoProofings in a document it must be carried out 50 paragraphs at a time, somewhat impractical for large documents unless you use a macro.
2018-06-02 05:32:40
Rod Grealish
Another possible (but not fully tested) solution is to switch off spelling and grammar checking for the offending text. Select the text (it doesn't need to be a whole sentence). From the ribbon select Review, then Languages, Set Proofing Language ... set Do not Check Spelling or Grammar.
I'm not able to test this across systems but, under testing, "Do not Check Spelling or Grammar" is maintained between closing and re-opening the file.
Got a version of Word that uses the ribbon interface (Word 2007 or later)? This site is for you! If you use an earlier version of Word, visit our WordTips site focusing on the menu interface.
Visit the WordTips channel on YouTube

FREE SERVICE: Get tips like this every week in WordTips, a free productivity newsletter. Enter your address and click "Subscribe."
Copyright © 2026 Sharon Parq Associates, Inc.
Comments