Creating a Single Index from Multiple Documents

Written by Allen Wyatt (last updated January 8, 2022)
This tip applies to Word 2007, 2010, 2013, 2016, 2019, Word in Microsoft 365, and 2021


Maurice has five Word documents, each of which is rather large. He needs to create a single index that covers all five documents, so he wonders if there is a way to do it without merging the five documents. He doesn't want to merge them because of their sizes.

There are two main ways you can do this. The first way is to create a master document that contains references to subdocuments, and then generate the index using the master document. (Both approaches covered here assume that your documents already have the index field codes inserted within them. In other words, this tip covers just the actual generation of the index, not the creation of the index entries.)

To create the master document, follow these steps:

  1. Create a brand-new document. Make sure that it uses the same template as the documents for which you want an index.
  2. Display the document in Outline view. (Display the View tab of the ribbon and click the Outline tool in the Views group.)
  3. Make sure the Outlining tab of the ribbon is displayed. (It should be displayed by default when you switch to Outline view.)
  4. In the Master Document group, click the Show Document tool. Word expands the tools in the Master Document group.
  5. Click the Insert tool, which is visible in the Master Document group. Word displays the Insert Subdocument dialog box. (This dialog box looks very similar to a standard Open dialog box.)
  6. Using the controls in the dialog box, locate and select the first document you want included in your index.
  7. Click Open. Word inserts the contents of the document, surrounded by section breaks.
  8. Repeat steps 2 through 9 for each of the other documents you want included.
  9. Generate your index as you normally would.

The second way to create the index is to use fields to combine the documents into a single document. Follow these steps:

  1. Create a brand-new document. Make sure that it uses the same template as the documents for which you want an index. You should make sure the insertion point is at the beginning of the document.
  2. Display the Insert tab of the ribbon.
  3. Click the Quick Parts tool in the Text group. Word displays some choices below the tool.
  4. Click Field. Word displays the Field dialog box.
  5. Choose Indexes and Tables from the Categories list (top left corner of the dialog box). (See Figure 1.)
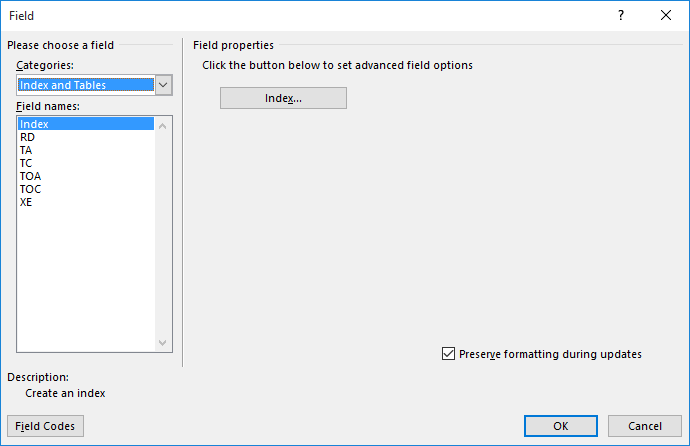
  6. Figure 1. The Field dialog box.

  7. Select RD from the Field Names list. Word adjusts the appearance of the dialog box to include a Filename or URL box.
  8. In the Filename or URL box enter the name of the first file you want included in the index.
  9. Click OK. Word inserts the field into the document.
  10. Press Enter once.
  11. Repeat steps 2 through 9 for each of the other documents you want included.
  12. Generate your index as you normally would.

The RD fields cause Word to reference each of the specified documents and include them in your index. If desired, you could also add the fields to the end of your fifth document rather than creating a blank document for the index. (If you do this you won't need to include a field for the fifth document itself; only the first four.) This assumes, of course, that you want the index to appear at the end of the fifth document.

WordTips is your source for cost-effective Microsoft Word training. (Microsoft Word is the most popular word processing software in the world.) This tip (13128) applies to Microsoft Word 2007, 2010, 2013, 2016, 2019, Word in Microsoft 365, and 2021.

Author Bio

Allen Wyatt

With more than 50 non-fiction books and numerous magazine articles to his credit, Allen Wyatt is an internationally recognized author. He is president of Sharon Parq Associates, a computer and publishing services company. ...

MORE FROM ALLEN

Getting Rid of Spreadsheet Panes

When working with different parts of your worksheet at the same time, it is often helpful to utilize panes. Here's how to ...

Discover More

Workaround for Multiple Rows of Worksheet Tabs

If you've got a lot of worksheets in your workbook, you may want to display their tabs in to rows at the bottom of the ...

Discover More

Turning Off AutoFill

AutoFill is a great editing tool that comes in particularly handy when you are first creating a worksheet. You may, at ...

Discover More

Do More in Less Time! Are you ready to harness the full power of Word 2013 to create professional documents? In this comprehensive guide you'll learn the skills and techniques for efficiently building the documents you need for your professional and your personal life. Check out Word 2013 In Depth today!

More WordTips (ribbon)

Creating an Index Entry

In order to create an index, you first need to create the entries that will be used to compile the index. Here's how you ...

Discover More

Specifying an Index Page-Range Separator

When generating an index, Word normally uses a dash to indicate page ranges. You can change the character used for these ...

Discover More

Using Subentries in an AutoMark File

If you have a large document and need to create a complicated index, an AutoMark file can make your life much easier. ...

Discover More
Subscribe

FREE SERVICE: Get tips like this every week in WordTips, a free productivity newsletter. Enter your address and click "Subscribe."

View most recent newsletter.

Comments

If you would like to add an image to your comment (not an avatar, but an image to help in making the point of your comment), include the characters [{fig}] (all 7 characters, in the sequence shown) in your comment text. You’ll be prompted to upload your image when you submit the comment. Maximum image size is 6Mpixels. Images larger than 600px wide or 1000px tall will be reduced. Up to three images may be included in a comment. All images are subject to review. Commenting privileges may be curtailed if inappropriate images are posted.

What is 6 - 0?

There are currently no comments for this tip. (Be the first to leave your comment—just use the simple form above!)


This Site

Got a version of Word that uses the ribbon interface (Word 2007 or later)? This site is for you! If you use an earlier version of Word, visit our WordTips site focusing on the menu interface.

Videos
Subscribe

FREE SERVICE: Get tips like this every week in WordTips, a free productivity newsletter. Enter your address and click "Subscribe."

(Your e-mail address is not shared with anyone, ever.)

View the most recent newsletter.