Please Note: This article is written for users of the following Microsoft Word versions: 2007, 2010, 2013, 2016, 2019, and 2021. If you are using an earlier version (Word 2003 or earlier), this tip may not work for you. For a version of this tip written specifically for earlier versions of Word, click here: Controlling Overtype Mode.
Word has two different editing modes you can use—insert mode and overtype mode. When insert mode (the default) is active, the information you type is inserted at (where else?) the insertion point. When overtype mode is active, information isn't inserted, but replaces whatever is to the right of the insertion point.
Word doesn't let you know, by default, if you are using overtype mode or not. The easiest way to tell is if, when you type, each character you type replaces a character previously in the document. You can also configure Word to display an indicator on the status bar. Right-click a blank spot on the status bar. Word displays a large list of items that can appear on the status bar. Each item that has a check mark next to it has a place on the status bar; if there is no check mark, then that item is excluded. You want to click the Overtype item so that it has a check mark. An indicator immediately appears near the left side of the status bar consisting either of the word Insert or Overtype. (By this point you can probably figure out what each word means.)
To control switching between insert and overtype modes, follow these steps:
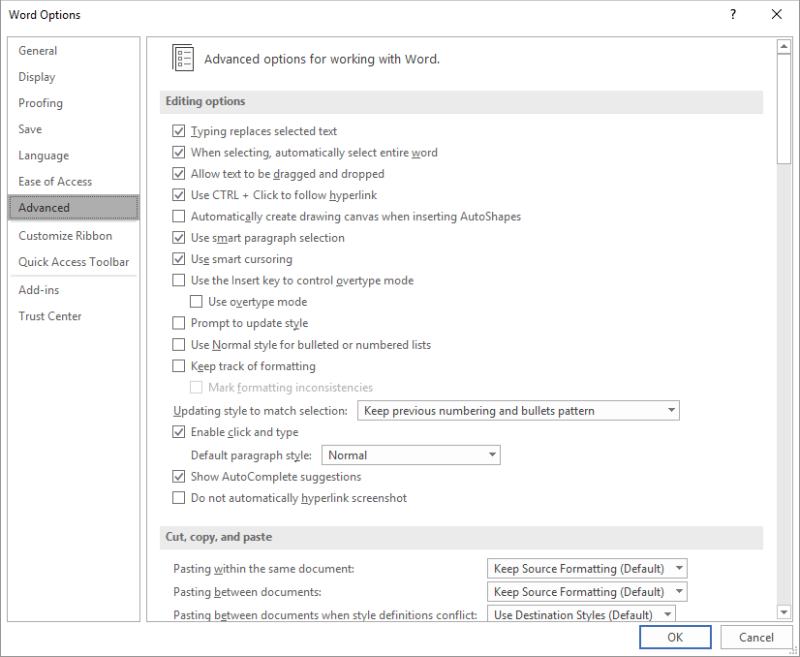
Figure 1. The Advanced options of the Word Options dialog box.
While you've got the dialog box open, you should also think strongly of choosing the Use the Insert Key to Control Overtype Mode option. With the option selected, the Insert key on your keyboard toggles between insert and overtype modes.
WordTips is your source for cost-effective Microsoft Word training. (Microsoft Word is the most popular word processing software in the world.) This tip (12974) applies to Microsoft Word 2007, 2010, 2013, 2016, 2019, and 2021. You can find a version of this tip for the older menu interface of Word here: Controlling Overtype Mode.

Learning Made Easy! Quickly teach yourself how to format, publish, and share your content using Word 2021 or Microsoft 365. With Step by Step, you set the pace, building and practicing the skills you need, just when you need them! Check out Microsoft Word Step by Step today!
When you need to perform certain editing tasks over and over again, you start to look for ways to make your work faster ...
Discover MoreNeed a special character (such as a bullet) in the middle of your text? Here are two quick ways to enter the character ...
Discover MoreMost people use the Clipboard to copy and move text in Word. Before the Clipboard, Word used F2 to move text and Shift+F2 ...
Discover MoreFREE SERVICE: Get tips like this every week in WordTips, a free productivity newsletter. Enter your address and click "Subscribe."
2021-05-15 10:39:40
Tomek
You can click on the indicator mentioned in the tip to toggle insert/overwrite.
Got a version of Word that uses the ribbon interface (Word 2007 or later)? This site is for you! If you use an earlier version of Word, visit our WordTips site focusing on the menu interface.
Visit the WordTips channel on YouTube

FREE SERVICE: Get tips like this every week in WordTips, a free productivity newsletter. Enter your address and click "Subscribe."
Copyright © 2026 Sharon Parq Associates, Inc.
 Please Note:
This article is written for users of the following Microsoft Word versions: 2007, 2010, 2013, 2016, 2019, and 2021. If you are using an earlier version (Word 2003 or earlier), this tip may not work for you. For a version of this tip written specifically for earlier versions of Word, click here:
Please Note:
This article is written for users of the following Microsoft Word versions: 2007, 2010, 2013, 2016, 2019, and 2021. If you are using an earlier version (Word 2003 or earlier), this tip may not work for you. For a version of this tip written specifically for earlier versions of Word, click here:
Comments