Sonja's company requires that a specific typeface (Lucida Sans) be used in all company materials. This is a recent requirement, and the company has updated their styles and templates to reflect the change. However, in some of Sonja's longer documents she is finding that blocks of text have been copied from older, before-the-change documents and are retaining the old typefaces. Sonja wonders if there is a quick way to examine long documents and determine if a typeface other than the new one is being used anywhere.
It appears, from the phrasing of Sonja's question, that her company relies on styles and templates to standardize the look of their documents. This is a huge plus, in the long run, because it means that both new and old documents can be easily updated to the new typeface. The problem that Sonja describes occurs in a very specific context—someone opens a document that uses the correct typeface (i.e., it has the new template and styles in play), opens an old document, copies text from the old document, and then pastes it into the updated document.
Because the pasted text now shows a typeface different from Lucida Sans, it means one of two things:
The copied text uses styles that are not in the new template, and those styles use a typeface other than Lucida Sans, or
The copied text is explicitly formatted with a typeface other than Lucida Sans.
Obviously, Sonja could simply press Ctrl+A and then apply the new typeface to the entire document. This, however, does not really fulfill her request. More importantly, it explicitly applies a typeface to the text, which circumvents the benefits of using styles in the first place.
To maintain the benefit of using styles in the company documents, Sonja must be able to determine where the non-Lucida Sans typeface exists within the document and then, more importantly, why it exists there. That can help her determine the correct remediation—whether to apply a different style to the non-compliant text or to use explicit formatting.
One approach is to save your document as a PDF file. Then, using Adobe Acrobat, open the PDF file and choose File > Properties > Fonts. You can there see a list of every font used in the document. This won't tell you where the typeface is used, but it can help you to, perhaps, use Find and Replace, within Word, to locate it and take the appropriate action.
If you don't have access to Adobe Acrobat, then a different approach is needed. The evaluation that is necessary for each instance of the non-compliant text means that a macro-based approach isn't terribly helpful in automatically correcting any non-Lucida Sans typefaces. A macro could be used, however, to explicitly mark any text that doesn't use Lucida Sans, like this:
Sub CheckFont1()
    Dim p As Paragraph

    For Each p In ActiveDocument.Paragraphs
        If p.Range.Font.Name <> "Lucida Sans" Then
            p.Range.HighlightColorIndex = wdYellow
        End If
    Next
End Sub
The macro steps through each paragraph and, if the paragraph isn't formatted to use Lucida Sans, then it is highlighted in yellow. This seems a very simple approach, except it can be deceiving. The biggest issue is if a paragraph contains mixed formatting. For instance, a paragraph uses a style that uses Lucida Sans, but a word or two within the paragraph was selected and set to a different typeface explicitly. In that case, the entire paragraph would be marked in yellow, instead of just the offending text. In that case, the following variation would be more helpful:
Sub CheckFont2()
    Dim p As Paragraph
    Dim c As Range
    Dim sFont As String

    sFont = "Lucida Sans"

    For Each p In ActiveDocument.Paragraphs
        ' Clear any old highlighting
        p.Range.HighlightColorIndex = wdNoHighlight

        If p.Range.Font.Name <> wdUndefined Then
            ' Entire paragraph uses same font
            If p.Range.Font.Name <> sFont Then
                p.Range.HighlightColorIndex = wdYellow
            End If
        Else
            ' Mixed font, so dive deeper
            For Each c In p.Range.Characters
                If c.Font.Name <> sFont Then
                    c.HighlightColorIndex = wdYellow
                End If
            Next c
        End If
    Next p
End Sub
In this version, the macro checks to see if the .Font.Name property for the paragraph is undefined (wdUndefined), which would be the case if there are multiple fonts used in the paragraph. In that case, each character of the paragraph is examined and highlighted, as appropriate. This allows the identification of non-compliant fonts to be more specific.
Finally, this macro only looks at the main document. If your document also uses headers, footers, footnotes, or endnotes, then those elements are not examined. If you want the macro to look at everything accessible (all elements), then you need to step through all the StoryRanges in the document, in this manner:
Sub CheckFont3()
    Dim sr As Range          'each story range "root"
    Dim rStory As Range      'walks the linked story chain
    Dim p As Paragraph
    Dim c As Range
    Dim sFont As String

    sFont = "Lucida Sans"

    For Each sr In ActiveDocument.StoryRanges
        Set rStory = sr
        Do While Not rStory Is Nothing
            For Each p In rStory.Paragraphs
                ' Clear any old highlighting
                p.Range.HighlightColorIndex = wdNoHighlight

                If p.Range.Font.Name <> wdUndefined Then
                    'Entire paragraph uses same font
                    If p.Range.Font.Name <> sFont Then
                        p.Range.HighlightColorIndex = wdYellow
                    End If
                Else
                    'Mixed font, so dive deeper
                    For Each c In p.Range.Characters
                        If c.Font.Name <> sFont Then
                            c.HighlightColorIndex = wdYellow
                        End If
                    Next c
                End If
            Next p
            Set rStory = rStory.NextStoryRange
        Loop
    Next sr
End Sub
Regardless of which macro you choose to use, once you run it, simply look through the document for any yellow highlighting. You can then make a determination as to whether the solution, for that instance, is to apply a correct style or to use explicit formatting.
Of course, it is entirely possible that Sonja's company doesn't allow the use of macros. (Yes, some companies do this.) In that case, you could use a reverse approach to that implemented by the macros—you could highlight all instances of Lucida Sans in yellow, and then examine the document for any unhighlighted text. Follow these steps:
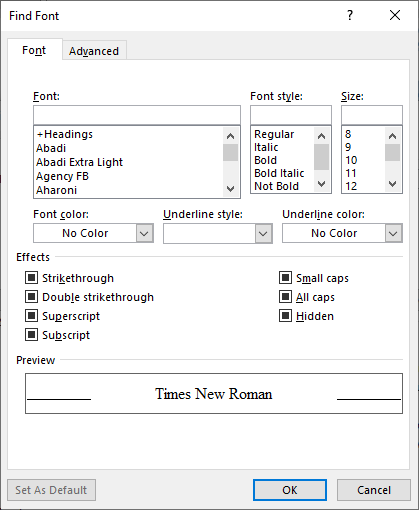
Figure 1. The Find Font dialog box.
At this point, all instances of Lucida Sans in your document are highlighted, but the highlighting is temporary; if you make an edit in the document, the highlighting disappears. So, before you do anything else, you should display the Home tab of the ribbon and click on the Highlight tool, in the Font group. This applies actual highlighting to everything that was temporarily highlighted. Now you can scroll through the document and locate any text that is not highlighted. This is what you need to pay attention to, determining if you need to apply a style or explicit formatting to correct the non-Lucida Sans text.
Note:
WordTips is your source for cost-effective Microsoft Word training. (Microsoft Word is the most popular word processing software in the world.) This tip (11912) applies to Microsoft Word 2007, 2010, 2013, 2016, 2019, 2021, 2024, and Word in Microsoft 365.

Learning Made Easy! Quickly teach yourself how to format, publish, and share your content using Word 2021 or Microsoft 365. With Step by Step, you set the pace, building and practicing the skills you need, just when you need them! Check out Microsoft Word Step by Step today!
When you create a document, Word is constantly checking behind the scenes to make sure that what you type makes sense. ...
Discover MoreWhen automatically capitalizing the beginning of sentences, Word relies on how you historically have done your typing. ...
Discover MoreUsing one of the page setup options in Word, you can specify that the paragraphs within the section be vertically aligned ...
Discover MoreFREE SERVICE: Get tips like this every week in WordTips, a free productivity newsletter. Enter your address and click "Subscribe."
There are currently no comments for this tip. (Be the first to leave your comment—just use the simple form above!)
Got a version of Word that uses the ribbon interface (Word 2007 or later)? This site is for you! If you use an earlier version of Word, visit our WordTips site focusing on the menu interface.
Visit the WordTips channel on YouTube

FREE SERVICE: Get tips like this every week in WordTips, a free productivity newsletter. Enter your address and click "Subscribe."
Copyright © 2026 Sharon Parq Associates, Inc.
Comments