Please Note: This article is written for users of the following Microsoft Word versions: 2007, 2010, 2013, 2016, 2019, 2021, 2024, and Word in Microsoft 365. If you are using an earlier version (Word 2003 or earlier), this tip may not work for you. For a version of this tip written specifically for earlier versions of Word, click here: Templates and Page Setup.
Other issues of WordTips have addressed how to use templates. Templates are nothing but special collections of styles, macros, toolbars, and other "goodies" that define your Word environment. You can change how a document looks by simply changing the template attached to the document and then applying styles, as necessary. You change the template attached to a document by using the Templates and Add-ins dialog box. You display this dialog box by displaying the Developer tab of the ribbon and then clicking Document Template in the Templates group. (See Figure 1.)
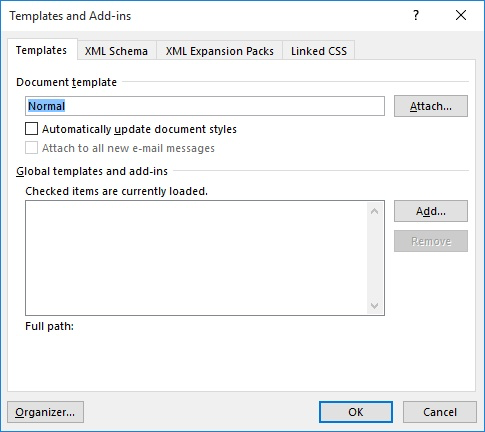
Figure 1. The Templates and Add-ins dialog box.
When you change templates on a document, not everything from the new template is applied to the document. For instance, the page setup for the template is not applied to a document. This can be frustrating, until you realize that applying it could create quite a few problems. Why? Because page setup information, within Word, is an attribute of sections. This means that you can vary page setup for each section defined in your document. When you attach a new template to a document, how is Word supposed to know which sections' page setup should be overwritten? If it applies the page setup from the template to all the sections in the document, then you could lose quite a bit of work.
There is no such problem, however, when you are first creating a document based on a template. In this case, the new document is simply a reflection of the entire template document.
With this understanding, if you still want to apply the page setup information from a template to the current document, you can do it rather easily using a macro. The following macro can serve as your guide:
Sub ApplyTemplatePageSetup()
    Dim Tmpl As String
    Dim CurDoc As Document

    Tmpl = ActiveDocument.AttachedTemplate
    Set CurDoc = ActiveDocument
    Documents.Add Template:=Tmpl

    With CurDoc.PageSetup
        .LineNumbering.Active = _
          ActiveDocument.PageSetup.LineNumbering.Active
        .Orientation = ActiveDocument.PageSetup.Orientation
        .TopMargin = ActiveDocument.PageSetup.TopMargin
        .BottomMargin = ActiveDocument.PageSetup.BottomMargin
        .LeftMargin = ActiveDocument.PageSetup.LeftMargin
        .RightMargin = ActiveDocument.PageSetup.RightMargin
        .Gutter = ActiveDocument.PageSetup.Gutter
        .HeaderDistance = ActiveDocument.PageSetup.HeaderDistance
        .FooterDistance = ActiveDocument.PageSetup.FooterDistance
        .PageWidth = ActiveDocument.PageSetup.PageWidth
        .PageHeight = ActiveDocument.PageSetup.PageHeight
        .FirstPageTray = ActiveDocument.PageSetup.FirstPageTray
        .OtherPagesTray = ActiveDocument.PageSetup.OtherPagesTray
        .OddAndEvenPagesHeaderFooter = _
          ActiveDocument.PageSetup.OddAndEvenPagesHeaderFooter
        .DifferentFirstPageHeaderFooter = _
          ActiveDocument.PageSetup.DifferentFirstPageHeaderFooter
        .SuppressEndnotes = ActiveDocument.PageSetup.SuppressEndnotes
        .MirrorMargins = ActiveDocument.PageSetup.MirrorMargins
    End With
    ActiveDocument.Close SaveChanges:=wdDoNotSaveChanges

    Set CurDoc = Nothing
End Sub
This macro determines the template in use, creates a new document based on that template, and then copies the page setup information from the new document to the original one. When completed, the new document created by the macro is deleted. You can delete any portions of the macro that you don't feel are applicable. For instance, if you only wanted to change the margins to match your template, all you need to keep in this macro are the four lines that set the margins.
Obviously, this macro overrides any page setup information in your document. (This is the original idea, right?)
Note:
WordTips is your source for cost-effective Microsoft Word training. (Microsoft Word is the most popular word processing software in the world.) This tip (11672) applies to Microsoft Word 2007, 2010, 2013, 2016, 2019, 2021, 2024, and Word in Microsoft 365. You can find a version of this tip for the older menu interface of Word here: Templates and Page Setup.

Do More in Less Time! An easy-to-understand guide to the more advanced features available in the Microsoft 365 version of Word. Enhance the quality of your documents and boost productivity in any field with this in-depth resource. Complete your Word-related tasks more efficiently as you unlock lesser-known tools and learn to quickly access the features you need. Check out Microsoft 365 Word For Professionals For Dummies today!
In many companies it is common to have standard templates accessible through the internal network. If you have templates ...
Discover MoreWord has a feature called AutoRecover that helps you when Word or Windows crashes. If your Normal template gets messed up ...
Discover MoreTemplates allow you to define and collect many formatting settings that control how your documents appear. Getting a ...
Discover MoreFREE SERVICE: Get tips like this every week in WordTips, a free productivity newsletter. Enter your address and click "Subscribe."
There are currently no comments for this tip. (Be the first to leave your comment—just use the simple form above!)
Got a version of Word that uses the ribbon interface (Word 2007 or later)? This site is for you! If you use an earlier version of Word, visit our WordTips site focusing on the menu interface.
Visit the WordTips channel on YouTube

FREE SERVICE: Get tips like this every week in WordTips, a free productivity newsletter. Enter your address and click "Subscribe."
Copyright © 2026 Sharon Parq Associates, Inc.
 Please Note:
This article is written for users of the following Microsoft Word versions: 2007, 2010, 2013, 2016, 2019, 2021, 2024, and Word in Microsoft 365. If you are using an earlier version (Word 2003 or earlier), this tip may not work for you. For a version of this tip written specifically for earlier versions of Word, click here:
Please Note:
This article is written for users of the following Microsoft Word versions: 2007, 2010, 2013, 2016, 2019, 2021, 2024, and Word in Microsoft 365. If you are using an earlier version (Word 2003 or earlier), this tip may not work for you. For a version of this tip written specifically for earlier versions of Word, click here:
Comments