Please Note: This article is written for users of the following Microsoft Word versions: 2007, 2010, 2013, 2016, 2019, 2021, 2024, and Word in Microsoft 365. If you are using an earlier version (Word 2003 or earlier), this tip may not work for you. For a version of this tip written specifically for earlier versions of Word, click here: Automatic Page Numbers across Multiple Documents.
Abulkalam has multiple documents that he wants to have continuous page numbering from one document to the other. If one document has an added or deleted page, then he has to manually change the page numbering in the following documents. He knows he could use master documents and subdocuments, but that can of worms is one he doesn't want to open. Abulkalam wonders if there is a way that he could avoid the need to manually change page numbers all the time.
There is no way to do this automatically in Word. You can try a workaround, by using fields within your documents, but that gets a bit complex. As an example, let's suppose that you have three documents, each representing chapters in a larger book. Chap1.docx has 15 pages, Chap2.docx has 11 pages, and Chap3.docx has 17 pages. Start by opening Chap1.docx and follow these general steps:
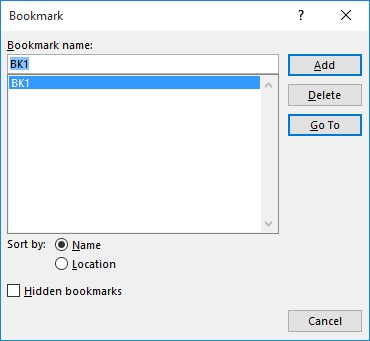
Figure 1. The Bookmark dialog box.
Now, you need to follow the same general steps in the Chap2.docx document, except that the fields you use need to be a bit more complex. Assuming that the document files are stored in the directory at C:\MyDocs\Example, you would use the following compound field in step 2:
{ ={ INCLUDETEXT "\\MyDocs\\Example\\Chap1.docx" bk \! } + { PAGE } }
What this does is use the INCLUDETEXT field to grab whatever is in the bookmark named bk from Chap1.docx (which is the total number of pages in that document) and then add the current page number to that value. Thus, numbering continues from whatever the page count was in Chap1.docx.
The field that you should use in step 7 is similarly complex:
{ ={ INCLUDETEXT "\\MyDocs\\Example\\Chap1.docx" bk \! } + { NUMPAGES } }
That's it for your Chap2.docx file; the page numbering should work just fine. In the Chap3.docx file you follow the same steps, again, using the same complex fields that you did in the Chap2.docx file. The only difference is that you reference Chap2.docx in the fields, in this manner:
{ ={ INCLUDETEXT "\\MyDocs\\Example\\Chap2.docx" bk \! } + { PAGE } }
{ ={ INCLUDETEXT "\\MyDocs\\Example\\Chap2.docx" bk \! } + { NUMPAGES } }
Note that whenever you add or delete pages from any of the documents, the page numbers within them are updated automatically when the fields are updated. (Fields are updated when you manually update them or when you choose to print or use print preview.)
There are, of course, a few "gotchas" you need to keep in mind when using this approach. First, if you delete the continuous section break (step 1) from any of the files, you will really mess things up. Second, if you move the documents to a different folder (or send them to another person who uses a different folder), then the fields won't work at all. Third, if you use multiple sections in your documents, then this approach can get quite a bit more complex as you attempt to compensate for those sections.
Another approach is to use a macro to handle the page numbering. The macro could step through all your files and set the starting page numbers to be whatever is appropriate for those files. The following is an example of such a macro:
Sub PageNumberReset()
    Dim pgNo As Long
    Dim n As Long
    Dim pathName As String
    Dim fileNames
    Dim thisFile As String
    Dim aRange As Range

    ' Specify the path to the document files
    pathName = "C:\MyDocs\Example\"
    ' Create an array holding the document file names, in sequence
    fileNames = Array("Chap1.docx", "Chap2.docx", "Chap3.docx")

    pgNo = 0
    For n = 0 To UBound(fileNames)
        thisFile = pathName & fileNames(n)
        Application.Documents.Open (thisFile)
        ActiveDocument.Sections(1).Headers(1).PageNumbers.StartingNumber = pgNo + 1
        Set aRange = ActiveDocument.Range
        aRange.Collapse Direction:=wdCollapseEnd
        aRange.Select
        pgNo = Selection.Information(wdActiveEndAdjustedPageNumber)
        Application.Documents(thisFile).Close Savechanges:=wdSaveChanges
    Next n
End Sub
To use the macro, you only have to specify the directory in which the documents are stored and put the document file names into the fileNames array. The macro sets the first document to start at page 1 and each subsequent document to start at one more than the highest page number in the previous document. If you change the number of pages in any of the documents, you'll need to rerun the macro.
If you don't want to use fields or macros to do the page numbering, you could rethink your document structure and combine all the different documents into a single document. You could also get away from Word entirely and do your page layout in desktop publishing program, such as InDesign, which is specialized to handle multiple-file page numbering.
Note:
WordTips is your source for cost-effective Microsoft Word training. (Microsoft Word is the most popular word processing software in the world.) This tip (11572) applies to Microsoft Word 2007, 2010, 2013, 2016, 2019, 2021, 2024, and Word in Microsoft 365. You can find a version of this tip for the older menu interface of Word here: Automatic Page Numbers across Multiple Documents.

Learning Made Easy! Quickly teach yourself how to format, publish, and share your content using Word 2021 or Microsoft 365. With Step by Step, you set the pace, building and practicing the skills you need, just when you need them! Check out Microsoft Word Step by Step today!
While Word has a default format for page numbers, you can design and specify how you want them to appear in your ...
Discover MoreA common pagination convention used in publishing is for new chapters (and sometimes new sections) to start on an ...
Discover MoreDo you need to add page numbers that include, as well, a chapter number? It's relatively easy to do, as described in this ...
Discover MoreFREE SERVICE: Get tips like this every week in WordTips, a free productivity newsletter. Enter your address and click "Subscribe."
There are currently no comments for this tip. (Be the first to leave your comment—just use the simple form above!)
Got a version of Word that uses the ribbon interface (Word 2007 or later)? This site is for you! If you use an earlier version of Word, visit our WordTips site focusing on the menu interface.
Visit the WordTips channel on YouTube

FREE SERVICE: Get tips like this every week in WordTips, a free productivity newsletter. Enter your address and click "Subscribe."
Copyright © 2026 Sharon Parq Associates, Inc.
 Please Note:
This article is written for users of the following Microsoft Word versions: 2007, 2010, 2013, 2016, 2019, 2021, 2024, and Word in Microsoft 365. If you are using an earlier version (Word 2003 or earlier), this tip may not work for you. For a version of this tip written specifically for earlier versions of Word, click here:
Please Note:
This article is written for users of the following Microsoft Word versions: 2007, 2010, 2013, 2016, 2019, 2021, 2024, and Word in Microsoft 365. If you are using an earlier version (Word 2003 or earlier), this tip may not work for you. For a version of this tip written specifically for earlier versions of Word, click here:
Comments