Written by Allen Wyatt (last updated May 20, 2023)
This tip applies to Word 2007, 2010, 2013, 2016, 2019, 2021, and Word in Microsoft 365
An easy way to select a sentence in Word is to hold down the Ctrl key as you click on a word. This selects the entire sentence in which the word is contained. What if you want to step through your document, once sentence at a time, though? Word doesn't provide a built-in way to do that, unlike some other word processors.
You can create this capability yourself through the use of macros. The following macro, StepRightSentence, provides the capability to step through a document one sentence at a time toward the right. You can assign the macro either to a shortcut key or to a toolbar button.
Sub StepRightSentence()
    If Selection.Type <> wdNoSelection Then
        Selection.MoveRight Unit:=wdCharacter, Count:=1, Extend:=wdMove
    End If
    Selection.Sentences(1).Next(Unit:=wdSentence, Count:=1).Select
End Sub
If you want to use Word to step through a document toward the left (beginning of the document), you can use the following macro, StepLeftSentence:
Sub StepLeftSentence()
    If Selection.Type <> wdNoSelection Then
        Selection.MoveLeft Unit:=wdCharacter, Count:=1, Extend:=wdMove
    End If
    Selection.Sentences(1).Previous(Unit:=wdSentence, Count:=1).Select
End Sub
Regardless of which of these macros you use, the result is that you step through your document, one sentence at a time. After running the macro, the next sentence—left or right—is selected. If you instead want to only jump to the beginning of the sentence, without selecting it, add the following line as the final line in the macro, just before the End Sub statement:
Selection.Collapse Direction:=wdCollapseStart
If you prefer to not use macros, you can also move through sentences by customizing Word to take advantage of some "hidden" commands. Follow these steps:
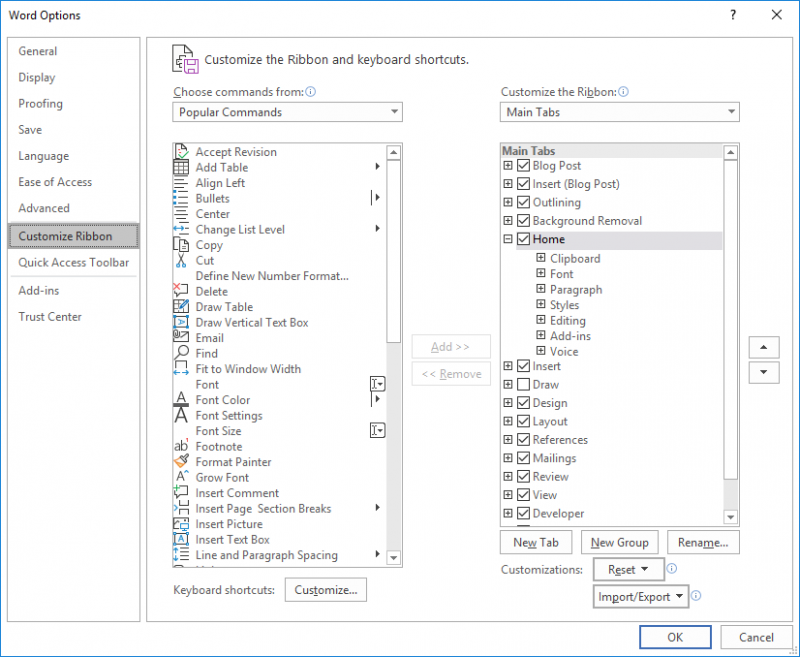
Figure 1. The customize ribbon area of the Word Options dialog box.
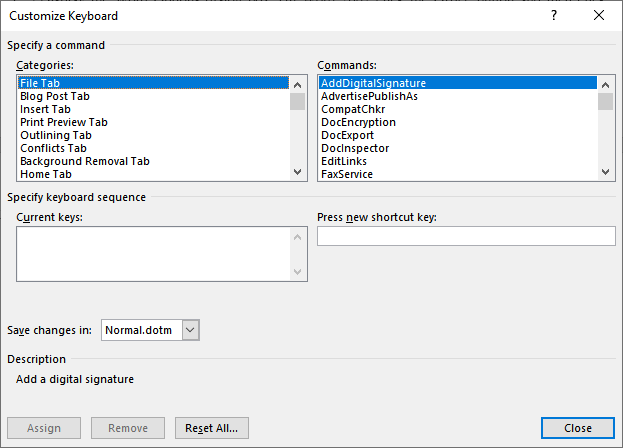
Figure 2. The Customize Keyboard dialog box.
After performing this series of steps, you can step backwards through your document, one sentence at a time, simply by pressing Alt+Left Arrow. You can also repeat the steps and assign the following
| Action | Commands List | Shortcut Key | ||
|---|---|---|---|---|
| Step right by sentences | SentRight | Alt+Right Arrow | ||
| Step left and select | SentLeftExtend | Shift+Alt+Left Arrow | ||
| Step right and select | SentRightExtend | Shift+Alt+Right Arrow |
Most Word users will find these keyboard commands a welcome addition to the normal editing keys. You should know, however, that some of these suggested shortcut keys are already in use by Word. For instance, the Shift+Alt+Left Arrow combination is used to promote a heading level in an outline. However, if you can live without that use of the keys, then go for it. (Personally, I think this reassigned use makes much more sense.) If you would rather use a different key combination, you can do so by using any one you would like in step 7 above.
Note:
WordTips is your source for cost-effective Microsoft Word training. (Microsoft Word is the most popular word processing software in the world.) This tip (10275) applies to Microsoft Word 2007, 2010, 2013, 2016, 2019, 2021, and Word in Microsoft 365.

The First and Last Word on Word! Bestselling For Dummies author Dan Gookin puts his usual fun and friendly candor back to work to show you how to navigate Word 2019. Spend more time working and less time trying to figure it all out! Check out Word 2019 For Dummies today!
If you use justified paragraphs, you know that if you press Shift+Enter, it can lead to some odd spacing between words ...
Discover MoreThe first-person, singular pronoun "I" should always be capitalized, unless you are exercising poetic license. Word may ...
Discover MoreThere are several ways that Word can handle formatting when you paste information in a document. This tip shows you how ...
Discover MoreFREE SERVICE: Get tips like this every week in WordTips, a free productivity newsletter. Enter your address and click "Subscribe."
There are currently no comments for this tip. (Be the first to leave your comment—just use the simple form above!)
Got a version of Word that uses the ribbon interface (Word 2007 or later)? This site is for you! If you use an earlier version of Word, visit our WordTips site focusing on the menu interface.
Visit the WordTips channel on YouTube

FREE SERVICE: Get tips like this every week in WordTips, a free productivity newsletter. Enter your address and click "Subscribe."
Copyright © 2026 Sharon Parq Associates, Inc.
Comments