Please Note: This article is written for users of the following Microsoft Word versions: 2007, 2010, 2013, and 2016. If you are using an earlier version (Word 2003 or earlier), this tip may not work for you. For a version of this tip written specifically for earlier versions of Word, click here: Spell Checking Forms.
Many people use Word to create forms that are then used by others to input information. I am not talking about your average, run-of-the-mill forms which are printed out and reproduced on a copier. I am talking about using forms with Word's special form fields that are used to collect specific data without allowing the user to modify the text surrounding the input fields.
Since these types of forms are protected, by design, the user cannot run certain Word tools on the form and cannot do other things, such as run macros. This is beneficial in many instances, but can be a drawback if you have special needs. One such common need is to run the spell checker on the form after the user inputs their information. However, this cannot be done, again because tools such as the spell checker are disabled.
Truth be told, however, and you will find that when you insert a form field, Word inserts it with the Language attribute set to "no proofing." This means that even if you could run the spell checker, Word would ignore the information typed into the form fields.
While this may sound a bit hopeless, there is a way around it. You can run the spell checker on your form by using a macro. The simplest way to do this is with the following macro:
Sub SCForm()
   ActiveDocument.Unprotect
   Selection.WholeStory
   Selection.LanguageID = wdEnglishUS
   ActiveDocument.CheckSpelling
   ActiveDocument.Protect Type:=wdAllowOnlyFormFields, NoReset:=True
End Sub
Note that the macro sets the Language attribute for the entire document to US English. If you are creating forms in some other language, you should make sure that you change the macro so the appropriate language is selected.
When you are making the form, define a style for the input fields. The key attribute of the input field style is that you have to explicitly disable the do not check spelling attribute by following these steps:
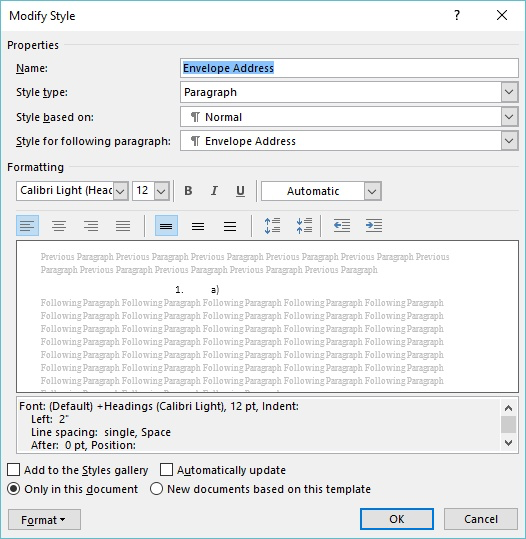
Figure 1. The Modify Style dialog box.
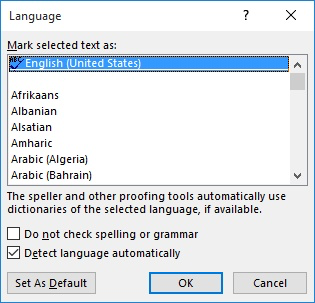
Figure 2. The Language dialog box.
There is a drawback to this macro which may not make it acceptable for all uses. When run, the macro spell checks everything in the document, not just the contents of the form fields. This is only a drawback if the form has lots of words which the spell checker may consider misspelled, such as highly technical prose. If you find yourself in such a situation, you will need to create a more complex macro that actually searches for and steps through the fields in the form or you could arrange to add the word to the dictionary file.
There are two things to remember when using this macro with a form:
Note:
WordTips is your source for cost-effective Microsoft Word training. (Microsoft Word is the most popular word processing software in the world.) This tip (9445) applies to Microsoft Word 2007, 2010, 2013, and 2016. You can find a version of this tip for the older menu interface of Word here: Spell Checking Forms.

Discover the Power of Microsoft Office This beginner-friendly guide reveals the expert tips and strategies you need to skyrocket your productivity and use Office 365 like a pro. Mastering software like Word, Excel, and PowerPoint is essential to be more efficient and advance your career. Simple lessons guide you through every step, providing the knowledge you need to get started. Check out Microsoft Office 365 For Beginners today!
When you lock a document as a form, then Word limits what you can do with that document. That includes not being able to ...
Discover MoreIn order to use a form in Word, it must be protected. This means that you cannot make any changes to the form, even if ...
Discover MoreWord allows you to protect documents that are intended to be used as forms. If you want to convert the form responses ...
Discover MoreFREE SERVICE: Get tips like this every week in WordTips, a free productivity newsletter. Enter your address and click "Subscribe."
2018-03-21 15:34:56
Denise
This worked great for spell checking my text form fields. However, now my check boxes and drop-down lists aren't working.
Is there a fix for those issues? Thanks
Got a version of Word that uses the ribbon interface (Word 2007 or later)? This site is for you! If you use an earlier version of Word, visit our WordTips site focusing on the menu interface.
Visit the WordTips channel on YouTube

FREE SERVICE: Get tips like this every week in WordTips, a free productivity newsletter. Enter your address and click "Subscribe."
Copyright © 2026 Sharon Parq Associates, Inc.
 Please Note:
This article is written for users of the following Microsoft Word versions: 2007, 2010, 2013, and 2016. If you are using an earlier version (Word 2003 or earlier), this tip may not work for you. For a version of this tip written specifically for earlier versions of Word, click here:
Please Note:
This article is written for users of the following Microsoft Word versions: 2007, 2010, 2013, and 2016. If you are using an earlier version (Word 2003 or earlier), this tip may not work for you. For a version of this tip written specifically for earlier versions of Word, click here:
Comments