Please Note: This article is written for users of the following Microsoft Word versions: 2007, 2010, 2013, 2016, 2019, and 2021. If you are using an earlier version (Word 2003 or earlier), this tip may not work for you. For a version of this tip written specifically for earlier versions of Word, click here: Missing Left Border.
John wrote about a problem he was having with printing his graphics. It seems that the left border of his graphics is always missing, and he can't figure out how to make it print.
The first thing to do is ensure that you really have a left border applied to the graphic. This may entail determining where the border actually exists. Right-click the graphic then choose Format Picture from the resulting Context menu. Use the controls that appear in the dialog box (Word 2007 and 2010) or in the task pane (Word 2013 or later versions) to determine if the Line setting is on for the graphic. The Line setting can be either on or off, and if it is on, it will be applied to all four sides of the graphic.
Another place the border could be set is to the paragraph itself, if the graphic is inserted "inline" with the text. Put the insertion point just to the left or right of the graphic, but in the same paragraph. Display the Home tab of the ribbon, click the down-arrow next to the Border tool (in the Paragraph group), then choose Borders and Shading. Word displays the Borders and Shading dialog box. (See Figure 1.)
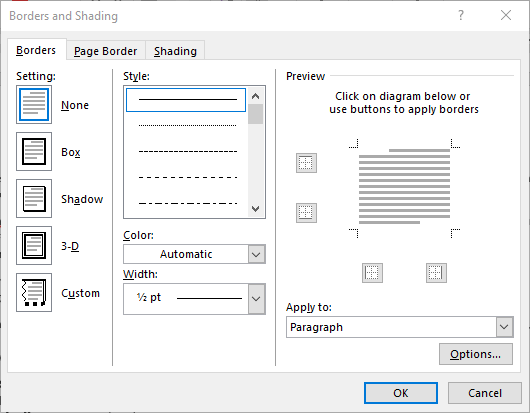
Figure 1. The Borders tab of the Borders and Shading dialog box.
If the border appears in preview area, make sure that it includes a left-side border.
A third place that the border could be applied is to a table cell, if the graphic was placed within a table. Select the table cell, display the Design tab of the ribbon, click the Borders tool, then choose Borders and Shading. Word displays the Borders and Shading dialog box. (See Figure 2.)
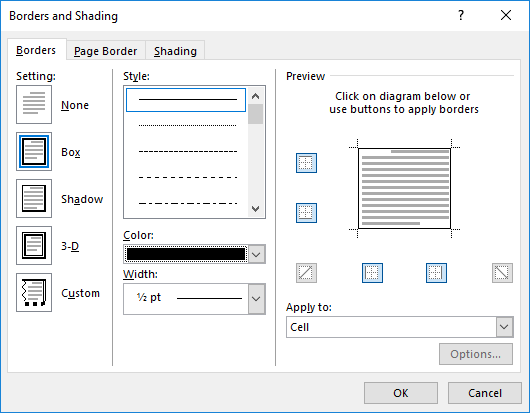
Figure 2. The Borders tab of the Borders and Shading dialog box.
Make sure Cell is selected from the Apply To drop-down list. Then make sure that the cell is formatted to include a left border.
If the desired border is actually in place and it still doesn't print, there are really only two possibilities. First, the left border may be located so close to the edge of the paper that the printer cannot print it. This pops up regularly if the border is applied to the paragraph as a whole, and the page has very narrow margins.
The second possibility is that there is a problem with your printer driver. To verify if this is the problem, take your document to a different computer—one that uses a different make and model of printer—and print it there. If the left border prints on that system, then you have a pretty good indication that it is a printer driver problem. Check the printer manufacturer's Web site for the latest and greatest printer driver.
WordTips is your source for cost-effective Microsoft Word training. (Microsoft Word is the most popular word processing software in the world.) This tip (8230) applies to Microsoft Word 2007, 2010, 2013, 2016, 2019, and 2021. You can find a version of this tip for the older menu interface of Word here: Missing Left Border.

Discover the Power of Microsoft Office This beginner-friendly guide reveals the expert tips and strategies you need to skyrocket your productivity and use Office 365 like a pro. Mastering software like Word, Excel, and PowerPoint is essential to be more efficient and advance your career. Simple lessons guide you through every step, providing the knowledge you need to get started. Check out Microsoft Office 365 For Beginners today!
The default font used for envelopes is called Callibri. What do you do if you cannot print that font on your printer? ...
Discover MoreIf you want to force Word to print some of its colors in black and white, you may be out of luck. One bright spot, as ...
Discover MoreYou go to print out your document, and all of a sudden notice that there was a blank page that printed at the end. This ...
Discover MoreFREE SERVICE: Get tips like this every week in WordTips, a free productivity newsletter. Enter your address and click "Subscribe."
2019-05-25 19:03:39
Allan
All of the above options work, but here is a simpler one--W7.
Rt clk in the image>Clk Format in the menu along the top (Not Format Picture in the drop down menu)>Clk Picture Border>Select an option
Got a version of Word that uses the ribbon interface (Word 2007 or later)? This site is for you! If you use an earlier version of Word, visit our WordTips site focusing on the menu interface.
Visit the WordTips channel on YouTube

FREE SERVICE: Get tips like this every week in WordTips, a free productivity newsletter. Enter your address and click "Subscribe."
Copyright © 2026 Sharon Parq Associates, Inc.
 Please Note:
This article is written for users of the following Microsoft Word versions: 2007, 2010, 2013, 2016, 2019, and 2021. If you are using an earlier version (Word 2003 or earlier), this tip may not work for you. For a version of this tip written specifically for earlier versions of Word, click here:
Please Note:
This article is written for users of the following Microsoft Word versions: 2007, 2010, 2013, 2016, 2019, and 2021. If you are using an earlier version (Word 2003 or earlier), this tip may not work for you. For a version of this tip written specifically for earlier versions of Word, click here:
Comments