Please Note: This article is written for users of the following Microsoft Word versions: 2007, 2010, 2013, 2016, 2019, and 2021. If you are using an earlier version (Word 2003 or earlier), this tip may not work for you. For a version of this tip written specifically for earlier versions of Word, click here: Expanding a Custom Dictionary.
Leonard has received a message that his custom dictionary is full. He wonders if he can expand it or find a way to use the CUSTOM2.DIC file that his copy of Word doesn't seem to recognize.
There's a good chance that the custom dictionary isn't really full; Word sometimes gives this message in error. Word MVP Suzanne Barnhill discusses this error a bit at her website and provides a link to the Microsoft Knowledge Base:
http://wordfaqs.mvps.org/MasterSpellCheck.htm#NotAdded
There is no real way to expand a dictionary if it really is full, but you can instruct Word to recognize and use other dictionaries on your system. Follow these steps:
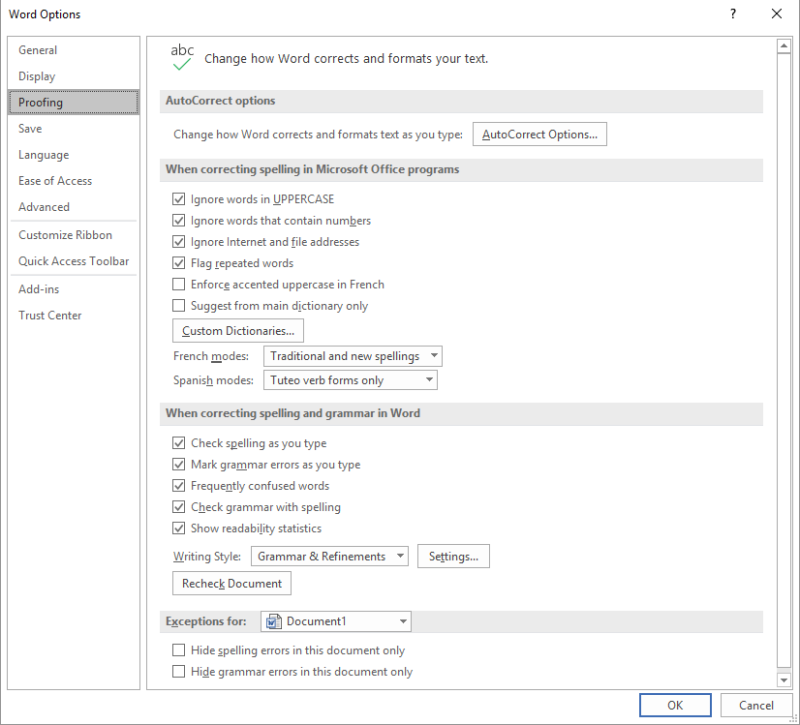
Figure 1. The Proofing options of the Word Options dialog box.
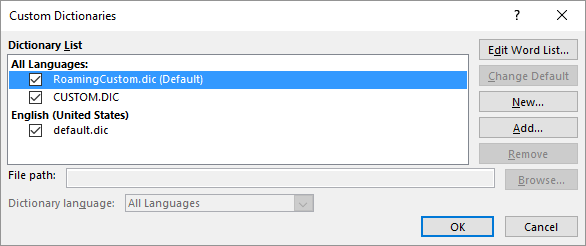
Figure 2. The Custom Dictionaries dialog box.
Word will now use the dictionary you specified in step 7 as the dictionary for its spell checking tasks.
WordTips is your source for cost-effective Microsoft Word training. (Microsoft Word is the most popular word processing software in the world.) This tip (6092) applies to Microsoft Word 2007, 2010, 2013, 2016, 2019, and 2021. You can find a version of this tip for the older menu interface of Word here: Expanding a Custom Dictionary.

Discover the Power of Microsoft Office This beginner-friendly guide reveals the expert tips and strategies you need to skyrocket your productivity and use Office 365 like a pro. Mastering software like Word, Excel, and PowerPoint is essential to be more efficient and advance your career. Simple lessons guide you through every step, providing the knowledge you need to get started. Check out Microsoft Office 365 For Beginners today!
Need to make sure that Word includes abbreviations when you check a document's spelling? Here's how to make sure that ...
Discover MoreIf you prefer the older spelling and grammar checking process used in Word, then you will find this tip helpful. It only ...
Discover MoreHaving a hard time doing a spell check on just the portion of the document you've selected? This is apparently due to a ...
Discover MoreFREE SERVICE: Get tips like this every week in WordTips, a free productivity newsletter. Enter your address and click "Subscribe."
There are currently no comments for this tip. (Be the first to leave your comment—just use the simple form above!)
Got a version of Word that uses the ribbon interface (Word 2007 or later)? This site is for you! If you use an earlier version of Word, visit our WordTips site focusing on the menu interface.
Visit the WordTips channel on YouTube

FREE SERVICE: Get tips like this every week in WordTips, a free productivity newsletter. Enter your address and click "Subscribe."
Copyright © 2026 Sharon Parq Associates, Inc.
 Please Note:
This article is written for users of the following Microsoft Word versions: 2007, 2010, 2013, 2016, 2019, and 2021. If you are using an earlier version (Word 2003 or earlier), this tip may not work for you. For a version of this tip written specifically for earlier versions of Word, click here:
Please Note:
This article is written for users of the following Microsoft Word versions: 2007, 2010, 2013, 2016, 2019, and 2021. If you are using an earlier version (Word 2003 or earlier), this tip may not work for you. For a version of this tip written specifically for earlier versions of Word, click here:
Comments