Written by Allen Wyatt (last updated April 1, 2023)
This tip applies to Word 2007, 2010, 2013, 2016, 2019, 2021, and Word in Microsoft 365
You know you can use the Field Codes check box on the View tab of the Options dialog box to control whether or not field codes are displayed in your document. You may even know that you can use Alt+F9 to switch between field codes and their results. However, what if you are mouse-bound, and want to accomplish the same task quickly without resorting to the keyboard?
You can add a tool to the Quick Access Toolbar that toggles between field codes and field results. To add such a tool, follow these steps:
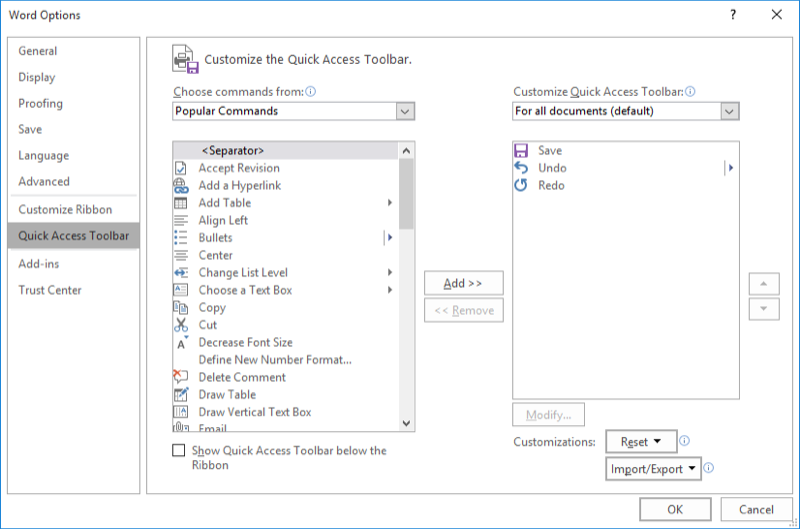
Figure 1. The Quick Access Toolbar area of the Word Options dialog box.
Now, click on the new icon to see your field coding. Click again, and the results of the field codes are instead displayed.
WordTips is your source for cost-effective Microsoft Word training. (Microsoft Word is the most popular word processing software in the world.) This tip (6080) applies to Microsoft Word 2007, 2010, 2013, 2016, 2019, 2021, and Word in Microsoft 365.

Create Custom Apps with VBA! Discover how to extend the capabilities of Office 365 applications with VBA programming. Written in clear terms and understandable language, the book includes systematic tutorials and contains both intermediate and advanced content for experienced VB developers. Designed to be comprehensive, the book addresses not just one Office application, but the entire Office suite. Check out Mastering VBA for Microsoft Office 365 today!
One of the things that Word keeps track of is how long, in minutes, you've been editing your current document. This ...
Discover MoreWho saved the document the last time? Word keeps track of that information, and you can insert the person?s name into the ...
Discover MoreIf you put a field into a text box, you might be surprised to find that it doesn't update when you try to update all your ...
Discover MoreFREE SERVICE: Get tips like this every week in WordTips, a free productivity newsletter. Enter your address and click "Subscribe."
2023-04-21 09:34:25
Allen
Sunny,
The Alt+F9 shortcut does still work in Word 365. I just tested it in Word 365 version 2303 build 16.0.16227.20202, and it toggles between the display of fields codes and field results, just like it always has.
Of course, the keyboard shortcut is not the focus of this tip. This tip talks about adding a toggling tool to the QAT.
-Allen
2023-04-21 04:24:59
Sunny Jamshedji
This does not display Field Codes in Word 365 like it did using Alt+F9 in older versions of the Word format. If you save files with .doc extension then you can use Alt+F9 to View Field Codes as you have outlined, but then you lose new version features. If you save them as .docx, then you can't use Alt+F9. I have an old document that has been moved and since Word does not use relative paths like it used to decades ago, if you move a document with image links to a different folder, you lose all the file references. I am trying to see which picture I was referring to by the filename, but can't see the filename, because I can't View Field Codes in .docx. You could see/edit these with .doc and View Field Codes, but not anymore. A lot of Catch 22s! Thanks Microsoft!
Got a version of Word that uses the ribbon interface (Word 2007 or later)? This site is for you! If you use an earlier version of Word, visit our WordTips site focusing on the menu interface.
Visit the WordTips channel on YouTube

FREE SERVICE: Get tips like this every week in WordTips, a free productivity newsletter. Enter your address and click "Subscribe."
Copyright © 2026 Sharon Parq Associates, Inc.
Comments