Written by Allen Wyatt (last updated October 26, 2024)
This tip applies to Word 2007, 2010, 2013, 2016, 2019, 2021, and Word in Microsoft 365
Martin recently received, from his company's legal team, a list of phrases that they don't like to see in documents the company creates. For instance, in most cases the phrase "solution will" should be, instead, "solution is intended to." Martin wonders if there is a way to have this new list of phrases checked and flagged automatically in Word, perhaps through the grammar checker.
The grammar checker won't do it, unfortunately. There simply is no way, in Word, to add your own phrases so that the grammar checker can, well, "check" them.
It sounds, though, like you may need two solutions—one that will kick into play as you are composing new documents and another that can be used to check existing documents. The "as you compose" solution is actually quite easy—all you need to do is to use AutoCorrect to automatically change the offending phrases for you.
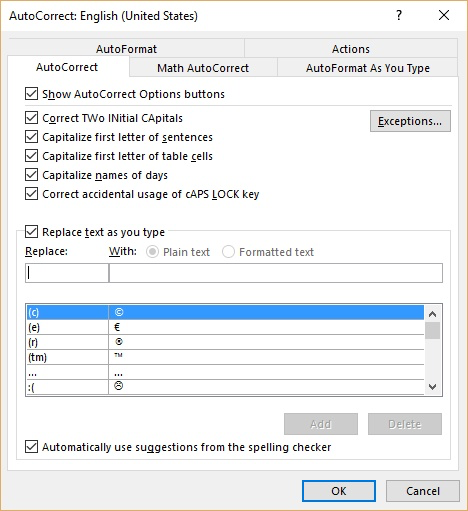
Figure 1. The AutoCorrect dialog box.
Now, as you type in your document, whenever an offending phrase is entered and the space or punctuation mark after that phrase is pressed, Word should automatically replace the phrase with the preferred phrase.
Of course, the AutoCorrect approach won't help with existing documents, nor will it help if blocks of text are copied from other documents and pasted into the current document. In those cases, you need a different approach. The simplest is to use the Find and Replace capabilities of Word to look for an offending phrase and make the determination if you want to replace it with the preferred phrase or not. This can work great if you have only a few phrases you need to correct.
If your list of phrases is considerably longer, you may want to consider using a macro to mark infractions. Here's a simple approach.
Sub ReplacePhrases()
    Dim sBadPhrase(19) As String
    Dim sGoodPhrase(19) As String
    Dim iCount As Integer
    Dim J As Integer

    iCount = 6   ' Set to number of phrases

    sBadPhrase(1) = "first offensive phrase"
    sBadPhrase(2) = "second offensive phrase"
    sBadPhrase(3) = "third offensive phrase"
    sBadPhrase(4) = "fourth offensive phrase"
    sBadPhrase(5) = "fifth offensive phrase"
    sBadPhrase(6) = "sixth offensive phrase"

    sGoodPhrase(1) = "first preferred phrase"
    sGoodPhrase(2) = "second preferred phrase"
    sGoodPhrase(3) = "third preferred phrase"
    sGoodPhrase(4) = "fourth preferred phrase"
    sGoodPhrase(5) = "fifth preferred phrase"
    sGoodPhrase(6) = "sixth preferred phrase"

    For J = 1 to iCount
        With Selection.Find
            .ClearFormatting
            .Replacement.ClearFormatting
            .Text = sBadPhrase(J)
            .Replacement.Text = sGoodPhrase(J)
            .Forward = True
            .Format = False
            .MatchWholeWord = False
            .MatchCase = False
            .MatchWildcards = False
            .Wrap = wdFindContinue
        End With
        Selection.Find.Execute Replace:=wdReplaceAll
    Next J
End Sub
This macro does a mass replacement of the values stored in the sBadPhrase array with the phrases stored in the sGoodPhrase array. All you need to do is to set up the arrays with your phrases and change iCount so that it is equal to the number of phrases you have defined. (If you go above 19 phrases, you'll also need to change the declaration of the two arrays so that they are large enough.)
Note:
WordTips is your source for cost-effective Microsoft Word training. (Microsoft Word is the most popular word processing software in the world.) This tip (5140) applies to Microsoft Word 2007, 2010, 2013, 2016, 2019, 2021, and Word in Microsoft 365.

Discover the Power of Microsoft Office This beginner-friendly guide reveals the expert tips and strategies you need to skyrocket your productivity and use Office 365 like a pro. Mastering software like Word, Excel, and PowerPoint is essential to be more efficient and advance your career. Simple lessons guide you through every step, providing the knowledge you need to get started. Check out Microsoft Office 365 For Beginners today!
When creating tracking documents in Word, you may need to come up with a series of dates in the document. You can type ...
Discover MoreSome people really like the ability to drag and drop text as they edit. What do you do if the ability is only available ...
Discover MoreWord has a feature that allows you to compare two documents side-by-side. What if you actually want to compare the ...
Discover MoreFREE SERVICE: Get tips like this every week in WordTips, a free productivity newsletter. Enter your address and click "Subscribe."
There are currently no comments for this tip. (Be the first to leave your comment—just use the simple form above!)
Got a version of Word that uses the ribbon interface (Word 2007 or later)? This site is for you! If you use an earlier version of Word, visit our WordTips site focusing on the menu interface.
Visit the WordTips channel on YouTube

FREE SERVICE: Get tips like this every week in WordTips, a free productivity newsletter. Enter your address and click "Subscribe."
Copyright © 2026 Sharon Parq Associates, Inc.
Comments