Written by Allen Wyatt (last updated August 31, 2024)
This tip applies to Word 2007, 2010, 2013, 2016, 2019, 2021, and Word in Microsoft 365
Denis frequently uses tables in his documents. In those tables, he has a need to add a series of sequential numbers to the cells in the first column. Denis wonders if there is a way to pick a starting number in a cell and then have Word add the sequential numbers for all the cells under that starting number.
There are a couple of ways you could go about this. One way is to use Word's built-in numbering, in this manner:
If you want to modify the starting number for the cells, right-click the number in the first cell and then choose Set Numbering Value from the resulting Context menu. Word displays the Set Numbering Value dialog box. (See Figure 1.)
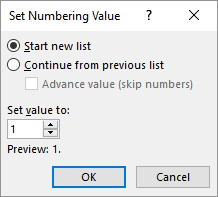
Figure 1. The Set Numbering Value dialog box.
Enter the value you want to start with, and when you click OK, Word updates the numbers in the cells. You'll also note that if you insert any rows in the middle of your numbered sequence, Word automatically adds a number to that inserted row.
Noting this behavior, you might appreciate a simple variation on the above process that works well when you are inserting a brand-new table:
Another powerful way to add your numbering is to use the SEQ field. Follow these general steps:
{ SEQ table1 \r4 }
Finally, if you prefer to use a macro to insert numbers in a sequence of cells, you could use one similar to this:
Sub AddNumbersToTable()
    Dim RowNum As Long
    Dim ColNum As Long
    Dim iStartNum As Integer
    Dim J As Integer

    If Selection.Information(wdWithInTable) Then
        RowNum = Selection.Cells(1).RowIndex
        ColNum = Selection.Cells(1).ColumnIndex

        iStartNum = Val(Selection.Cells(1).Range.Text)
        If iStartNum <> 0 Then
            iStartNum = iStartNum + 1

            For J = RowNum + 1 To ActiveDocument.Tables(1).Rows.Count
                ActiveDocument.Tables(1).Cell(J, ColNum).Range.Text = iStartNum
                iStartNum = iStartNum + 1
            Next
        Else
            MsgBox "Cell doesn't contain a non-zero starting number."
            Exit Sub
        End If
    Else
        MsgBox "Not in table"
    End If
End Sub
To use the macro, just put a starting sequence value into a cell of the table and leave the insertion point in that cell. When you then run the macro, all the cells under that starting cell are filled with sequential values. (Anything previously in those cells is deleted.)
Note:
WordTips is your source for cost-effective Microsoft Word training. (Microsoft Word is the most popular word processing software in the world.) This tip (89) applies to Microsoft Word 2007, 2010, 2013, 2016, 2019, 2021, and Word in Microsoft 365.

Discover the Power of Microsoft Office This beginner-friendly guide reveals the expert tips and strategies you need to skyrocket your productivity and use Office 365 like a pro. Mastering software like Word, Excel, and PowerPoint is essential to be more efficient and advance your career. Simple lessons guide you through every step, providing the knowledge you need to get started. Check out Microsoft Office 365 For Beginners today!
When creating a table, you can turn the orientation of the text, within a cell, by ninety degrees in either direction ...
Discover MoreIf you have problems getting the printout of a table to look correct, it can be frustrating. This tip provides a few ...
Discover MoreWord allows you to insert simple formulas, using fields, in table cells. If you want to see these formulas in their ...
Discover MoreFREE SERVICE: Get tips like this every week in WordTips, a free productivity newsletter. Enter your address and click "Subscribe."
2025-11-25 18:36:39
Paul Dalton
Allen -
I just tried this macro on a table I created and it didn't seemed to work at all.
I created the table by converting many short paragraphs of text to a one-column table, then I inserted a new column to the left of that one, making this a 2 column table.
Then I copied this macro text, opened the Macro Editor, typed the same name for this new Macro, clicked on Create, then pasted your macro text (& deleted the extra "Sub" line and "End Sub" the Macro Editor had inserted).
Then I returned to the table, typed the number 1 into the first cell of the new (otherwise empty) column (leaving my cursor there), then ran this macro. Nothing happened.
What did I do wrong?
FWIW, my copy of Word says it is "Microsoft® Word for Microsoft 365 MSO (Version 2510 Build 16.0.19328.20244) 64-bit"'.
2024-09-03 08:56:07
DougB
Does not work if the current table is not Tables(1).
Got a version of Word that uses the ribbon interface (Word 2007 or later)? This site is for you! If you use an earlier version of Word, visit our WordTips site focusing on the menu interface.
Visit the WordTips channel on YouTube

FREE SERVICE: Get tips like this every week in WordTips, a free productivity newsletter. Enter your address and click "Subscribe."
Copyright © 2026 Sharon Parq Associates, Inc.
Comments