Written by Allen Wyatt (last updated December 25, 2023)
This tip applies to Word 2007, 2010, 2013, 2016, 2019, and 2021
Shiva has a document that has several tables. Periodically he needs to hide certain rows in a table, so they do not appear on the printout. He wonders if there is a way to hide a row so that it won't print.
There are generally three things that people try in order to hide table rows: changing font color, changing row size, and hiding text. Of these three, you'll find that the last one provides the best results. Let me go over the other two quickly, however.
You can select a row in a table and change the font color to white. This effectively makes your text disappear on printouts, as white-on-white is not visible. The drawback to this approach (and it is a major one in my book) is that the row itself is not hidden; it only affects the text in the row.
The second approach is to change row size to some very, very small value. If you use the tools on the ribbon to implement this approach, you can set the height of any selected row to 0.1 inches. This is, indeed, small, but it is not small enough—the row is still visible on printouts. If you use a macro you can set the row height to even smaller values, but that still won't make the row disappear.
Finally, you can use hidden text to actually hide a row. In order to do this, you'll want to make sure that you have non-printing characters displayed in your document. (That is the fastest way to understand what is going on.) You do that by displaying the Home tab of the ribbon and clicking the Show/Hide tool—it looks like a backwards P. When displayed, you'll be able to see the non-printing characters in your table and in the entire document. (See Figure 1.)
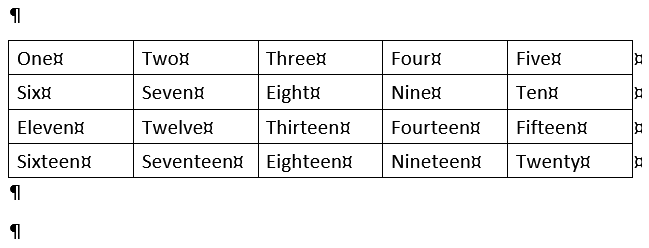
Figure 1. Non-printing characters displayed in a document.
Now you should select the row you want to hide. Simply move the mouse pointer into the margin at the left of the row. If it is positioned correctly, the mouse pointer will be pointing up and to the right. Click once, and the row is selected. (See Figure 2.)
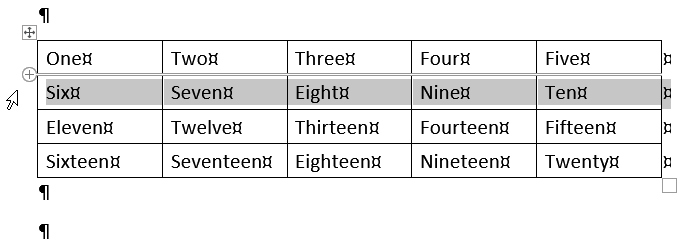
Figure 2. A row is selected.
The important thing to note here is that the non-printing characters are selected, as well, particularly the end-of-row marker at the very right side of the row. (This is why turning on the display of non-printing characters is so helpful—it allows you to see that you have, indeed, selected them.) If you don't make sure the end-of-row marker is selected, then you won't be able to truly hide the entire row.
Now you should press Ctrl+D to display the Font tab of the Font dialog box. (See Figure 3.)
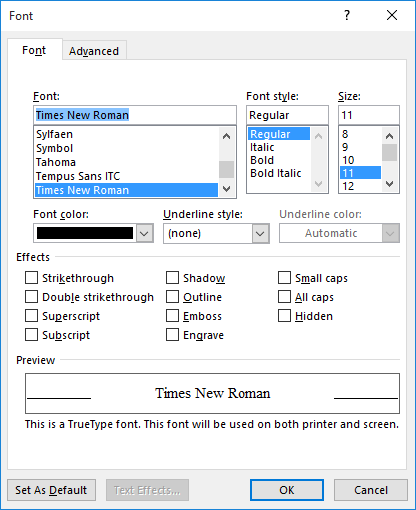
Figure 3. The Font tab of the Font dialog box.
You can ignore all the controls in the dialog box except one—the Hidden check box. (The check box isn't hidden; it is named "Hidden.") You want to click this so that a check mark appears in the box. This turns on the Hidden attribute for whatever you have selected in the document. With the check box selected, click OK to dismiss the Font dialog box. You should notice a rather subtle change in your document. (See Figure 4.)
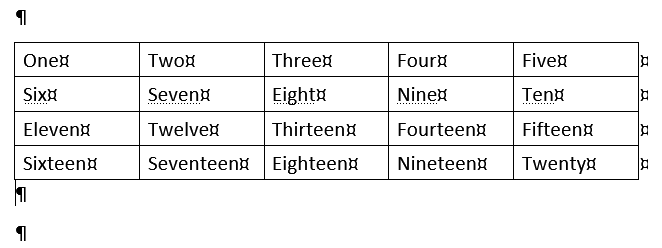
Figure 4. Hidden text is marked in the document (see the second row).
Note that all of the text in the row you selected now has faint dotted lines under it. This is Word's tell-tale sign that the text has the Hidden attribute turned on. You can see it on the screen because you are displaying non-printing characters. If you turn off the non-printing characters (again, click Show/Hide on the Home tab of the ribbon), it is very possible that the row will disappear entirely.
At this point, there is a very important distinction to understand—the display and printing of hidden text is handled independently of each other in Word. In other words, you can print (or not print) the hidden text regardless of whether it is displayed on the screen. To exercise your control, display the Word Options dialog box. (In Word 2007 click the Office button and then click Word Options. In Word 2010 or a later version, display the File tab of the ribbon and then click Options.) At the left side of the dialog box click Display. (See Figure 5.)

Figure 5. The Display options of the Word Options dialog box.
Note that there are two check boxes of interest here—Hidden Text and Print Hidden Text. The first check box controls the display of hidden text and the second controls the printing of hidden text. Most people find it helpful to turn on the Hidden Text control and clear the Print Hidden Text control. This allows you to see the hidden text on the screen (again, with the faint dotted lines under it) and yet not have the hidden text appear on your printouts (as Shiva desires).
WordTips is your source for cost-effective Microsoft Word training. (Microsoft Word is the most popular word processing software in the world.) This tip (13679) applies to Microsoft Word 2007, 2010, 2013, 2016, 2019, and 2021.

Learning Made Easy! Quickly teach yourself how to format, publish, and share your content using Word 2021 or Microsoft 365. With Step by Step, you set the pace, building and practicing the skills you need, just when you need them! Check out Microsoft Word Step by Step today!
If you need to quickly display the Column tab of the Table Properties dialog box, here are some handy tricks you can use. ...
Discover MoreYou can use fields to calculate a sum of values in a table column. Here are two ways you can modify what the fields ...
Discover MoreWhen pasting text from another document or from the Web you can have unexpected characters sometimes show up. Many of ...
Discover MoreFREE SERVICE: Get tips like this every week in WordTips, a free productivity newsletter. Enter your address and click "Subscribe."
2023-11-03 22:49:22
Erik Eilertsen
Even easier to hide table contents is to save a second version of the document with an appropriate indicator in the title.
Then, in the copy, delete those elements of the table you want to hide/remove.
Print the now-amended copy of the document.
Very much quicker and simpler because you have the original as a MASTER copy and can repeat the process as often as you need to.
2019-09-29 21:55:01
Jim Strzoda
Regarding the problem that Shankar Saran is experiencing: is he using the Draw commands in MS Word? I have been creating engineering drawings for years with that method and have not had any problems converting doc or docx drawings to pdf.
2019-09-28 08:51:42
Shankar Saran
I have made 317 engineering drawings for my technical book in MS Word for publishing. The publishers are now telling to convert all text to pdf for printing. When doing so, all the arrow heads made in 2 elements are getting deformed and angular arcs with arrowheads are looking horrible. Is there a method to solve this major problem?
By first pasting in MS Paint then copy pasting in original is better but still lines are too thick. URGENT solution is requested.
Got a version of Word that uses the ribbon interface (Word 2007 or later)? This site is for you! If you use an earlier version of Word, visit our WordTips site focusing on the menu interface.
Visit the WordTips channel on YouTube

FREE SERVICE: Get tips like this every week in WordTips, a free productivity newsletter. Enter your address and click "Subscribe."
Copyright © 2026 Sharon Parq Associates, Inc.
Comments