Andree-Jeanne has a problem with switching off markup and Track Changes. She switches them off and saves the document without all the marks in her document, but when she opens the document again, there they are again. Even when Andree-Jeanne sends it by e-mail without marks, it opens full of markup and tracking marks.
There are two things to keep in mind in relation to markup in a document. ("Markup" is a generic term that refers, among other things, to Track Changes marks and comments added to the document.) The first thing is that markup can be displayed or hidden. The second thing to remember is that hiding markup isn't the same as getting rid of markup. Let me explain...
Markup is added in two general ways, using tools available on the Review tab of the ribbon. You can use the New Comment tool to add comments to the document and you can use the Track Changes tool to start keeping track of any editing or formatting changes.
Most people control what markup is displayed in a document by using the Show Markup drop-down list on the Review tab (in the Tracking group). You can also control what markup is displayed by clicking the small icon at the bottom-right of the Tracking group, which displays the Track Changes Options dialog box. (See Figure 1.)
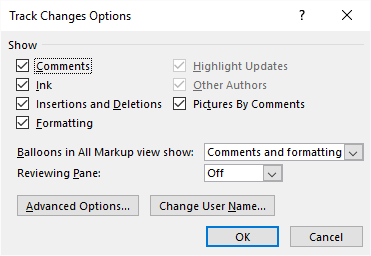
Figure 1. The Track Changes Options dialog box.
You can also turn off the display of markup by using the Display for Review drop-down list, which is in the Tracking group, right above the Show Markup drop-down list. Using the Display for Review drop-down list, choose either No Markup or Original Document, and the markup all disappears.
Which brings us to the second thing to keep in mind relative to markup: Hiding markup isn't the same as getting rid of markup. All the things I've discussed so far only hide markup by changing what is displayed. The markup—all your tracked changes and all your comments—are still there, even though you cannot see them. Thus, when you later open the document or someone else opens the document, they can see all that markup.
If you want to actually get rid of markup, there is only one way to do it, and it involves two steps:
You do the first step so that future edits and formatting changes aren't tracked. The second step is done so that you can get rid of changes you previously tracked. It is this second step that can also take the most time, depending on how you do it. The normal method involves evaluating each tracked change and letting Word know if you want to make that change permanent or not:
If the above seems too tedious or if you know that you agree with all of the edits in the document, you can simply click the down-arrow on the Accept tool and choose Accept All Changes.
This process takes care of any tracked changes. You still have to go through the same process with comments, if there are any comments in your document. The only difference is that you use the tools in the Comments group of the Review tab of the ribbon to step through the comments (Next or Previous tools) and then delete them (Delete tool).
Once you've dealt with all the tracked changes and comments in this manner, all the markup in the document should be gone, and it will no longer appear the next time you open the document.
WordTips is your source for cost-effective Microsoft Word training. (Microsoft Word is the most popular word processing software in the world.) This tip (13451) applies to Microsoft Word 2007, 2010, 2013, 2016, 2019, 2021, and Word in Microsoft 365.

Learning Made Easy! Quickly teach yourself how to format, publish, and share your content using Word 2021 or Microsoft 365. With Step by Step, you set the pace, building and practicing the skills you need, just when you need them! Check out Microsoft Word Step by Step today!
Word includes a feature that allows you to track changes made to a document. One of the ways in which Word marks your ...
Discover MoreWhen you use Track Changes in a document, Word marks everything that changes. (Makes sense, huh?) If an editor makes a ...
Discover MoreIf you are editing a document with Track Changes turned on, Word won't let you delete a column in a table and have it ...
Discover MoreFREE SERVICE: Get tips like this every week in WordTips, a free productivity newsletter. Enter your address and click "Subscribe."
2023-07-29 22:13:39
Tomek
While doing the review of tracked changes, you may deal with the comments added while the track-changes was on at the same time, although you need to use a reverse logic. See, the added comments are tracked as a change, if you accept it, the comment will stay, if you reject it, the comment will be removed. Funny, eh.
This probably will not affect comments that were added without tracking changes, so you may need to check for those separately.
Got a version of Word that uses the ribbon interface (Word 2007 or later)? This site is for you! If you use an earlier version of Word, visit our WordTips site focusing on the menu interface.
Visit the WordTips channel on YouTube

FREE SERVICE: Get tips like this every week in WordTips, a free productivity newsletter. Enter your address and click "Subscribe."
Copyright © 2026 Sharon Parq Associates, Inc.
Comments