Anthony has a long Word document that includes a number of superscripts. As one of his proofreading steps he needs to check each of the superscripts, so he wonders if there is an easy way to highlight all of them so he can find them easily.
Making the superscripts stand out can be easily accomplished by using the Find and Replace capabilities built into Word. Here are the steps to follow:
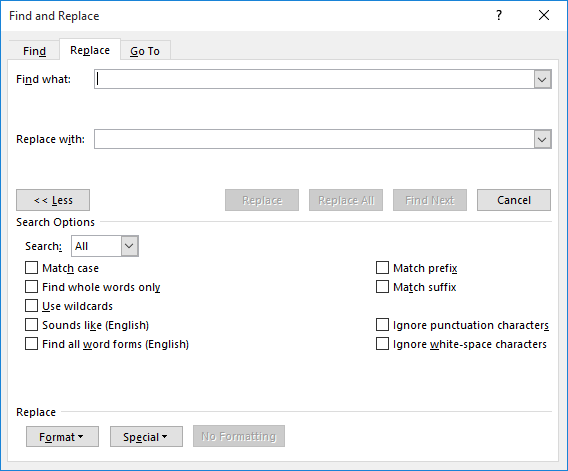
Figure 1. The Replace tab of the Find and Replace dialog box.
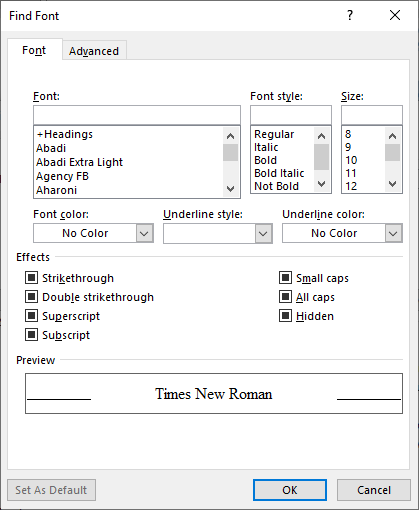
Figure 2. The Find Font dialog box.
At this point, all your superscripts are highlighted using whatever color you selected in step 2. Of course, if all you needed to do was to check the superscripts, there was no need to highlight them, meaning you could have skipped steps 1, 2, 10, and 11. Instead of step 12, you simply could have clicked Find Next to step through each of the superscripts and review them.
If you do, however, add highlighting, at some point you will want to remove that highlighting. Here's how you can get rid of it:
WordTips is your source for cost-effective Microsoft Word training. (Microsoft Word is the most popular word processing software in the world.) This tip (13110) applies to Microsoft Word 2007, 2010, 2013, 2016, 2019, and 2021.

Create Custom Apps with VBA! Discover how to extend the capabilities of Office 365 applications with VBA programming. Written in clear terms and understandable language, the book includes systematic tutorials and contains both intermediate and advanced content for experienced VB developers. Designed to be comprehensive, the book addresses not just one Office application, but the entire Office suite. Check out Mastering VBA for Microsoft Office 365 today!
Got a table that contains rows you want to delete? Deleting one or two rows in a table is easy; deleting a bunch of rows ...
Discover MoreNeed to find all the instances of a particular word and change the formatting of those instances? It's easy to do using ...
Discover MoreWord makes it easy, using Find and Replace, to replace or delete information based on its formatting. Whether this ...
Discover MoreFREE SERVICE: Get tips like this every week in WordTips, a free productivity newsletter. Enter your address and click "Subscribe."
2021-03-25 03:16:04
Bülent Erdem
This solution worked well for me, thank you...
2020-07-22 17:33:04
PJ
I miss the old days when Search & Replace highlighted the words or characters it found during a search & replace. Sometimes now when searching, Word finds an instance of whatever I was searching for, but I have a heck of a time visually locating the found text on the screen. I wish we didn't have to resort to adding & removing highlighting or other tactics, to do a simple search.
Got a version of Word that uses the ribbon interface (Word 2007 or later)? This site is for you! If you use an earlier version of Word, visit our WordTips site focusing on the menu interface.
Visit the WordTips channel on YouTube

FREE SERVICE: Get tips like this every week in WordTips, a free productivity newsletter. Enter your address and click "Subscribe."
Copyright © 2026 Sharon Parq Associates, Inc.
Comments