Maren has a document that has a very large table in it, spanning many pages. She would like the ability to jump to a specific row in the table, so she wonders if it is possible to use the Go To feature to jump to a particular row number, such as row 80.
The Go To dialog box (which is displayed by pressing F5 or Ctrl+G) allows you to jump to lots of different places in a document. (How you use the dialog box has been covered in other issues of WordTips.) It is actually possible for it to be used with table rows, with one huge caveat.
If your document only contains a table, you can jump to rows by following these steps:
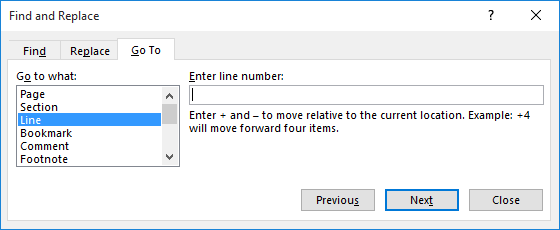
Figure 1. The Go To tab of the Find and Replace dialog box.
This works because Word apparently considers each row in the table a "line." (It isn't affected, either, but rows that contain wrapped lines or multiple paragraphs.) This brings me to the caveat: If your document contains more than a table—especially text before the table—then the line jumping will be off because Word counts the non-table text in its line count calculations.
In that case, you'll need to use a macro to jump to the row you want. The following is an example of one that could be used.
Sub GoToTableRow()
    Dim RowNum As Integer
    Dim LastRow As Integer
    Dim Question As String

    If Selection.Information(wdWithInTable) Then
        LastRow = Selection.Tables(1).Rows.Count
        Question = "Enter a number from 1 to " & LastRow
        RowNum = InputBox(Question, 1)
        If (RowNum < 1) Or (RowNum > LastRow) Then
            MsgBox "That's an invalid row number"
            Exit Sub
        End If
        Selection.Tables(1).Rows(RowNum).Cells(1).Select
    Else
        MsgBox "Not in table"
    End If
End Sub
The macro first checks to make sure the insertion point is within a table. If so, it asks the user which row number he or she would like to jump to. Assuming that the row number is in the range of available row numbers, the row is then jumped to.
Note:
WordTips is your source for cost-effective Microsoft Word training. (Microsoft Word is the most popular word processing software in the world.) This tip (10906) applies to Microsoft Word 2007, 2010, 2013, 2016, 2019, and 2021.

Create Custom Apps with VBA! Discover how to extend the capabilities of Office 365 applications with VBA programming. Written in clear terms and understandable language, the book includes systematic tutorials and contains both intermediate and advanced content for experienced VB developers. Designed to be comprehensive, the book addresses not just one Office application, but the entire Office suite. Check out Mastering VBA for Microsoft Office 365 today!
Tables are a great way to organize information in a document. For some editing needs, you may want to create a new ...
Discover MoreIf you want to have Word highlight rows in a table that contain a certain character, you need to resort to using a macro. ...
Discover MoreInsert a picture into a table cell, and you may quickly find that the table is no longer the size you expected. Here's ...
Discover MoreFREE SERVICE: Get tips like this every week in WordTips, a free productivity newsletter. Enter your address and click "Subscribe."
There are currently no comments for this tip. (Be the first to leave your comment—just use the simple form above!)
Got a version of Word that uses the ribbon interface (Word 2007 or later)? This site is for you! If you use an earlier version of Word, visit our WordTips site focusing on the menu interface.
Visit the WordTips channel on YouTube

FREE SERVICE: Get tips like this every week in WordTips, a free productivity newsletter. Enter your address and click "Subscribe."
Copyright © 2026 Sharon Parq Associates, Inc.
Comments