Please Note: This article is written for users of the following Microsoft Word versions: 2007, 2010, 2013, 2016, 2019, 2021, and Word in Microsoft 365. If you are using an earlier version (Word 2003 or earlier), this tip may not work for you. For a version of this tip written specifically for earlier versions of Word, click here: Creating Thin Spaces.
Word does not include a feature to automatically create thin spaces, like it does for regular spaces or non-breaking spaces. Some people require a space that is narrower (thinner) than the regular space, to place just a small amount of space between items on a line.
There are actually a few ways you can create or approximate thin spaces in your documents. One way is to rely on some of the special spaces provided in Unicode. For instance, you could type 2009 and then, with the insertion point immediately after the 9, press Alt+X. This converts the 2009 into the Unicode character that happens to use that code. That character happens to be a thinner space than the regular space.
If that doesn't satisfy your spacing needs, a workaround is to use a regular space and then format that space (and only that space) to a point size smaller than what is used for the surrounding text. This requires some trial and error to get the appearance just as you like it. The drawback to this approach is that if you use justified text, Word automatically adjusts the width of the spaces on a line to fit the overall goal of justifying both margins. This, of course, defeats your purpose.
You can also use non-breaking spaces, and then format them to a smaller point size. Non-breaking spaces are not “resized” by Word when justifying text.
A final option is to adjust the character spacing before and after the item that you want to include additional space. This does not add a real “thin space,” but instead instructs Word to “space out” the items. This is done by following these steps:
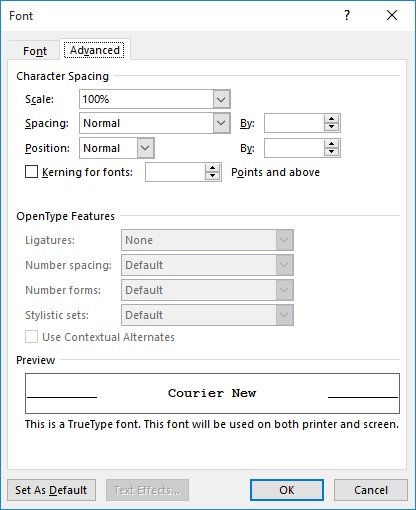
Figure 1. The Advanced tab of the Font dialog box.
Again, this approach may take a bit of trial and error on your part to get the desired effect.
WordTips is your source for cost-effective Microsoft Word training. (Microsoft Word is the most popular word processing software in the world.) This tip (10626) applies to Microsoft Word 2007, 2010, 2013, 2016, 2019, 2021, and Word in Microsoft 365. You can find a version of this tip for the older menu interface of Word here: Creating Thin Spaces.

Do More in Less Time! An easy-to-understand guide to the more advanced features available in the Microsoft 365 version of Word. Enhance the quality of your documents and boost productivity in any field with this in-depth resource. Complete your Word-related tasks more efficiently as you unlock lesser-known tools and learn to quickly access the features you need. Check out Microsoft 365 Word For Professionals For Dummies today!
Word allows you to easily change the color of the text in your document. If you get a document from someone else, you may ...
Discover MoreYou can format your text to use some very, very large font sizes. The results you see from formatting with large fonts ...
Discover MoreIf you have a word that you need to make sure is formatted the same way throughout your document, there are several ways ...
Discover MoreFREE SERVICE: Get tips like this every week in WordTips, a free productivity newsletter. Enter your address and click "Subscribe."
There are currently no comments for this tip. (Be the first to leave your comment—just use the simple form above!)
Got a version of Word that uses the ribbon interface (Word 2007 or later)? This site is for you! If you use an earlier version of Word, visit our WordTips site focusing on the menu interface.
Visit the WordTips channel on YouTube

FREE SERVICE: Get tips like this every week in WordTips, a free productivity newsletter. Enter your address and click "Subscribe."
Copyright © 2026 Sharon Parq Associates, Inc.
 Please Note:
This article is written for users of the following Microsoft Word versions: 2007, 2010, 2013, 2016, 2019, 2021, and Word in Microsoft 365. If you are using an earlier version (Word 2003 or earlier), this tip may not work for you. For a version of this tip written specifically for earlier versions of Word, click here:
Please Note:
This article is written for users of the following Microsoft Word versions: 2007, 2010, 2013, 2016, 2019, 2021, and Word in Microsoft 365. If you are using an earlier version (Word 2003 or earlier), this tip may not work for you. For a version of this tip written specifically for earlier versions of Word, click here:
Comments