Please Note: This article is written for users of the following Microsoft Word versions: 2007, 2010, 2013, 2016, 2019, 2021, and Word in Microsoft 365. If you are using an earlier version (Word 2003 or earlier), this tip may not work for you. For a version of this tip written specifically for earlier versions of Word, click here: Easily Changing Links in Documents.
John has documents that contain links to pictures on a network drive. The pictures have been moved, and he wants a way to change the links so they point to the new location of the pictures. The only thing that has to change is the drive letter and the path, not the picture name itself.
When you insert pictures as links in your document, they are inserted as INCLUDEPICTURE fields. You can see this if you select the picture and press Shift+F9. You should then, instead of the picture, see a field similar to the following:
{ INCLUDEPICTURE "R:\\CommonPics\\masthead.jpg" \* MERGEFORMAT \d }
With the field code displayed, the contents of that field code can easily be changed using the Find and Replace capabilities of Word. Thus, you can change the drive and path by following these general steps:
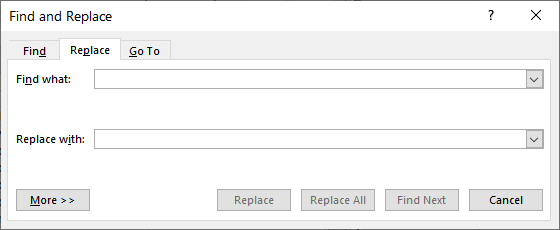
Figure 1. The Replace tab of the Find and Replace dialog box.
The links in the document are now all updated, and you can save your document.
If you have quite a few documents that you need to change, you may be interested in implementing the above steps in a macro. Creating the macro is easy (just record the above steps) but getting Word to perform the operation on a series of files, without intervention on your part, is a bit more involved. A good place to start to learn how to do this is at the Word MVP site:
https://wordmvp.com/FAQs/MacrosVBA/BatchFR.htm
Once you learn the technique of how to work with multiple files, you can then modify your single-file macro (the one you recorded) so it will work on more than one file.
WordTips is your source for cost-effective Microsoft Word training. (Microsoft Word is the most popular word processing software in the world.) This tip (10524) applies to Microsoft Word 2007, 2010, 2013, 2016, 2019, 2021, and Word in Microsoft 365. You can find a version of this tip for the older menu interface of Word here: Easily Changing Links in Documents.

Discover the Power of Microsoft Office This beginner-friendly guide reveals the expert tips and strategies you need to skyrocket your productivity and use Office 365 like a pro. Mastering software like Word, Excel, and PowerPoint is essential to be more efficient and advance your career. Simple lessons guide you through every step, providing the knowledge you need to get started. Check out Microsoft Office 365 For Beginners today!
Using graphics to add callouts to your graphics is a common occurrence in Word. Here's how to stop all those graphics ...
Discover MoreAn object anchor is used to signify the point at which an object is inserted into a document. If you want to see these ...
Discover MoreThe tools on the Review tab of the ribbon allow you to do all sorts of markup and comparisons of documents. When ...
Discover MoreFREE SERVICE: Get tips like this every week in WordTips, a free productivity newsletter. Enter your address and click "Subscribe."
There are currently no comments for this tip. (Be the first to leave your comment—just use the simple form above!)
Got a version of Word that uses the ribbon interface (Word 2007 or later)? This site is for you! If you use an earlier version of Word, visit our WordTips site focusing on the menu interface.
Visit the WordTips channel on YouTube

FREE SERVICE: Get tips like this every week in WordTips, a free productivity newsletter. Enter your address and click "Subscribe."
Copyright © 2026 Sharon Parq Associates, Inc.
 Please Note:
This article is written for users of the following Microsoft Word versions: 2007, 2010, 2013, 2016, 2019, 2021, and Word in Microsoft 365. If you are using an earlier version (Word 2003 or earlier), this tip may not work for you. For a version of this tip written specifically for earlier versions of Word, click here:
Please Note:
This article is written for users of the following Microsoft Word versions: 2007, 2010, 2013, 2016, 2019, 2021, and Word in Microsoft 365. If you are using an earlier version (Word 2003 or earlier), this tip may not work for you. For a version of this tip written specifically for earlier versions of Word, click here:
Comments